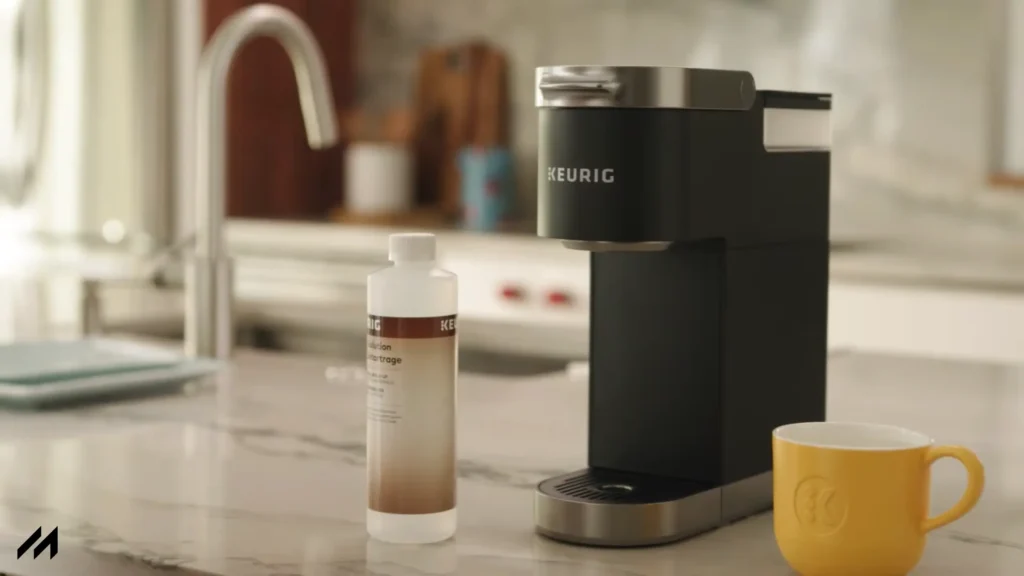
The Keurig Mini Coffee Maker is compact and transportable, ideal for little spaces like offices, kitchens, and dorms. Scale, or mineral deposits from water, will, nevertheless, affect its operation over a period of time. Descaling is necessary in order to ensure that it remains functioning well and providing excellent-tasting coffee.
Descale regularly to remove these deposits, avoiding problems such as slow brewing, less strong coffee, and strange noises. Indications that your Keurig k-Mini requires descaling are increased brew times and white, chalky buildup in the reservoir. Maintenance helps to have a smooth and pleasant brewing experience.
Understanding Descaling and Its Importance
What Is Descaling?
Descaling removes mineral buildup, a coffee machine hard water deposit like that on the Keurig Mini. Scale decreases heating effectiveness, lowers brewing temperature, and affects coffee taste. Scale even prevents water flow and creates wear, reducing the machine’s life. Regular descaling of the Keurig Mini keeps it working smoothly, makes it deliver terrific coffee, and extends its lifespan.
Why Is Descaling Important?
Descaling is important for your Keurig Mini because it discourages clogs and brewing failure as a result of scaling. Descaling also enables your coffee to taste improved on a regular basis by removing scale that may impose off-flavor and change the brewing temperature. Finally, frequent descaling reduces stress on machine components, leading to a longer-life machine and preventing pre-mature replacements.
How Often Should You Descale Your Keurig Mini?
Descaling your Keurig Mini every 3-6 months or even more may be based on individual circumstances. Frequent hard water usage and frequent use require descaling every 2-3 months. Soft water and light use accommodate up to 6 months. Stale-tasting coffee or slow brews mean it is time to descale. Tailor your scheduling based on hardness and usage rates of water.
Step-by-Step Guide to Descaling Keurig Mini
Descaling your Keurig Mini Coffee Maker is a simple procedure that requires just a couple of minutes of your time. Below are the steps to descale mineral buildup efficiently and keep your coffee machine running smoothly:
Materials You’ll Need

Preparing the Keurig Mini for Descaling
Get Ready to Descale (Short Version)
- Power Off & Unplug: Turn off your Keurig Mini and unplug it from the wall for safety.
- Empty Water: Take out the water tank and pour out any water that’s left in it.
- Remove K-Cup: Open the top and take out any coffee pod or K-Cup that’s inside.
Descaling Process Using Vinegar or Descaling Solution
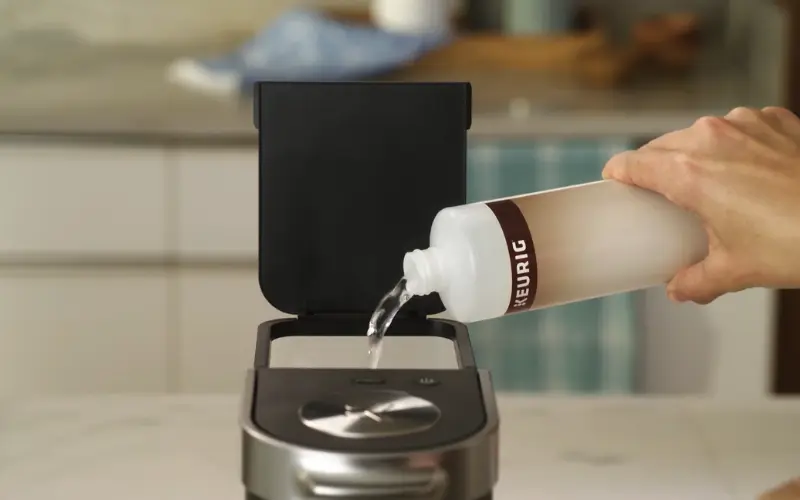
Option 1: Using Keurig Descaling Solution
Option 2: Using White Vinegar
Rinsing and Final Cleaning
Flushing the Machine with Fresh Water
Following the descaling process of your Keurig Mini, it’s essential to flush the machine with fresh water in order to eliminate any residue of the cleaning solution. Begin with draining and rinsing the reservoir. Next, fill it with fresh water. Perform a few brew cycles without a K-Cup in a ceramic mug to catch the water.
Usually, 2-3 cycles suffice after using Keurig Descaling Solution. If you did use vinegar, 3 to 5 cycles or more should be needed to eliminate any lingering scent or taste. Check the water for purity, smell, and taste. Continue to flush until the water clears and is free of aftertaste. This washes your next brew and makes it fresh.
Cleaning the Exterior and Removable Parts
Wipe the exterior with a damp cloth, and apply mild soap to tougher stains, drying afterwards. Wash the drip tray and water reservoir in warm, soapy water, and then rinse them, ensuring they dry before reassembly. Never immerse the actual unit of the machine or clean it when plugged in. Maintenance cleans and maintains your Keurig Mini in order.
Troubleshooting Common Issues After Descaling
Keurig Mini Won’t Brew After Descaling
If your Keurig Mini refuses to brew following descaling, mineral buildup clogs could be responsible. Clear the needle with a paper clip or Keurig tool to clear any blockages. Run some more water cycles to eliminate any line or airlock problem. Inspect the water reservoir and clean the sensor zone. For consistent issues, see the manual or contact support. Descale and use filtered water regularly to avoid clogs in the future.
“Add Water” Error After Descaling
Once you have descaled a Keurig Mini, you can get an “Add Water” error even if the water reservoir is full. This is usually a sensor issue and not because of a lack of water. The problem can be caused by changes in sensor sensitivity, airlocks, blockages, or a stuck float valve.
In troubleshooting, power cycle the machine, refill the reservoir correctly, gently tap the machine, run rinse cycles, and clean the sensor area. If none of these steps fix the issue, contact Keurig support.
For future prevention, descale the machine periodically, use filtered water, rinse the machine thoroughly when descaling, and handle the water reservoir gently.
Coffee Tastes Bad After Descaling
Coffee tasting bad after descaling is usually due to residual descaling solution in the Keurig Mini. Commercial descalers and vinegar are two such examples, as they contain an aftertaste.
To fix this, thoroughly rinse the reservoir and run a minimum of 12 brew cycles on fresh water (without a K-Cup) until water comes out smelling and tasting neither. In the event of the lingering off flavor, reiterate the rinse cycles, employ filtered water in rinsing, and consider brewing a “sacrificial” coffee to absorb whatever residue is still left.
Preventing Scale Buildup in Your Keurig Mini
Using Filtered or Bottled Water
Employing filtered water or bottled water in your Keurig Mini is the solution for preventing mineral buildup. It reduces significantly mineral buildup, so you descale much less. It will also significantly improve your coffee taste by eradicating mineral-contaminated flavor notes. Opt for faucet filters, filter pitcher systems, or inbuilt filters for maximum and most effective performance.
Regular Cleaning and Maintenance Tips
Keeping Track of Descaling Schedule
To simply recall descaling your Keurig Mini, set reminders every 3-6 months. This avoids scale buildup, makes your coffee continue to taste good, and prolongs the life of the machine. Utilize calendar programs, phone reminders, smart home devices, or merely notes to keep yourself on track. Select a reminder interval dependent on your water hardness and Keurig use. Frequent reminders guarantee steady descaling and peak performance.

Hello, I am Yeasin Sorker, a blog writer and a kitchen appliance expert. I’m a kitchen industry veteran and provide insight, installation advice, and unbiased reviews. I love helping consumers know what to expect from appliances, their benefits and their drawbacks, and have the best experience with them. My information is based on the data.
Leave a Reply