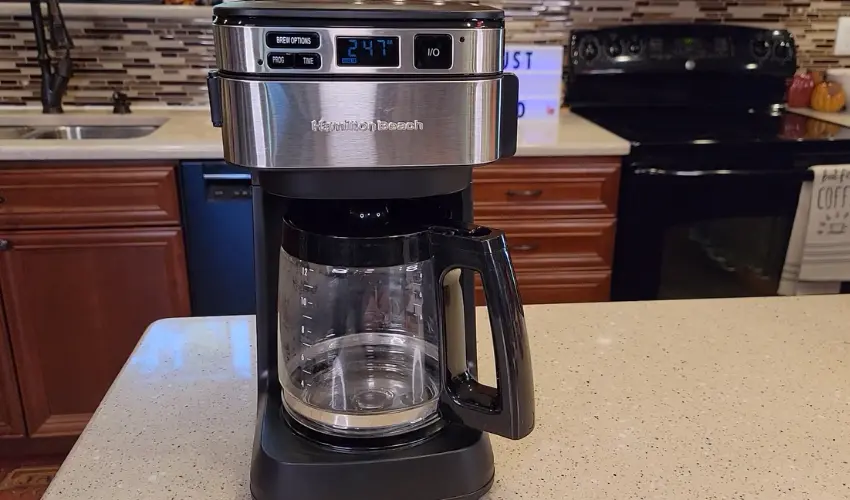
This guide will take you through literally everything you should know to start using your Hamilton Beach coffee maker. We provide a step-by-step tutorial for setting up and using your new machine, hence assuring that you can be on your way to enjoying freshly delicious coffee morning after morning in no time.

Getting Started with Your Hamilton Beach Coffee Maker
Unboxing and Assembly
Hamilton Beach coffee makers are relatively easy to assemble. In a box, you will most likely find the base, carafe, brew basket, filter holder, and sometimes filters and a scoop. Most require minimal assembly. Just pop the brew basket and carafe into place. FlexBrew models have additional single-serve parts. No tools are necessary. Take a glance at the manual, and you’re off brewing.
Setting Up the Coffee Maker for the First Time
First Use Seasoning: To season a new Hamilton Beach coffee maker for first use, run an entire brew cycle with cold water only. This will remove residue from manufacturing and heat the machine up for best functioning. Discard the hot water once the cycle has completed. Put the coffee maker on a level surface, and not proximal to any edge, where it could easily tip over. For model-specific setup, refer to the instruction manual.
Brewing Your First Coffee Cup
Step 1: Fill the Water Reservoir
For the best coffee, always use the water level markings on your Hamilton Beach coffee maker to add the right amount of cold water for your desired cup size. It is highly recommended to use clean, filtered water. The filtered water not only improves the taste of your coffee by getting rid of some impurities but also helps in preventing mineral buildup inside your coffee maker, extending its life, and ensuring that it works optimally.
Step 2: Adding Coffee Grounds
For Hamilton Beach coffee makers, a medium grind of coffee has the best flavor. General guideline: for every 6 ounces of water, use about 1 to 2 tablespoons of coffee ground. Adjust your amount of coffee to suit taste-more for strong, less for weak. This may take little experimentation to be perfect.
Step 3: Starting the Brewing Process
To start brewing, simply make sure everything is set up right and press the clearly labeled “Brew” or “On” button. Brew time varies depending on the model, but an average of 8-12 minutes for a full carafe is typical. During the brewing cycle, water is heated, saturates the coffee grounds, extracts flavor, and then filters into the carafe. Carafe models have a warming plate and most models offer automatic shut-off for added safety. Other models have the “Pause and Serve” feature, which interrupts the brewing to pour a cup in moments.
Using Hamilton Beach Coffee Maker Additional Features
Auto-Brew Function
Operate the auto-brew feature on your Hamilton Beach coffee maker:
Some models will also allow you to choose brew strength (“Bold”, for example) during auto-brew programming. To cancel an auto-brew, just press the “Program” or “Auto” button again. The indicator light will shut off. How nice to wake up to fresh coffee, automatically!
Single Serve Mode (if applicable)
Hamilton Beach Single-serve mode, much like the FlexBrew models, lets you promptly brew a single cup. Fit on the correct components to use, like a funnel or pod holder, and make use of the smaller water reservoir when serving one cup. For K-Cups, just place them in the holder and shut the top, while ground coffee is made possible with a special filter on some versions.
Place your mug, select the cup size if available, and then press the “Brew” button. Single-serving brewers are quick, minimize waste, and allow for a lot of varieties. Always check your manual for model-specific details.
Tips for Better Coffee
Adjusting the Coffee-to-Water Ratio
Adjust the ratio of coffee to water in your Hamilton Beach coffee maker for changes in the strength of coffee. For a more intense flavor, use a larger amount of grounds for an unchanged amount of water, from 2 to 2.5 tablespoons for 6 ounces, for instance. For mild flavor, add a smaller quantity of grounds in a given volume, say, from 2 down to 1.5 tablespoons for every 6 ounces of water. Just experiment gradually toward your taste ideal.
Choosing the Right Coffee Grind
Grind size can affect your Hamilton Beach coffee maker’s performance and taste. A medium grind, about the size of coarse sand, will provide a perfect balance in flavor and brewing. Fine grinds can cause bitterness and clog the machine, while coarse grinds result in weak coffee. Medium grind yields the best results consistently.
Customizing Brew Strength (if applicable)
Most Hamilton Beach coffee makers have a “Bold” setting for stronger coffee. To make stronger coffee, before brewing, simply press the “Bold” or “Brew Strength” button to slow down the brewing process for more flavor. Some models will change the temperature, while others use pre-infusion. Try different settings, such as “1-4 cup,” for your ideal strength.
Troubleshooting Common Issues
1. Why is My Coffee Maker Not Brewing?
If your Hamilton Beach coffee maker is not brewing, rapidly check these general issues:
2. Weak or Watery Coffee
If your coffee is too weak, the most common fixes are:
Less common things to try are descaling your machine or using the “Bold” brew setting if your model has one.
3. Spills or Leaks
To avoid spills and leaks in your Hamilton Beach® coffee maker:
Cleaning and Maintenance
Daily Cleaning
Daily cleaning for the best of coffee and machines requires: after every brew, discard grounds and filter. Wash pot/carafe and filter basket with soapy water and then rinse clean. Wipe down the outside of the coffee maker and dry the drip tray. Daily cleaning will prevent buildup, stains, and odors while ensuring great taste and machine longevity. Always unplug, let cool before cleaning, and avoid harsh cleaners.
Deep Cleaning and Descaling
For deeper cleaning and descaling of the coffee maker every 1-3 months, do it more often if you’re using hard water. Descale if brewing is slowing down, coffee is cooler or bitter, or white deposits appear. Use a solution of vinegar and water or a commercial descaling product, run a brew cycle, then thoroughly rinse. This will remove mineral buildup and greatly improve the functioning of the appliance, extending its life and enabling better-tasting coffee.
Replacing Parts
Clean and descale your coffee maker every 1 to 3 months, but if you have hard water or use it more frequently, it could be more often. Descale if brewing slows down, if the coffee is cooler or tastes more bitter, or there are white deposits building up. Use a vinegar-and-water solution or another descaling product, brew a cycle, and then rinse thoroughly with water. Descaling removes mineral buildup, enhances performance, prolongs the life span of the machine, and provides better-tasting coffee.
Frequently Asked Questions (FAQs)
1. Can I Use a Reusable Filter?
Reusable filters for Hamilton Beach coffee makers are both earth-friendly and economical. They can also make great improvements in flavor. To use, place the filter in the brew basket, add grounds, and brew. To clean, simply empty grounds and rinse with soapy water after each use. Proper cleaning and grind size will indeed help to yield the best results.
2. How Can I Make Iced Coffee with a Hamilton Beach Coffee Maker?
They provide eco-friendliness with two added, attached benefits-cost-efficiency for your Hamilton Beach and even enhancement of flavor. Just put this in your brew basket, full it with the coffee grounds, brew, then get the cup off, toss off the ground remnants, wash clean under the stream with mild detergent. Just pay attention to appropriate cleaning after proper grind, size for proper flow.
3. How Can I Program My Hamilton Beach Coffee Maker to Brew at a Specific Time?
To program a Hamilton Beach coffee maker, it needs to be filled with water and coffee grounds. Press either “PROG” or “PROGRAM” for programming. The time is adjusted by “HOUR” and “MIN” and selected in AM/PM. Pressing “AUTO” or “ON” starts auto-brew, while making sure the auto light indicator is turned on. Note: Refer to the specific steps from the particular model’s user manual.

Hello, I am Yeasin Sorker, a blog writer and a kitchen appliance expert. I’m a kitchen industry veteran and provide insight, installation advice, and unbiased reviews. I love helping consumers know what to expect from appliances, their benefits and their drawbacks, and have the best experience with them. My information is based on the data.


Leave a Reply