
Kitchen Appliances
Cuisinart Griddler Guide: Grill, Griddle and Panini Modes
As an Amazon Associate we earn from qualifying purchases. We may earn a commission from links on this page, at no extra cost to you. Learn more.
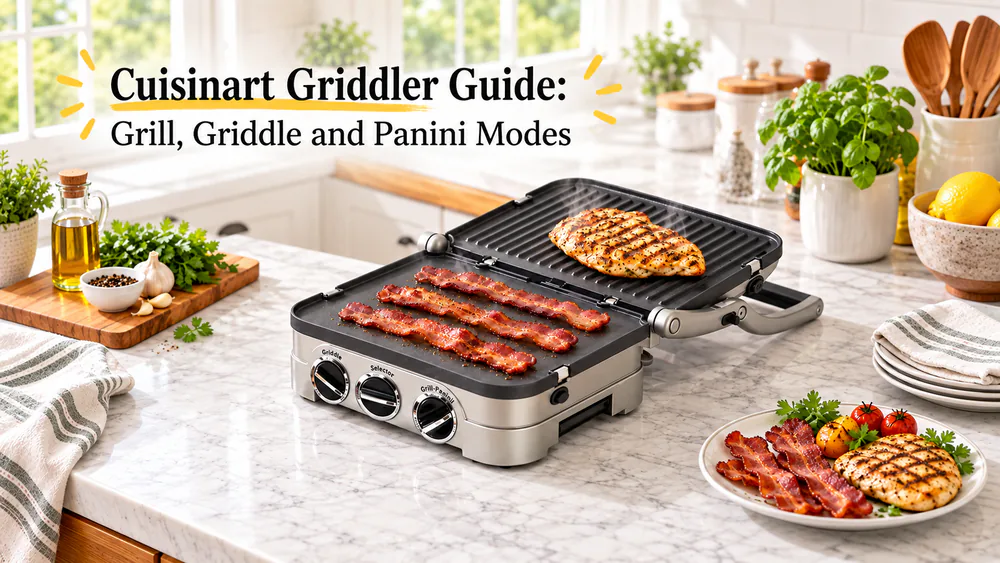
The Cuisinart Griddler is a countertop cooker with two reversible plates, a floating hinge, and two temperature knobs. Flip the plates and change the hinge, and it becomes five different appliances: a contact grill, a panini press, a full grill, a full griddle, or a half grill/half griddle. Once you know which knob controls each cooking mode, it is one of the easier electric griddles to run.
In our kitchen we worked through the full range of cooking positions, from pancakes, crumpets, and English muffins on the flat griddle to turkey burgers, thin chicken breasts, and Cuban sandwiches pressed between the plates. Turkey burgers finished in about six minutes closed, and the Cuban sandwiches went smoothly.
Our settings come from the GR-4N booklet, the most complete official source we found, plus notes from our own kitchen.
What Your Griddler Can Do (Five Cooking Positions)
Cuisinart lists five cooking options for the GR-4N: contact grill, panini press, full grill, full griddle, and half grill/half griddle. You make them by flipping the reversible plates and adjusting the hinge. Here is how they break down.
| Mode | Plates | Hinge | Best for |
|---|---|---|---|
| Contact grill | Grill sides, closed | Closed, floating cover | Burgers, chicken breasts, steak |
| Panini press | Grill sides, closed | Closed, floating cover | Sandwiches, quesadillas |
| Full grill | Grill sides, open | Open flat | Large cuts, vegetables, sausages |
| Full griddle | Griddle sides, open | Open flat | Pancakes, eggs, bacon |
| Half grill/half griddle | One of each, open | Open flat | Breakfast and a main at once |
Before the First Use
Wash and dry the plates
Before the first cook, wipe the base, cover, and controls with a damp cloth. Then wash the plates, the drip tray, and the scraping tool. All three are dishwasher safe, but we hand wash them to help the nonstick coating last longer than it would with repeated dishwasher cycles.
First-heat smoke and seasoning
The first run can give off a slight odor and a bit of smoke. Cuisinart says this is normal with nonstick surfaces, and we saw the same thing: a closed preheat on the first run can smoke lightly. Open a window or run the range hood.
The GR-4N booklet gives no seasoning step, so we skip one. These are nonstick plates, not cast iron.
Warning. First-use smoke is normal, but keep the unit away from smoke detectors and ventilate the room. Never leave a heating Griddler unattended.
Setting Up the Plates and Hinge
Installing the reversible plates (grill side vs. griddle side)
Each plate fits the upper or lower housing, either side up. That means you pick the grill ridges or the flat griddle surface for each half independently. Here is the install routine from the booklet.
- Unplug the unit, let it cool, and set it flat with the controls toward you.
- Work one plate at a time, with the drip spout at the rear.
- Tilt the back end of the plate and line up the rear cutouts with the metal brackets.
- Slide the plate under the brackets.
- Push the front down until it snaps in.
To remove a plate, make sure the unit is cool, set it flat, and press the plate release button on one side. The plate pops up. Slide it out from under the metal brackets, lift it out, and repeat with the other button.
Adjusting the hinge for open flat vs. closed
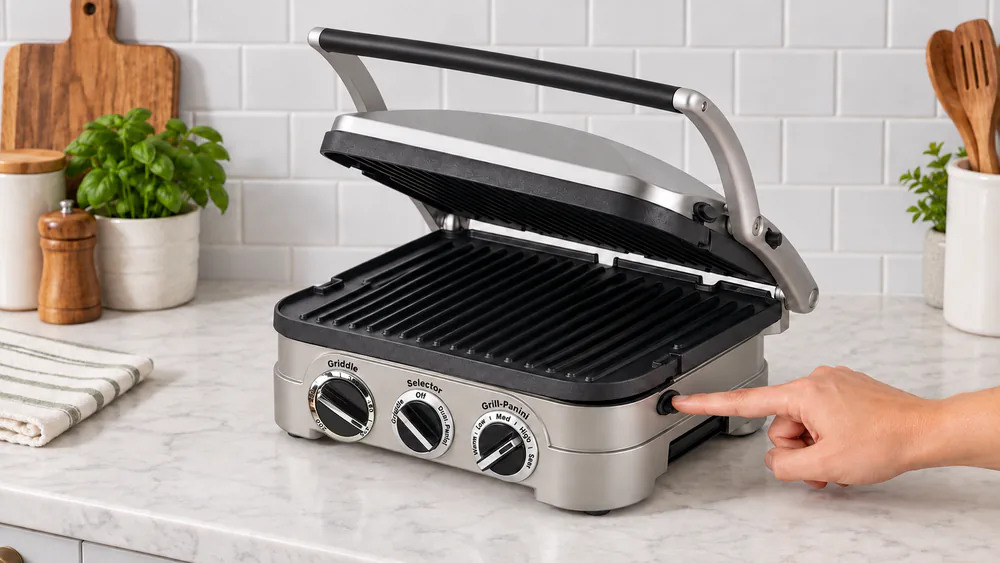
The floating hinge lets the cover rest on the food at any thickness. For the open flat position, follow these steps.
- Stand at the front and put your left hand on the handle.
- Slide the hinge release lever on the right arm toward you.
- Push the handle back until the cover rests flat.
- Leave it. It stays flat until you lift the handle.
If the cover is already open, pull the handle slightly toward you first, then lift the lever. For closed cooking, just lower the cover and let it float on the food.
Tip. The hinge floats, so a loaded sandwich can slide the top plate sideways and squeeze cheese out. We keep fillings modest for paninis for that reason.
Understanding the Controls
Grill/Panini knob vs. Griddle knob
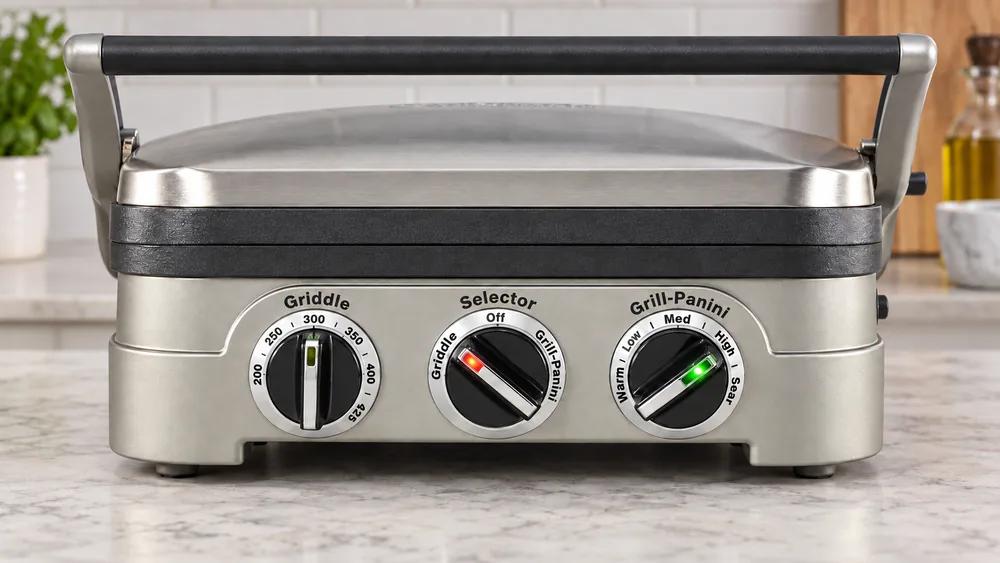
The GR-4N has a selector dial and two temperature knobs. Turn the selector left for Griddle or right for Grill/Panini. The dial also has an Off position. Use the temperature knob for the selected mode; it controls both plates, rather than setting each plate independently.
The Griddle knob runs from 200F to 425F. The Grill/Panini knob is a scale from Warm to Sear, with no degrees printed. Use your judgment to set the heat, with the cheat sheet below as a guide.
Temperature settings and indicator lights
The red light means the unit has power. The green light inside the chosen control means it is ready to cook. The green light also cycles on and off as the thermostat regulates the heat. That is normal, so do not read it as a fault.
Preheat takes up to 10 minutes, depending on the setting. Wait for the green light. Most sticking problems we see come down to technique: wait for the ready light, oil the plates lightly if needed, and skip metal tools.
How to Use Each Cooking Mode
Contact grill
Close the cover on grill-side plates and cook from both sides at once. This is the mode for burgers, thin chicken breasts, and steak.
- Install the grill sides of both plates.
- Turn the selector right to Grill/Panini and set the knob.
- Preheat closed until the green light comes on.
- Open, add the food, and lower the cover.
- Check doneness with a thermometer, and skip flipping.
The booklet preheats burgers to Sear, closed, and cooks them 5 to 8 minutes, with an internal temperature of 140F to 165F listed. Thin chicken breasts cooked between both plates finish in about 5 minutes, and turkey burgers in about six.
Panini press
The panini press uses the same closed setup, with the knob higher. The booklet preheats paninis on High, closed, and cooks them for 3 1/2 to 4 minutes.
- Build the sandwich with modest fillings.
- Brush the outside of the bread lightly with butter or oil.
- Place it on the preheated plate and lower the cover.
- Let the cover float. Do not press down.
- Lift the sandwich with a heat-proof plastic or wooden tool.
A batch of Cuban sandwiches for a crowd went smoothly on the Griddler Five, and the heat looked even across the plates.
Full grill
Open the unit flat and you have two grill surfaces side by side, which is double the cooking area. Use this for sausages, vegetables, and larger cuts that would not fit closed.
- Release the hinge and push the cover back until it rests flat.
- Set the selector to Grill/Panini and preheat.
- Cook, turning the food as needed.
The booklet cooks steak after a Sear preheat for 6 to 10 minutes.
Full griddle
Put the griddle sides on both plates, open it flat, and use the Griddle knob. Crumpets, English muffins, and pancakes do well on the flat griddle.
- Install the griddle sides and open the hinge flat.
- Turn the selector left to Griddle and preheat until the green light comes on.
- Add the food with space between pieces.
- Scrape stuck bits into the drip tray between batches.
For pancakes, the booklet preheats to 375F closed, then cooks them open flat: 3 1/2 to 4 minutes, then 2 to 3 minutes after the flip. Keep finished pancakes in a 175F to 200F oven. Heat can run uneven in griddle mode on some units, so rotate food that browns faster at one edge.
Half grill / half griddle
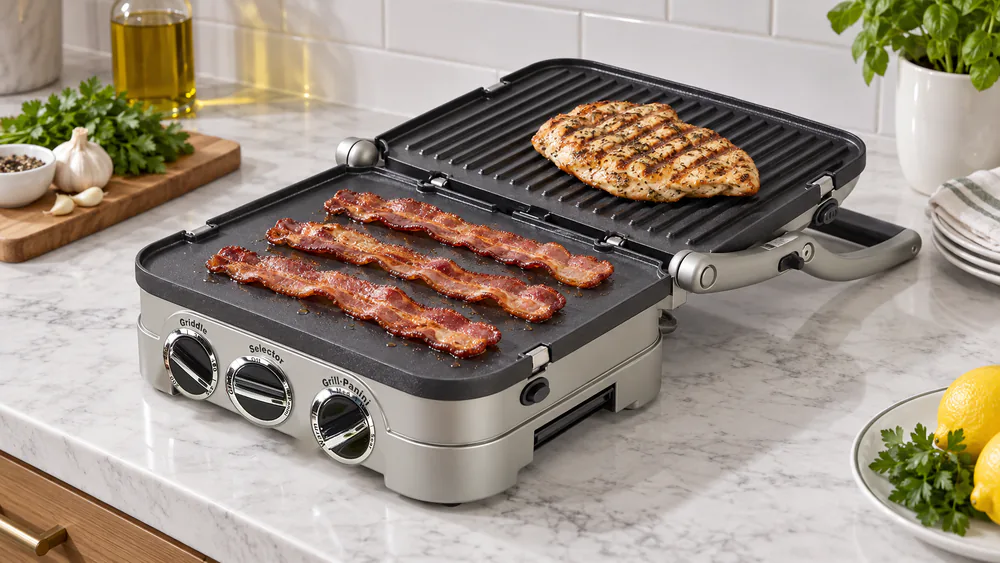
This is the mode for a breakfast sandwich and bacon at once, or a burger with grilled onions. Install one grill side and one griddle side, then open the unit flat.
The booklet says to use either the grill/panini or the griddle temperature for this setup. If you do not need the whole surface, use the bottom plate only.
Cooking Times and Temperatures Cheat Sheet
All of these come from the GR-4N booklet's recipe section, unless we say otherwise. Treat them as a starting point and adjust to your food's thickness.
| Food | Setup | Setting | Time |
|---|---|---|---|
| Burgers | Closed | Sear | 5 to 8 minutes |
| Pancakes | Open flat | Griddle 375F | 3 1/2 to 4 minutes, then 2 to 3 after the flip |
| French toast | Closed | Griddle 325F | 4 to 5 minutes per side |
| Paninis | Closed | High | 3 1/2 to 4 minutes |
| Sausage patties | Full griddle | Griddle 375F | 14 to 16 minutes |
| Salmon or fish | Griddle | Griddle 425F | 4 to 5 minutes per side |
| Steak | Closed or open | Sear | 6 to 10 minutes |
| Fajita vegetables, potatoes | Griddle | Griddle 425F | Cook until browned |
The Sear setting has no printed temperature on the GR-4N, so we avoid quoting one. Newer models differ, as the model section below shows.
Cleaning and Storing Your Griddler
Let the unit cool for at least 30 minutes before you handle it, remove the plates, or clean it. The arms and cover run very hot, so use an oven mitt when you must touch them.
- Unplug the unit and wait out the 30 minutes.
- Scrape stuck food into the drip tray with wood or heat-proof plastic.
- Remove the plates using the release buttons.
- Wash the plates by hand or on the dishwasher's top rack. The plates, drip tray, and scraping tool are all dishwasher safe.
- Wipe the base, cover, and knobs with a soft cloth. Never use abrasives.
- Dry everything, reinstall the plates, and unplug before storing.
Scrape stuck grease and sauce from the plate ridges before putting them in the dishwasher; soaking the removable parts also makes cleanup easier. For seafood smells, wipe the plates with lemon juice. The Griddler Five weighs about 15 lb, plates lift out easily, and the unit stores without fuss.
Warning. Never immerse the base, cord, or plug in water. No metal utensils, no scouring pads, and no knives or forks on the plates, because they scratch the nonstick coating. Do not leave plastic tools or the scraper on a hot plate, because they can melt.
Common Mistakes and Troubleshooting
Food sticks. Wait for the green ready light before the food goes on. Oil the plates lightly if needed, and skip metal tools.
Uneven browning. Heat is uneven on some units, especially in griddle mode. Space food apart and rotate pieces that brown faster.
Squeezed-out sandwich filling. The floating hinge can shear the top of a loaded sandwich away from the bottom. Keep fillings modest.
Worn parts. Plate-retaining clips can melt, the floating hinge can stop locking, and the unit can shut off or lose a heating element over time. If you see these signs, stop using the unit.
Model Differences (GR-4N, GR-300WS, GR-6S, Griddler Trio)
Note. We read only the GR-4N booklet in full. For other models, check the manual that came with yours, because Cuisinart's manuals page did not load when we tried it.
- GR-300WS: The plates, drip tray, and scraping tool are dishwasher safe. The top Sear temperature differs by retailer description, so we give no number for it.
- GR-6S: It has a smokeless mode, and its plates are dishwasher safe. Preheat runs about 5 to 10 minutes.
- Griddler Five (GR-5B): The temperature range is 175F to 450F with a sear function, and an LCD shows the function, temperature, and timer. It has reversible dishwasher-safe plates and a 3-year warranty. The GR-4N carries a limited three-year warranty as well.
- Griddler Trio: We did not find enough sourced detail to describe it. Use its own manual.
If you are still choosing between them, our guide to the best Cuisinart Griddler models compares them side by side.
FAQ
Do I need to preheat?
Yes. The unit takes up to 10 minutes to reach operating temperature, depending on the setting. Wait for the green ready light before the food goes on.
What do the two knobs do?
The selector dial chooses Griddle or Grill/Panini, or Off. The Griddle knob sets 200F to 425F. The Grill/Panini knob runs from Warm to Sear with no degrees printed.
Can I use oil or spray?
A light coat of oil helps if food sticks, but heavy oil is rarely needed on nonstick plates. Wipe up drips so they do not build into a sticky film.
Can I use metal utensils?
No. Metal scratches the nonstick coating. Use wood or heat-proof plastic, and keep the scraper off hot plates because it can melt.
Conclusion
The Griddler rewards a short routine: install the plates you want, pick the hinge position, preheat until the green light comes on, and clean it once it has cooled for 30 minutes. Following those four steps makes the five cooking modes easier to use.
Read next
Ready to upgrade your kitchen?
Browse our tested buying guides and find the right appliance for the way you cook.