Helping you create a kitchen you love.

Kitchen Appliances

Nespresso Aeroccino3 Milk Frother Review: Foam and Cleanup

As an Amazon Associate we earn from qualifying purchases. We may earn a commission from links on this page, at no extra cost to you. Learn more.

Nespresso Aeroccino3 Milk Frother Review: Foam and Cleanup

The Nespresso Aeroccino3 is a small countertop jug that heats and froths milk at the press of one button. In our kitchen it earns its space by making thick, pillowy dairy foam with almost no effort. Its main limitation is capacity: it handles only one small drink at a time. It sits in a crowded field of Nespresso-style milk frothers, and its simplicity is both its best and its most limiting trait.

The quick verdict sits in the review box right below the table of contents. After that we cover how it froths, how it cleans up, how it compares with the Aeroccino4, and who should buy it. It also fits neatly with every Nespresso product we have covered.

Aeroccino3 Quick Verdict: Pros, Cons and Best Fit

Nespresso Aeroccino3
1

Nespresso Aeroccino3

Best for Simple Foam
Check Price on Amazon
4.1/5

The Aeroccino3 makes substantial, pillowy dairy foam that suits cappuccinos and espresso macchiatos, and its single button makes daily use easy. It suits a personal coffee routine, and the pros and cons below cover where it falls short.

  • Thick, pillowy hot dairy foam
  • Cold foam that holds its structure for iced drinks
  • One-button control with automatic stop
  • Quiet and compact on the counter
  • Works without a Nespresso coffee machine

Specifications

Frothing input
120 ml maximum
Heating input
Upper mark, about 240 ml
Preparations
Hot foam, cold foam, hot milk
Controls
Single illuminated button
Cleaning
Hand wash only

Pros

  • Dense, creamy foam that suits cappuccinos
  • Cold foam works without pre-chilling the jug
  • Quiet running and a small footprint
  • Simple enough that nobody needs the manual after the first day

Cons

  • Thick foam can separate and need spooning out
  • No handle or pouring spout, so pouring can take two hands
  • Milk film can stick to the heated bottom
  • Hand wash only, and small batches mean repeat cycles for guests

How We Tested the Aeroccino3

We judged the Aeroccino3 the way most people use it: a jug of cold milk, one button, and a mug waiting on the counter. We made hot foam for cappuccinos, cold foam for iced coffee, and plain heated milk with the spring removed.

Our scoring leans on four things: foam quality, ease of use, cleanup, and how well it fits a real morning routine. We did not measure foam volume or serving temperature with instruments, so you will not find invented numbers in this review.

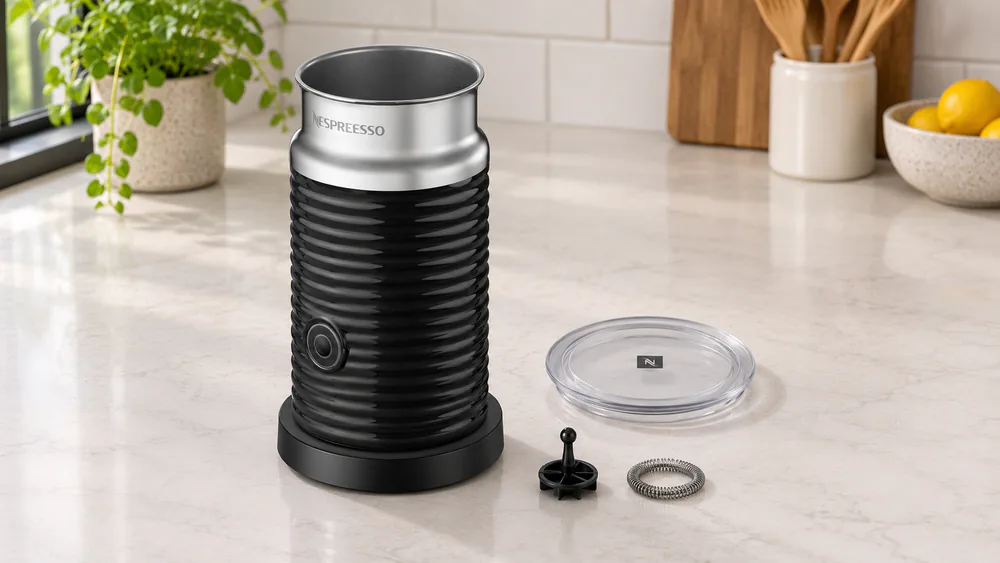
The Nespresso Aeroccino3 jug beside its removable whisk, coil spring, and lid on a light kitchen counter

Design, Capacity and Key Specifications

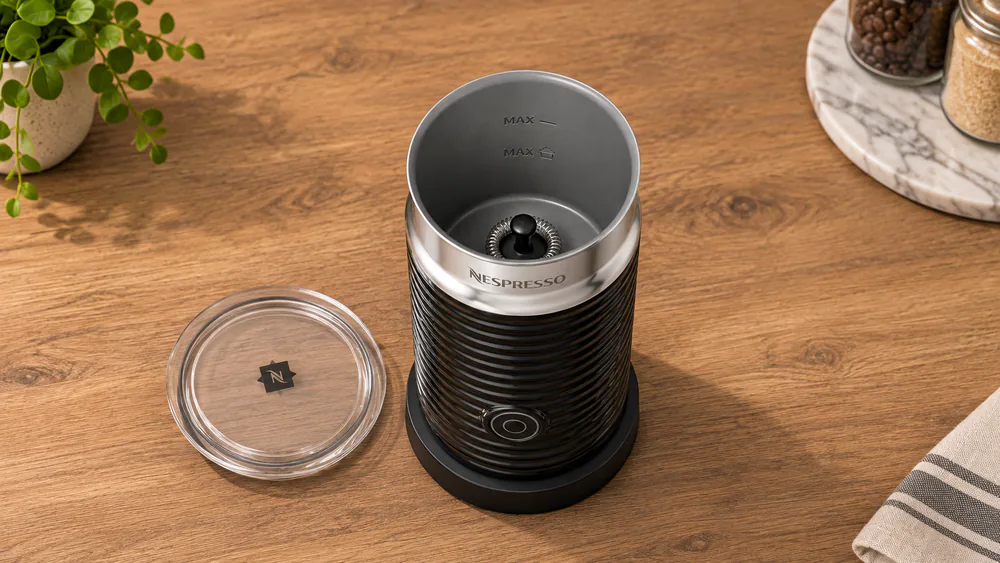
The design is compact and straightforward. The Aeroccino3 is a ribbed black cylinder of plastic and steel that sits on a detachable power base. The jug has a nonstick interior, a lid with a seal, and a removable whisk. It runs quietly and takes up little counter space.

Nespresso Aeroccino3 key specifications
Frothing input120 ml maximum (about 4.1 oz)
Heating inputUpper fill mark, about 240 ml (8.1 oz), heating only
PreparationsHot foam, cold foam, hot milk
ControlsOne illuminated button, automatic stop
Handle and spoutNone
Temperature settingNone
CleaningHand wash, never immerse

Sizes differ between regional records, so check the exact unit if your counter space is tight. The version we looked at lists roughly 9 cm across and 17 cm high.

Frothing Capacity vs. Heating Capacity

This is the spec that trips people up. The jug holds more than it can froth. For either hot or cold foam, the limit is 120 ml, or about 4.1 oz. The upper mark is for heating milk with the spring removed, and you should not fill to that level when you want foam.

In practice, 120 ml makes one generous cappuccino or a small iced drink. It will not fill a large latte mug. The foam expands as it whisks, so overfilling is the quickest way to a messy base.

Controls, Whisk and Countertop Footprint

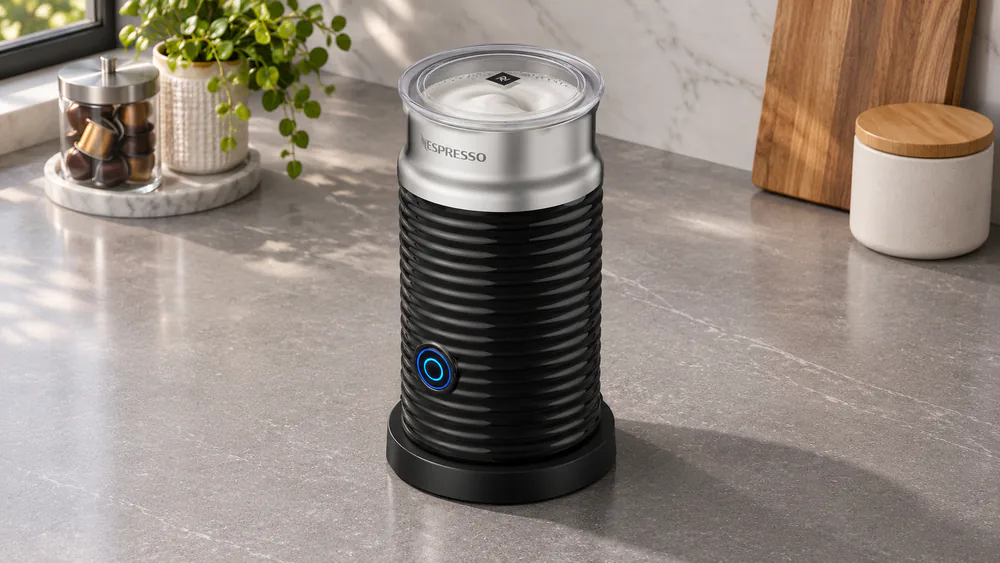
There is one button and nothing else. A brief press starts hot preparation with a red light. Hold it for 2 seconds and the light turns blue for cold foam. The unit stops on its own when the cycle ends.

The whisk is the other control. With the coil spring on, you get foam. With the spring off and only the stirrer in place, you get heated milk. The lid doubles as storage for the spring, which keeps it from wandering off.

We like the simplicity of a single control.

Milk Foam Quality and Everyday Performance

With the controls covered, the next question is what ends up in the cup. The Aeroccino3 does one thing very well: it turns cold dairy milk into thick, airy foam. It does that quietly and without fuss. Where it struggles is finesse.

Hot Foam for Cappuccinos and Lattes

Hot foam is the headline result. The foam comes out substantial and pillowy, which is exactly what a cappuccino or an espresso macchiato wants. It sits proudly on top of the coffee and holds for the length of a drink.

For a latte, it works if you like a thick cap rather than silky microfoam. Cycle times depend on how much milk you start with and how cold it is, so treat any quoted time as a rough guide.

Cold Foam and Milk Heating

Cold foam is a pleasant surprise. It holds a good structure over iced coffee and froths without any extra chilling, so you can go straight from the fridge to the jug.

There is no temperature setting, and milk temperature varies from batch to batch. If you like your drinks very hot, warm your mug first and drink promptly.

Dairy Milk vs. Plant-Based Milk

Dairy is the most predictable starting point, and fresh, cold milk gives the best results. Oat, soy, and almond all produced usable foam for us, but results vary with the brand and formulation. It froths plant milk quietly and with very little setup, so it is worth experimenting if you avoid dairy. Expect to do some trial and error before you find a carton you like.

Speed, Noise and Temperature Control

The Aeroccino3 runs quietly enough for an early-morning kitchen. A cycle takes roughly a minute or more, depending on the fill and the starting temperature. Because there is no way to adjust the heat, your best lever is how much milk you put in.

If you try a quick second hot cycle, the jug can refuse to start until it cools. That is a built-in safeguard, so give it a few minutes between batches.


How to Use the Aeroccino3

Using it takes about a minute to learn, but good results depend on correct setup. The one thing worth getting right is the setup before you press the button.

Tip. Use fresh, refrigerated milk and a clean jug. Most poor froth comes from old milk, a leftover film, or a whisk that is not seated properly.

Choosing the Whisk Setup and Fill Level

Fit the whisk with its spring for foam, or remove the spring for heated milk. Pour cold milk up to the correct mark. For foam, stay at or under 120 ml. For hot milk without foam, you can go to the upper mark, about 240 ml.

Close the lid and set the jug firmly on its base. A secure seat matters because a poorly placed jug will not run properly.

Selecting Hot or Cold Preparation

A brief press gives hot preparation with a red light. Hold for 2 seconds for cold foam with a blue light. Then let it run until it stops by itself.

The Nespresso Aeroccino3 on its base with the blue cold-foam light lit, milk visibly swirling behind the lid

Cleaning, Maintenance and Durability

After the foam itself, cleanup is where this frother asks for the most attention. It is not a dishwasher machine, and the jug and base must stay dry on the electrical side.

Cleaning After Each Use

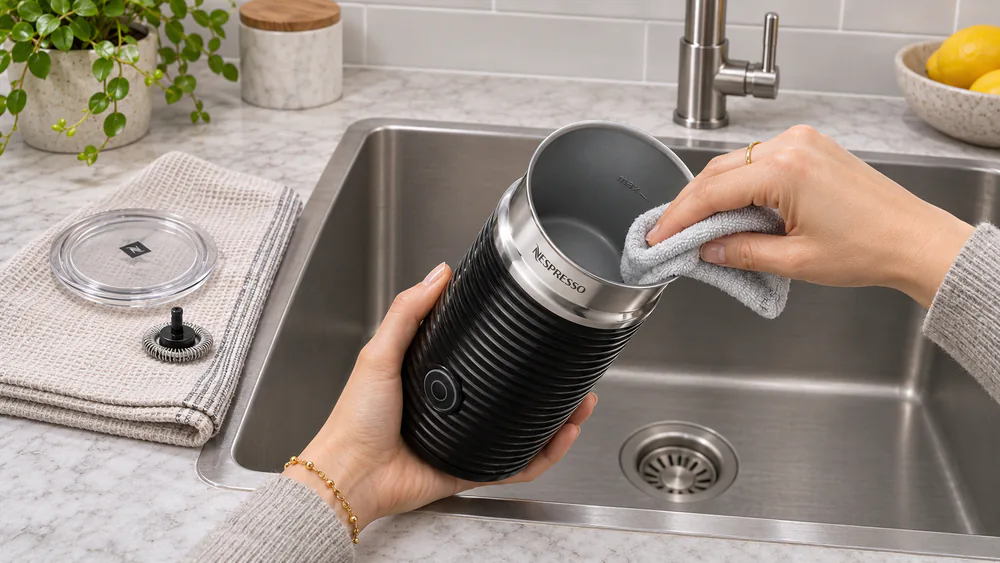
Wash the jug interior, lid, seal, whisk, and spring by hand with mild detergent right after use. Use a soft, nonabrasive cloth, and never immerse the jug or the base. Dry the connector before you use it again.

The thing we watch for is a milk film on the heated bottom. It can build up even when the milk has not visibly burned, and a rinse alone may miss it. A gentle wipe after rinsing clears it. Keep sugar, chocolate powder, and syrups out of the jug.

Hands wiping the nonstick interior of a Nespresso Aeroccino3 jug with a soft cloth over a kitchen sink

Caring for the Coating and Whisk

The nonstick interior stays easy to wipe when you clean it promptly, and soft cloths keep it that way. Avoid abrasive pads and metal tools. Keep the whisk and spring free of dried milk.

One failure symptom to know about is a stalled or displaced whisk, which makes the unit refuse a quick repeat hot cycle until it cools. A flashing red light can also point to overheating, a missing whisk, or too little milk. Neither the coating lifespan nor the failure rate has been established. Prompt cleaning is the best protection we can recommend.

Aeroccino3 vs. Aeroccino4 and Other Alternatives

Care needs are one reason people look at the newer model. The Aeroccino4 adds a handle, a pouring spout, separate recipe buttons, and a stainless exterior. It offers 4 preparations: cold foam, hot milk, airy hot foam, and dense hot foam. Both models froth up to 120 ml, and the Aeroccino4 heats up to 240 ml. The US model is rated at 450 W, weighs 1.87 lbs, and carries a 1-year warranty. Its parts are dishwasher-safe to 158 F, though the base is excluded.

The handle and spout are the real upgrade. One-handed pouring is comfortable and drips are fewer. The extra foam modes are subtler than their names suggest, and the batch size stays small. For a fuller side-by-side, see our Nespresso Aeroccino 3 vs 4 comparison, or read our Nespresso Aeroccino 4 review on its own.

CriterionAeroccino3Aeroccino4
Foam modesHot foam, cold foam, hot milkCold foam, hot milk, airy hot foam, dense hot foam
Frothing capacity120 ml120 ml
ControlsSingle button; hold 2 seconds for coldSeparate recipe buttons
PouringPlain rim, no handleHandle and pouring spout
CleaningHand wash; never immerseDishwasher-safe parts to 158 F; base excluded
Temperature adjustmentNoneNone

Both models share the same small-batch limit and the same lack of temperature control. If you want to see other options, our best Nespresso milk frothers roundup covers the wider field.

Price and Value: Who Should Buy the Aeroccino3?

With both models side by side, value comes down to price tier. The Aeroccino3 sits in the mid-priced range, and it is the lower-cost choice of the two Nespresso frothers we compared. The Aeroccino4 costs noticeably more, and that extra spend buys pouring comfort, easier cleaning, and more foam options rather than bigger batches.

Buy the Aeroccino3 if you make one or two milky drinks a day and like thick cappuccino foam. It works with any coffee, not just Nespresso machines, so ordinary brewed coffee gets the same treatment.

Skip it if you want latte art, you pour a lot of drinks in a row, or you hate hand washing. In those cases the Aeroccino4's handle and dishwasher-friendly parts are worth the step up.

Frequently Asked Questions

Do You Need a Nespresso Machine to Use It?

Do you need a Nespresso machine to use the Aeroccino3?

No. It is a standalone electric frother that works independently of any coffee machine. Pair it with espresso, drip, or ordinary brewed coffee.

What is the return policy if I buy direct from Nespresso?

Nespresso USA offers a 30-day return window, and you need the original packaging and a receipt.

Can it heat milk without making foam?

Yes. Remove the coil spring, keep the stirrer in, fill up to the upper mark of about 240 ml, and press once.

Final Verdict

Step up to the Aeroccino4 only if the missing spout and the hand washing would bother you every morning. Otherwise the Aeroccino3 does the job for less.

Read next

Ready to upgrade your kitchen?

Explore more buying guides to find the right gear for your daily coffee.