
Kitchen Appliances
How to Clean Your Ninja Creami: 5 Steps for a Spotless Spindle, Paddle, and Lid

As an Amazon Associate we earn from qualifying purchases. We may earn a commission from links on this page, at no extra cost to you. Learn more.
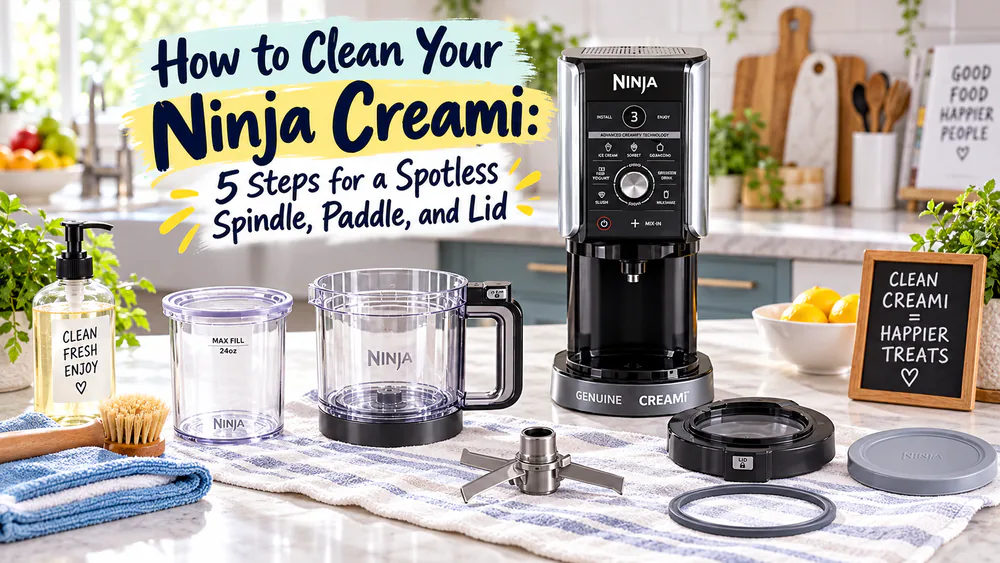
We learned the hard way that the Ninja Creami does not forgive a skipped rinse. Leave the parts on the counter for half an hour, and the dairy residue sets into a crust you will scrape for twenty minutes. Rinse everything within 60 seconds of the last scoop, and the whole cleanup takes about five minutes. That is the lesson from six months of regular use in our test kitchen.
Here's how it goes: unplug the machine, take it apart, rinse, wash, and air dry. Spindle, paddle, bowl, and lid all follow the same routine, and every removable part is dishwasher safe on the top rack. The full routine below walks through each one, with the deeper weekly and monthly care further down.
Quick Answer: The Fastest Way to Clean Ninja Creami
The whole routine runs fast once the parts have come to room temperature. Here is the order we use in our test kitchen:
- Unplug the machine.
- Disassemble every removable part, including the gasket.
- Rinse everything under warm water within 60 seconds of the last scoop.
- Wash with mild soapy water and rinse thoroughly.
- Air dry completely before you reassemble.
The same five steps cover the original 7-in-1 models (NC299, NC300, and NC301) and the Deluxe 11-in-1 (NC500 and NC501). The spindle tip needs a quick extra wipe, covered below.
Why Proper Cleaning Matters for Your Ninja CREAMi
Dairy is the culprit behind most Creami grime. The fat and sugar in ice cream base turn stubborn fast, so what rinses off cleanly at minute five needs real scrubbing by minute thirty.
Moisture is the other enemy. Water left in nooks and crannies raises the risk of mold and musty smells that carry into your next batch. Soap left behind leaves water marks and an off taste, and neglected parts can even attract insects.
Clean parts also mean a better freeze. A few minutes after every batch prevents all of it, and the 5-step routine below is all it takes.
Ninja Creami Parts: What Needs Cleaning
Every part that touches the ice cream needs washing after every use, though the machine is not actually messy; the paddle, the lid, and the pint need the real attention. The same instructions cover the whole family, from the NC300 to the NC501 Deluxe XL.
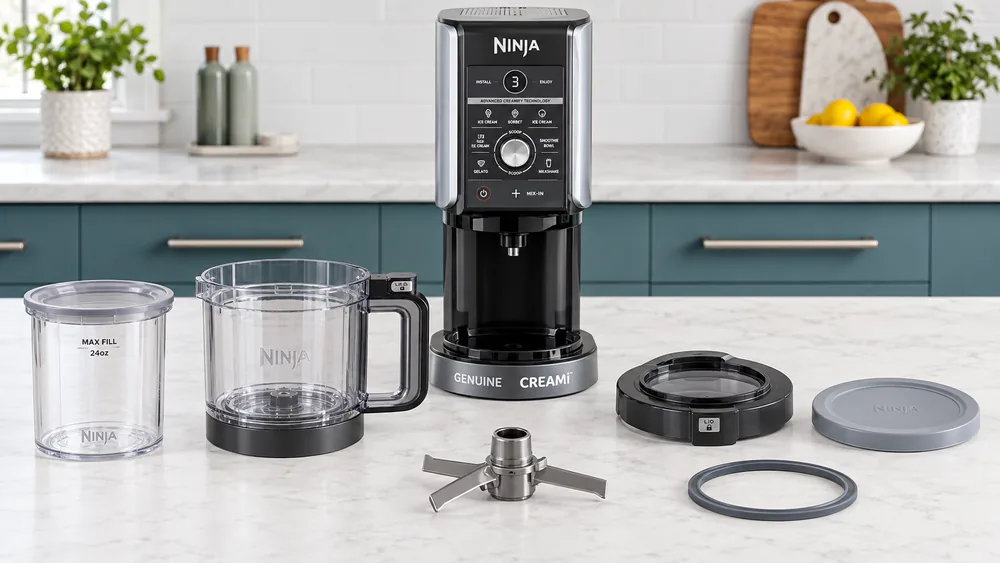
The Motor Base
The motor base holds the spindle and the electronics, and it never goes near water. Unplug it before cleaning, then wipe it with a clean, damp cloth. Skip abrasive cloths, pads, and brushes, and never submerge the base.
The Creamerizer Paddle
The Creamerizer paddle is the spinning blade that shaves the frozen base, and the blade is sharp. Wash it with a handled utensil, and never leave it attached to the lid; it traps moisture. Its hollow shaft holds water if fully submerged, so scrub it with a long-handled brush instead.
The Outer Bowl Lid (and Gasket)
The lid is the most annoying part to clean until you learn the trick, and the trick is the gasket. Ingredients lodge underneath the dark grey rubber lip seal on the underside every time. Remove the paddle before cleaning the lid, then ease the gasket out gently; it is tight the first few times and stretches if you pull hard.
The Creami Pints and Outer Bowl
The pints and the outer bowl wash up quickly, but they need the soft touch. Abrasive sponges scratch the BPA-free plastic, and the scratches become micro-cavities that welcome bacteria. Use the soft side of a sponge and check the walls for scratches before reuse. The original 16-oz pints and the Deluxe's 24-oz XL tubs follow the same rules, and the XL tubs hold 50% more per batch.
Step-by-Step: How to Clean Ninja Creami After Every Use
This is the routine we run after every batch.
What You'll Need Before You Start
Keep these near the machine, and the whole job stays under ten minutes:
- Mild dish soap and warm water
- A soft sponge or dishcloth, soft side only
- A soft brush or toothbrush for crevices and the spindle tip
- A clean towel or a drying rack
- White vinegar for the monthly deep soak
Step 1: Unplug the Machine
Unplug the motor base before you touch anything; it keeps the spindle from spinning while your hands are near it.
Step 2: Disassemble All Components
Take the pint out of the outer bowl, remove the outer bowl, its lid, and the paddle, and separate the dark grey rubber lip seal. Let freezer-cold parts sit at room temperature first; sudden heat can warp or crack them.
Step 3: Rinse Immediately Under Warm Water
Rinse the pint, lid, paddle, and seal under warm running water within 60 seconds of the last scoop. Run warm water through the paddle release lever and out the drain holes on either side of the lid.
Tip. Rinse every part within 60 seconds of finishing a batch and the whole cleanup takes about five minutes. Wait half an hour and you will be scraping for twenty.
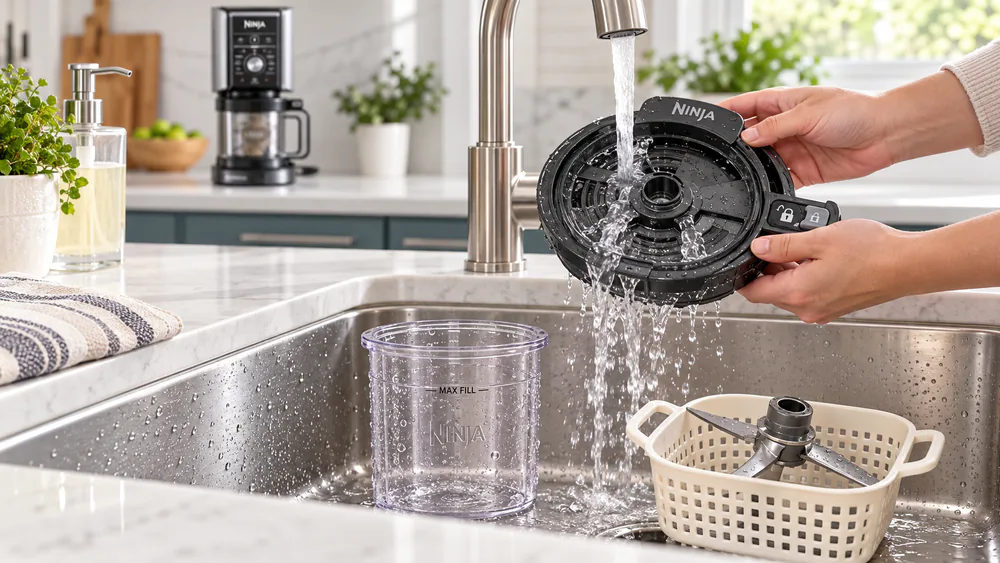
Step 4: Wash With Mild Soapy Water
Wash each part in mild soapy water, using a handled utensil on the paddle and a toothbrush with a little soap for the lid's locking mechanism. Rinse everything thoroughly; leftover suds leave water marks and an off taste.
Step 5: Air Dry Completely Before Reassembly
Set everything out to dry completely before you reassemble, tilting the small creviced parts so water drips out. Stand the lid lever-side down and dry the containers upside down so nothing pools inside; water left in nooks is how sour smells start.
Warning. Never reassemble with wet parts; moisture invites mold and musty smells that carry into your desserts. Ten minutes of patience keeps the machine fresh.
Ninja Creami Dishwasher Guide: What Is Actually Safe
Every removable part is dishwasher safe, top rack only, separated before loading. Ninja's official support center lists the same instructions, and Ninja's official cleaning guide covers the NC500 and NC501 family. Here is the right way to load it, at a glance:
| Part | Dishwasher safe | Hand wash | Notes |
|---|---|---|---|
| Pint / tub (16-oz or 24-oz XL) | Yes, top rack only | Yes, warm soapy water | Avoid super-hot sanitizing cycles; soft sponge only; inspect for scratches before reuse |
| Storage lid | Yes, top rack | Yes | Check the seal closes tight; a loose seal lets air in and crystals form |
| Outer bowl | Yes, top rack | Yes | Wipe the ledge on the motor base where it seats after each use |
| Outer bowl lid | Yes, top rack | Yes | Remove the paddle first; flush water through the lever and drain holes; dry lever-side down |
| Rubber lip seal / gasket | Yes, top rack | Yes, warm soapy water | Remove and wash separately; ease out gently, do not stretch |
| Creamerizer paddle | Yes, top rack | Yes, handled utensil | Blade is sharp; soak 5-10 minutes for stuck residue; dry separately |
| Spindle (drive shaft) | No | Wipe with a damp cloth after each use | Interior is self-cleaning by design; only the exposed tip needs manual cleaning |
| Motor base | No | Damp cloth wipe only | Unplug before cleaning; never submerge; no abrasive cloths, pads, or brushes |
Dishwasher-Safe Parts
Load the containers, lids, outer bowl, and paddle on the top rack, and run a normal cycle. We have run our containers through six months of top-rack dishwasher cycles with no deformation. Skip the super-hot sanitizing cycles, which can damage the plastic.
What to Hand Wash Instead (and Why)
The motor base and the spindle never go in the dishwasher, or anywhere near water. Everything else hand washes fine with warm soapy water. The dishwasher gives the most thorough clean because the heat sanitizes, while hand washing is gentler on the plastic and rubber over time.
Warning. Never wash the motor base in the sink or dishwasher, and never run water over it. Unplug it first, then wipe it with a clean, damp cloth; it is the one part of this machine that never gets submerged.
Protecting the Lid Gasket and Seal
The gasket is where cleaning failures start. Remove the dark grey rubber lip seal and wash it separately, then dry it fully before it goes back in. Ease it out gently rather than pulling, and give the storage lids' silicone seals the same monthly disassembly.
Deep Cleaning: Weekly and Monthly Maintenance
Two deeper passes catch what the daily sink wash misses: weekly, the lid and gasket; monthly, a soak and base wipe-down.
Cleaning Hidden Lid Channels and Crevices
The lid's hidden channels flush clean when you run warm water through the side holes while working the lever back and forth, then stand it up to drain. Once a week, take a toothbrush with a baking soda paste to the locking mechanism; the lid needs scrubbing and rinsing, not just a rinse.
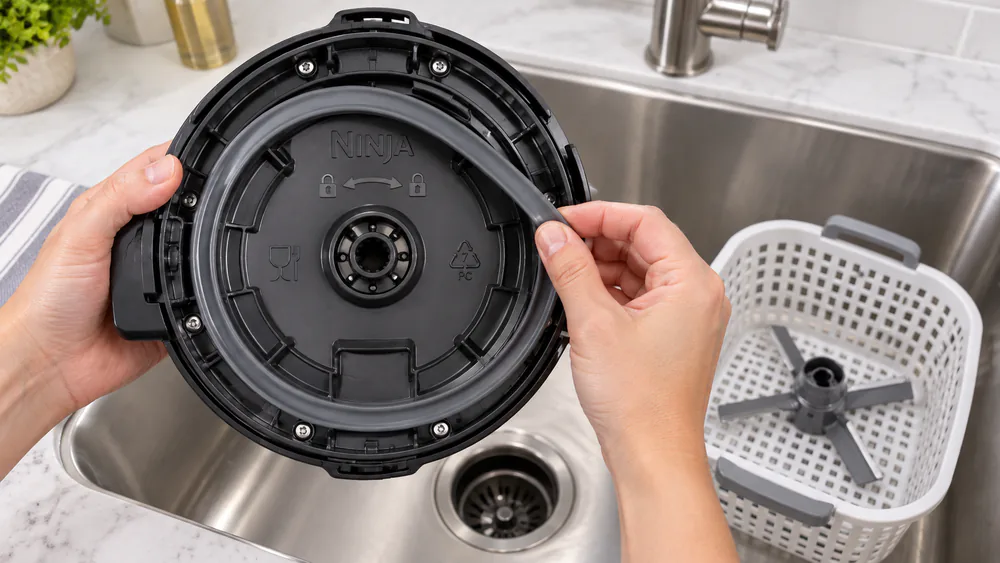
Tip. Soak hacks from our kitchen: two Alka-Seltzer tablets in warm water break up hardened sugar and fat in the lid's crevices; a half-and-half white vinegar soak for about 30 minutes descales containers monthly; an oxygen-bleach soak lifts stubborn berry, coffee, or turmeric stains. Skip bleach; it leaves an off taste.
Removing Odors With Vinegar and Baking Soda
A white vinegar soak neutralizes odor in the tubs: use a half-and-half mix for about 30 minutes, then wash and dry as usual. A baking soda shake also works: 2 tablespoons in lukewarm water, shake for 30 seconds, and let it rest for an hour. A lemon half scrubbed inside adds deodorizing power.
Motor Base Wipe-Down
Unplug the base, then wipe the spindle below the control panel with a damp cloth after every use; it is the only cleaning frequency the manual states. If liquid gets trapped between the base and the platform, seat the outer bowl with the handle centered below the control panel, twist the handle right to raise the platform, and wipe the exposed area dry, a trick straight from the NC500 series manual.
How to Clean the Ninja Creami Spindle
The spindle is mostly self-cleaning by design; a lip seal wipes the shaft as it retracts, so only the exposed tip needs manual attention. Wipe the tip with a damp cloth after every use, especially the little connection tip that looks like a tire valve cap. Dried-on residue takes warm water plus a toothbrush or bottle brush.
Gray or black greasy residue on the spindle is most likely internal lubricant seeping out, not food grime. Do not eat that batch, and do not expect a wipe to fix the source; it tends to come back. Do not run soapy or plain water through the machine either; soap can break down the spindle lubricant, and the machine is not built for unfrozen liquid. If the trouble keeps recurring, call Ninja; the unit carries a 1-year limited warranty in the US and Canada.
Troubleshooting Common Ninja Creami Cleaning Problems
Ice Cream Stuck to the Creamerizer Paddle
Soak the paddle in warm water for five to ten minutes and the stuck base wipes off. A long-handled brush gets the blade edge clean without your fingers near it.
Sour Lid Smell After Washing
A sour lid almost always means moisture or residue hid somewhere the wash missed. Take out the rubber gasket, wash underneath it, flush the lid's channels, and dry it lever-side down overnight. The viral maggot case traced back to a lid that was never dried, and lingering moisture is exactly what food safety guidance from the CDC warns about.
Warped or Deformed Pint Container
Warping usually comes from a sudden temperature shift, like moving a frozen pint straight into hot water, so let frozen parts come to room temperature first. Replace any warped or scratched container; a damaged wall can be cut by the blade, leaving plastic pieces in your batch.
Stuck Shaft or Outer Bowl
A stuck outer bowl usually means it was turned the wrong way, and once turned left it is nearly impossible to remove. It can also happen when the spindle stays extended, when residue freezes between the lid and spindle, or when water freezes in the lid hole. Unplug the machine for about 15 minutes so the spindle can reset, then check for anything jamming it.
Ninja Creami Cleaning FAQs
Is the Ninja Creami dishwasher safe?
Yes, with limits. The pint containers, storage lids, outer bowl, outer bowl lid, and paddle are all top-rack dishwasher safe. Separate every part before loading; never put the motor base or spindle near water.
How do you clean the Ninja Creami lid?
Remove the paddle first, then ease out the dark grey rubber lip seal. Wash both in warm soapy water or on the top rack, flush water through the lever and drain holes, and dry the lid lever-side down.
How do you clean the spindle on the Ninja Creami?
Wipe the exposed tip with a damp cloth after every use; the interior is self-cleaning by design. Dried-on residue takes warm water and a toothbrush or bottle brush.
Why does gray sludge keep coming back on the spindle?
It is most likely internal lubricant seeping out, not food residue. Do not eat that batch; wiping it off does not fix the source. If it keeps coming back, contact Ninja.
How often should I deep clean my Ninja Creami?
Wash the removable parts after every use and wipe the spindle tip daily. Give the gasket, lid channels, and tub seals a deeper clean weekly, and run a monthly vinegar soak.
What should I do if my Ninja Creami lid smells or has mold?
Disassemble the lid completely, including the gasket, and wash everything with soapy water. Soak the parts in white vinegar, then dry them fully before reassembly.
Can I run the machine with water to clean the shaft?
The official manuals never describe a water cycle, and the machine is not built for unfrozen liquid. Some guides recommend a water rinse; others warn it can break down the spindle lubricant. The safe route is the manual's damp cloth.
Are the paddle and outer bowl dishwasher safe?
Yes, both are top-rack dishwasher safe. Separate them from each other and from the lid before loading. Hand washing is just as good and gentler on the plastic.
Why is my Ninja Creami shaft stuck?
A stuck shaft or outer bowl usually comes from turning the outer bowl left instead of right, or from frozen residue. Unplug the machine for about 15 minutes so the spindle can reset, then check for anything jamming it.
Final Takeaway: The 5-Minute Ninja Creami Cleaning Routine
The whole daily routine takes about five minutes: unplug, disassemble, rinse, wash, air dry, and wipe the spindle tip. Do the rinse within 60 seconds and the rest is easy. Once a week, pull the gasket and scrub the lid channels; once a month, soak the tubs in vinegar and wipe down the base. Store dry parts with containers upside down, and use the cord's hook-and-loop fastener instead of wrapping it around the base. Follow that rhythm, and the only thing you will ever scrape is the last scoop.
Read next
Ready to upgrade your kitchen?
Rinse within 60 seconds, dry everything fully, and a five-minute routine keeps every batch tasting fresh.