
Kitchen Appliances
How to Make Coffee at Home: A Beginner’s Guide

As an Amazon Associate we earn from qualifying purchases. We may earn a commission from links on this page, at no extra cost to you. Learn more.
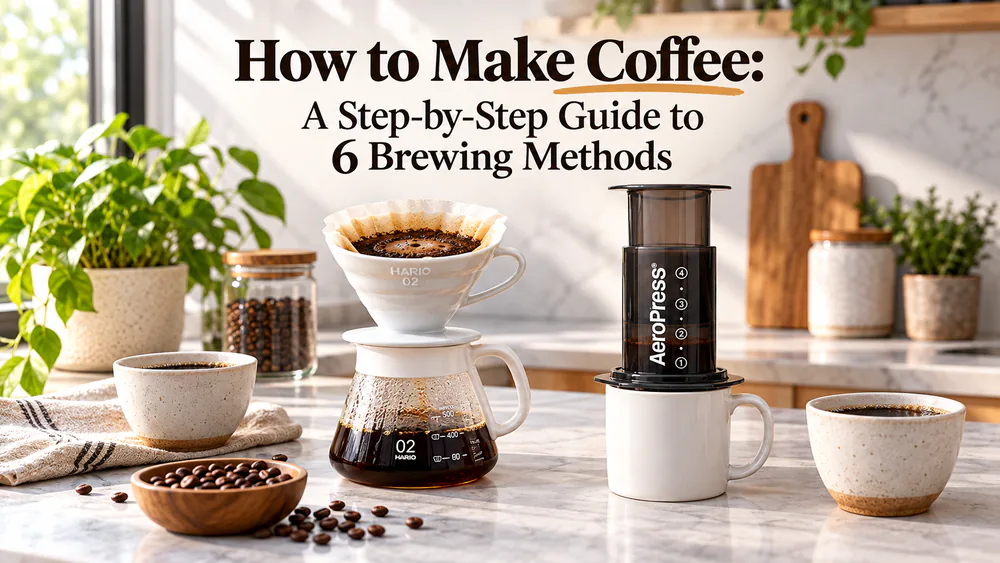
Everyone wants a better cup of coffee, and the good news is that it takes only a few habits. Measure your coffee, match the grind to your brewer, use hot water, and pay attention to time. Start with the drip recipe below, then use the method table to pick a brewer that fits your mornings.
We have pulled shots, steeped presses, and poured kettles through all of them as baristas, so the steps below are the ones we would hand a new hire on day one. If you are shopping for a machine rather than a method, our coffee maker guides cover the gear in detail.
How to Make Coffee in a Drip Coffee Maker
An automatic drip machine is the easiest place to begin. It heats the water, spreads it over the grounds, and fills the carafe while you do something else. Automatic drip cuts the active work for a full batch. The catch is that neglected cleaning and descaling undermine the result, so keep the machine tidy.
Here is the starter procedure:
- Start with a clean brewer and the correct filter for your machine. Check the manual for filter shapes and sizes.
- Weigh your coffee. A medium grind suits most drip baskets. For a full pot, 30 g of coffee is a good start.
- Add the grounds to the filter and shake the basket gently so the bed sits level.
- Fill the reservoir with cool, filtered water, measured at 1:16 by weight. For 30 g of coffee, that means 480 g of water. Stay within the reservoir's stated capacity.
- Seat the carafe, close the lid, and run the brew cycle.
- Pour as soon as the cycle ends and taste. Adjust the dose next time, not the water.

If you like to sip slowly, a thermal carafe keeps the batch warm without forcing you to brew again.
What You Need to Make Coffee
You need four things: coffee, water, a brewer, and a way to measure. A scale makes your doses repeatable, and a burr grinder lets you adjust the grind. Neither is required on day one, but both pay you back quickly in consistency.
Coffee beans or ground coffee
Fresh beans in a grind that suits your method give the best flavor. Grind only what you need right before brewing. Pre-ground coffee still works when its grind matches the brewer, so a bag labeled for drip is fine in a drip machine.
Store beans airtight, opaque, cool, and away from moisture and heat. Buy manageable batches you will finish in a reasonable time. Do not use espresso-fine coffee everywhere, because a grind that is too fine for the brewer tastes harsh.
Water and basic brewing equipment
Clean-tasting water matters because coffee is mostly water. If your tap water tastes off, filtered water usually fixes it. A clean brewer matters just as much, since old oils and mineral scale both show up in the cup.
A kettle, ideally a gooseneck for pour-over, and a timer round out the kit.

How Much Coffee and Water to Use
Ratio is the biggest lever you have. We write ratios as coffee to water by weight, so 1:16 means 1 g of coffee for every 16 g of water. For hot filter coffee, 1:16 is a dependable starting point. You can nudge it stronger or weaker by taste.
The table below shows water inputs, not finished cup volumes. Grounds soak up water, so a brew made with 480 g of water yields less than 480 mL in the pot. Divide the actual yield between your mugs.
| Method and measurement basis | Ground coffee | Water added or beverage collected | What it means |
|---|---|---|---|
| Hot filter, 1:16 | 15 g | 240 g water added | Small brew; finished amount is lower |
| Hot filter, 1:16 | 30 g | 480 g water added | Batch; divide actual yield between mugs |
| Hot filter, 1:16 | 60 g | 960 g water added | Larger batch within brewer capacity |
| French press starting recipe | 30 g | 450 g water added | Finished amount is lower |
| Cold brew concentrate, 1:4 | 100 g | 400 g water added | Filtered concentrate; dilute before serving |
| Espresso, 1:2 | 18 g | 36 g beverage collected | One double-shot recipe, not a mug |
Espresso and cold brew do not follow the hot filter ratio. Espresso is measured by the liquid that comes out, and cold brew is a concentrate you dilute later.
Measuring by weight or with a tablespoon
Weight is the most reliable way to measure, because grams do not change with grind or roast. For water, grams and milliliters are close enough to interchangeable in a kitchen.
No scale? Two level tablespoons of coffee per 8 US fluid ounces of water is a workable starting recipe, and you can adjust by taste. Spoon volume does not give a fixed weight, though, since grind, roast, and how full you fill the spoon all change the dose.
Be careful with the markings on a coffee maker. Cup markings are model-specific. A 5-cup machine with a 25 fluid ounce capacity uses a 5 fluid ounce cup, which is smaller than an 8 fluid ounce measuring cup. Check the manual's stated capacity instead of assuming a marked cup equals a mug.
Matching grind size and water temperature to your method
Grind size controls how fast flavor leaves the coffee. Coarse grounds suit long steeps like French press and cold brew. Medium grounds suit drip and pour-over. Fine grounds suit espresso, and moka and AeroPress sit in between.
For manual hot filter brewing, start with water at 195-205 F, roughly 90 to 96 C. Some recipes, including certain French press and AeroPress recipes, call for a different temperature, so follow the recipe you choose.

Choose a Coffee Brewing Method
The best method is the one you will actually use on a weekday. Think about how many people you are serving, how much time you have, and how much cleanup you can stand. Here is how the common methods compare.
| Attribute | Drip | French press | Pour-over | Cold brew | Espresso | Moka | AeroPress |
|---|---|---|---|---|---|---|---|
| Starting grind | Medium | Coarse | Medium | Coarse | Fine | Moka grind | Medium-fine |
| How it brews | Automated filter | Immersion, metal mesh | Manual filter | Long cool immersion | Pressure extraction | Stovetop pressure | Immersion and gentle pressing |
| Starting recipe | 1:16 input | 1:15 input, adjustable | 1:16 input | 1:4 concentrate input | 1:2 beverage output | Fill to pot guidance | 16-18 g, model fill mark |
| Main result | Convenient batch | Heavy body, sediment | Clear flavors | Concentrate to dilute | Small concentrated shot | Strong coffee | Compact single serving |
| Main friction | Cleaning and descaling | Mesh cleanup | Pour control | Long wait and filtering | Dialing in | Heat control | Limited batch size |
If you want hands-off mornings, choose drip. If you want body and do not mind sediment, choose a French press. If you want a clean, bright cup and enjoy a little ritual, choose pour-over.
How to Make French Press Coffee
A French press steeps coffee fully in hot water, then separates it with a metal mesh plunger. The result is heavier and oilier than paper-filter coffee, with a little sediment that makes the last sip gritty. We like it when we want a full-bodied cup without much fuss.
- Grind 30 g of coffee coarse and even.
- Heat water to your recipe's temperature. Recipes vary by roast, so follow the one you choose.
- Add the grounds to the press and pour in 450 g of water, the 1:15 starting recipe. Expect less than 450 mL of finished coffee.
- Stir gently so no dry pockets remain, then rest the lid on top with the plunger up.
- Steep for 4 minutes.
- Press the plunger down slowly and steadily. If it resists, stop and do not force it.
- Pour all the coffee out right away. Coffee left on the grounds keeps extracting and turns bitter.
Warning. Hot water and glass do not forgive rough handling. Glass French press carafes are vulnerable to breakage during routine handling, so set yours down gently and keep a hand on the lid while pressing.

Cleanup is where the press asks more of you. The mesh traps residue, so it takes more effort than throwing away a paper filter. Take the filter apart and rinse each piece.
How to Make Pour-Over Coffee
Pour-over uses a paper filter in a cone, and you control the pour by hand. It gives a clear cup with distinct flavor and aftertaste. Technique affects consistency, so your first few cups may vary. That is normal.
Pour-over also demands more attention than a batch drip machine, especially for a group.
- Heat water to 195-205 F and place the dripper on your mug or server.
- Rinse the paper filter with hot water and discard the rinse.
- Add 30 g of medium-ground coffee and level the bed.
- Start a timer and pour about twice the coffee's weight in water, 60 g in this case, to bloom the grounds. Pause for 30-45 seconds. The bloom water counts toward your total.
- Pour in slow circles toward a total of 480 g, keeping the water level steady and avoiding the filter edge.
- Let the water drain completely, then remove the dripper.
A small pour-over may finish around 2:30 to 3:30 minutes. Treat that as a diagnostic guide rather than a deadline. If the coffee drains much faster, grind finer next time, and if it stalls, grind coarser.

How to Make Cold Brew Coffee
Cold brew steeps coarse coffee in cool water for many hours. It is convenient to serve straight from a prepared batch in the refrigerator, but it requires planning ahead. Cold brew describes the extraction method. Iced coffee, by contrast, can be hot-brewed coffee served cold.
Here is a concentrate recipe:
- Combine 100 g of coarse coffee with 400 g of cool water, the 1:4 starting ratio, in a jar or pitcher.
- Stir until every ground is wet. Dry pockets can remain unless the coffee is thoroughly wetted.
- Cover and refrigerate for 20-24 hours.
- Filter the concentrate through a fine strainer or paper filter. Incomplete filtering leaves an unpleasant gritty drink.
- Dilute before serving. Begin with 1 part concentrate to 2 parts water or milk. For example, 60 mL of concentrate plus 120 mL of water makes a 180 mL drink before ice.
- Adjust to taste, and add ice.
Storage advice differs from brewer to brewer, so make a manageable batch and follow your brewer's instructions. A storage limit for plain concentrate does not automatically apply to a drink mixed with milk.

How to Make Espresso
Espresso uses pressure to push hot water through finely ground coffee. It is the most demanding method here, and a pump machine and a good grinder are non-negotiable. For a first recipe, use 18 g of ground coffee and collect 36 g of espresso, a 1:2 ratio. The output is finished espresso, not water added to the machine.
The basic steps:
- Grind fine and weigh 18 g into a basket that matches that dose.
- Distribute the grounds evenly and tamp level.
- Lock in the portafilter and start the shot on a scale.
- Stop at 36 g of liquid. About 25-30 seconds is a starting target, but roast, preinfusion, and desired yield all shift it.
- Taste the shot and adjust the grind, not the dose, for the next one.
Dialing in takes repeated grind and yield adjustments, and it can use up coffee before the flavor comes into balance. We tell every newcomer to expect a few wasted shots. If the shot tastes sharp and thin, grind finer, and if it is bitter and slow, grind coarser. Change one thing at a time.
How to Make Moka Pot Coffee
A moka pot brews on the stovetop, pushing hot water up through the grounds with steam pressure. The coffee tastes intense and concentrated, and overheating can give it a burnt edge. Heat control is the skill to learn.
Warning. Fill the base only to just below the safety valve, keep any flame inside the base, and let the pot cool before you take it apart. Parts and steam get very hot.
- Fill the base with water just below the safety valve.
- Fill the funnel loosely with coffee ground for moka and level it off. Do not tamp.
- Screw the top on securely.
- Set it over low to medium heat.
- Remove the pot from the heat when brewing finishes, then let it cool.
- Pour, then hand wash once the pot is cool.
Grind labels differ between brands, so follow the instructions that came with your pot. Avoid packing an extremely fine, tight espresso puck into the funnel. A loose bed brews more evenly.
How to Make AeroPress Coffee
The AeroPress is compact, quick to clean, and easy to travel with. Its small batch size limits how many people you can serve at once, so it suits one or two cups. We like it for desk mornings and trips.
This is the upright medium-fine recipe:
- Fit a paper filter into the cap, lock the cap onto the chamber, and set it upright on a sturdy mug.
- Add 16-18 g of medium-fine coffee.
- Pour water at 185 F (85 C) up to the fill mark specified for your exact AeroPress model.
- Stir briefly, insert the plunger, and wait 30 seconds.
- Press gently until you hear a hiss.
- Cool the hot cap, remove it, eject the puck, and rinse.
The 185 F figure belongs to this recipe. It is not a replacement for the hot filter range above. Fill marks differ between models, so follow your own brewer's instructions.

How to Make Coffee Without a Coffee Maker
No brewer? You can still make a decent cup with a pot and a mug.
Making instant coffee
Instant coffee is brewed coffee that has been dehydrated, so it dissolves in hot water. Start with 1 teaspoon of granules per 6 US fluid ounces of hot water. Follow the packet and adjust to taste. This is the fastest route, and you need nothing but a kettle.
Brewing ground coffee in a saucepan
Ordinary ground coffee still needs extraction and separation. A saucepan can do both:
- Heat a measured amount of water until it is hot, then take it off the heat.
- Stir in medium-coarse ground coffee at about the 1:16 ratio.
- Steep off the heat for roughly 5 minutes.
- Let the grounds settle, then ladle or pour through a strainer, leaving the sediment behind.
Do not boil the coffee in the pan.
How to Fix Bitter, Sour, or Weak Coffee
Most bad coffee comes down to extraction, which is how much flavor the water pulled from the grounds. Change one variable at a time, taste, and then change another. That way you always know what helped. Roast and personal taste matter too, so aim for the sweet spot you like.
If your coffee tastes bitter
Harsh, drying bitterness usually means over-extraction. Try a coarser grind, shorter brew time, or slightly cooler water. In a French press, pour all the coffee out of the press promptly.
If your coffee tastes sour
Sharp sourness with little sweetness points to under-extraction. Try a finer grind or a longer brew time. For pour-over, slow your pours a little. For espresso, grind finer and watch the yield.
If your coffee tastes weak
If the cup is thin but otherwise balanced, raise the dose relative to the water. Moving from 1:16 toward 1:15 is an easy first step. Also check that you measured by weight.
Keep your gear clean as well. Coffee oils and mineral scale are separate problems. Wash filters and carafes after every brew, and descale automatic machines according to the manual and your water conditions.
Frequently Asked Questions
Can you make coffee with pre-ground beans?
Yes. Pre-ground coffee works as long as the grind suits your method. Medium suits drip and pour-over, coarse suits French press and cold brew, and fine suits espresso. It stales faster than whole beans, so keep it sealed and use it up.
Is a coffee maker’s cup the same as a measuring cup?
No. Cup markings are model-specific. A 5-cup, 25 fluid ounce machine uses a 5 fluid ounce cup, which is smaller than an 8 fluid ounce measuring cup. Check the manual's stated capacity and measure by weight if you can.
How should you store coffee beans and clean your equipment?
Keep beans in an airtight, opaque container somewhere cool and dry, and grind only what you need. After brewing, empty the grounds and wash the filter parts and carafe. Pull apart French press mesh to remove trapped residue, and descale automatic machines per the manual.
Read next
Ready to upgrade your kitchen?
Explore our buying guides for your home coffee routine, or subscribe for more kitchen advice.