
Kitchen Appliances
How to Make Ice Cream with an Ice Cream Maker: Step-by-Step Guide

As an Amazon Associate we earn from qualifying purchases. We may earn a commission from links on this page, at no extra cost to you. Learn more.
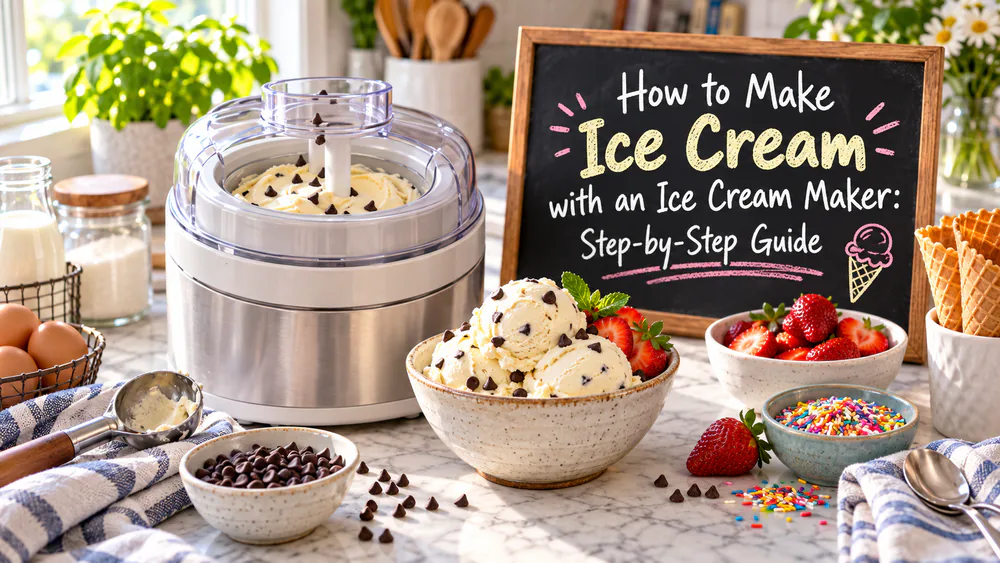
If your homemade ice cream keeps turning out icy instead of creamy, the machine is rarely the problem. In our kitchen, the failed batches almost always traced back to one skipped step: a base that went in warm, a bowl that was not frozen through, or a churn that ran a few minutes too long. Get those right and a good scoop is genuinely easy.
The truth that changes everything is simple. A home ice cream maker only ever gets your base to soft-serve, and the freezer does the real hardening afterward. Once you stop expecting scoopable ice cream to march straight out of the bowl, the whole process clicks into place. This step-by-step guide walks through every stage, from chilling the base to storing the finished pint, with the fixes we reach for when a batch goes sideways.
What Is an Ice Cream Maker and How Does It Work?
An ice cream maker does two jobs at once. It chills your liquid base below freezing while a paddle, called a dasher, stirs constantly. That constant motion is the whole secret. Stirring keeps water from settling into large crystals and whips in tiny air bubbles, which is how churning limits ice-crystal size and gives ice cream its light, smooth body instead of a solid frozen block.
You can hear the machine doing its work. As the base thickens and climbs the sides of the bowl, the motor bogs down and changes pitch. That shift in sound is your best done signal, better than any timer. When the base looks like soft-serve and rises in the bowl, it is ready.
Types of Ice Cream Makers (Manual, Freezer-Bowl, Compressor)
There are three main kinds, and the type you own changes your prep more than anything else. Hand-crank machines pack ice and rock salt around a metal canister and churn in roughly 20 to 40 minutes, but need a steady supply of ice. Freezer-bowl machines use a pre-frozen gel canister that lives in your freezer, so they need planning ahead but cost the least. Compressor machines have a built-in freezer, so there is no bowl to pre-freeze and you can run batches back to back.
For most home cooks, the freezer-bowl style is the sweet spot on price. The catch is that the bowl must be frozen solid before you start, and it churns only one batch before it needs to refreeze. Compressor machines cost more but skip that wait, which matters if you make ice cream often.
What You'll Need: Ingredients and Equipment
Homemade ice cream needs surprisingly little, and most of it is already in your fridge. What matters is the balance of ingredients, because fat, sugar, and air are what separate a creamy scoop from an icy one.
Core Ingredients for a Creamy Base
Every base starts with dairy, sugar, and flavor. A common creamy ratio is 2 cups heavy cream to 1 cup milk, a 2:1 blend, though the cream-to-milk ratio changes with how rich you want the result, so it varies by recipe. More cream tastes richer, but there is a limit. Too much cream can cause buttering, where tiny fat globules clump into a grainy, lumpy texture. When that happens, dial back the cream and add more milk.
Sugar does more than sweeten. It lowers the freezing point, which keeps the ice cream soft enough to scoop straight from the freezer. Egg yolks, if you use them, add richness and act as a natural emulsifier. Cornstarch, corn syrup, honey, or a little invert sugar reduces ice-crystal formation for an even smoother texture, which is why so many recipes lean on one of them.
Tip. For a scoopable pint that never freezes rock-hard, stir 1 to 2 tablespoons of a 40 percent liquor per quart into the base. The alcohol lowers the freezing point and keeps the ice cream soft, and it will not make the flavor boozy at that amount.
Equipment Checklist
You do not need a professional setup. Here is what earns its place on the counter:
- An ice cream maker, with the freezer bowl already frozen if yours uses one
- A saucepan and instant-read thermometer if you plan to cook a custard base
- A whisk and a large mixing bowl for combining the base
- A fine-mesh strainer to catch any cooked egg bits from a custard
- A shallow, airtight container and plastic wrap for storage
How to Make Ice Cream with an Ice Cream Maker: Step by Step
This is the heart of it. Six stages take you from raw ingredients to a scoopable pint, and none of them are hard. The order matters more than the effort.
Step 1: Prepare and Chill the Base
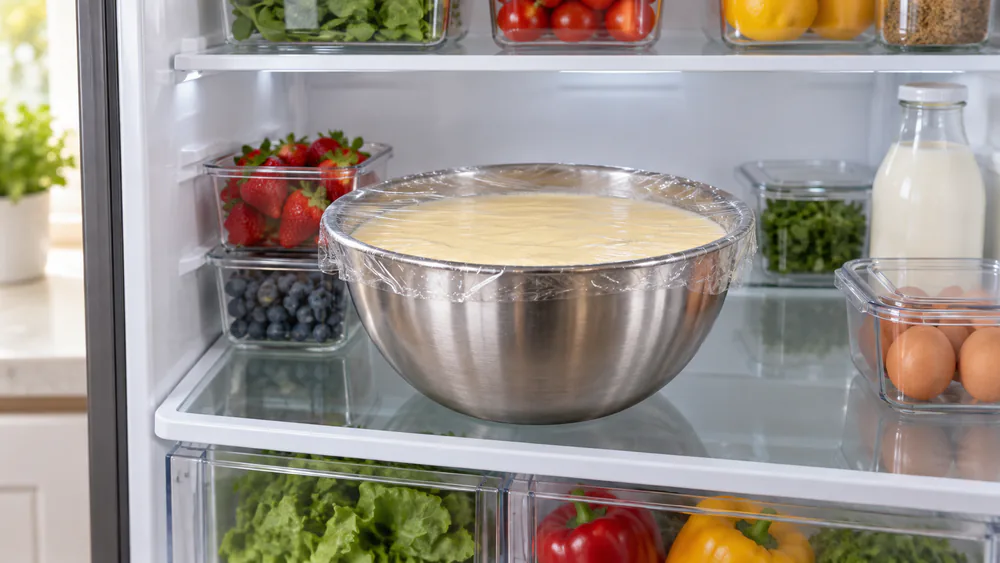
Mix your base first, then get it cold. Whether you cook a custard or whisk together a no-cook base, it needs to reach fridge temperature, about 39 F (4 C), before it ever touches the machine. A warm base is the single most common reason ice cream turns out coarse and icy, melting away fast on the tongue.
Chill the base in the fridge for at least an hour, though a couple of hours or more is better; the recommended pre-chill time varies with recipe richness and whether the base is custard or no-cook. We plan for an overnight chill whenever we can, because a thoroughly cold base churns faster and freezes with fewer crystals.
Step 2: Freeze the Bowl (or Ready the Machine)
If you have a freezer-bowl machine, freeze the bowl at least 12 to 24 hours before churning. This step trips up more first-timers than any other. A freezer-bowl that is not frozen solid all the way through is the number-one reason a batch never thickens, and a warm or crowded freezer needs even longer. Give the bowl a shake first; if you can hear liquid sloshing inside, it is not ready.
Compressor machines skip the wait. You only pre-chill them for about 15 minutes before pouring in the base. Hand-crank models need their ice and rock salt packed in just before you start.
Step 3: Pour and Start Churning
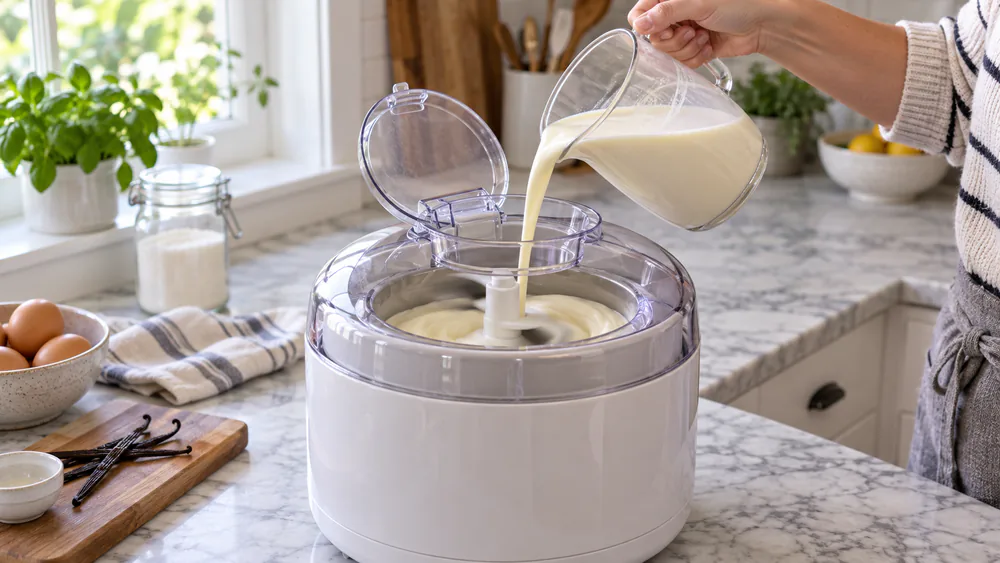
Turn the machine on before you pour, so the paddle is already moving when the base hits the cold surface. Pouring into a still bowl can freeze the base to the walls in a solid ring before the dasher can break it up.
Fill the bowl no more than two-thirds full. The base expands as air whips in, and it needs the room. Overfilling past two-thirds leaves the paddle no space to whip in air, so the batch either overflows or comes out dense instead of light.
Step 4: Churn to Soft-Serve Consistency
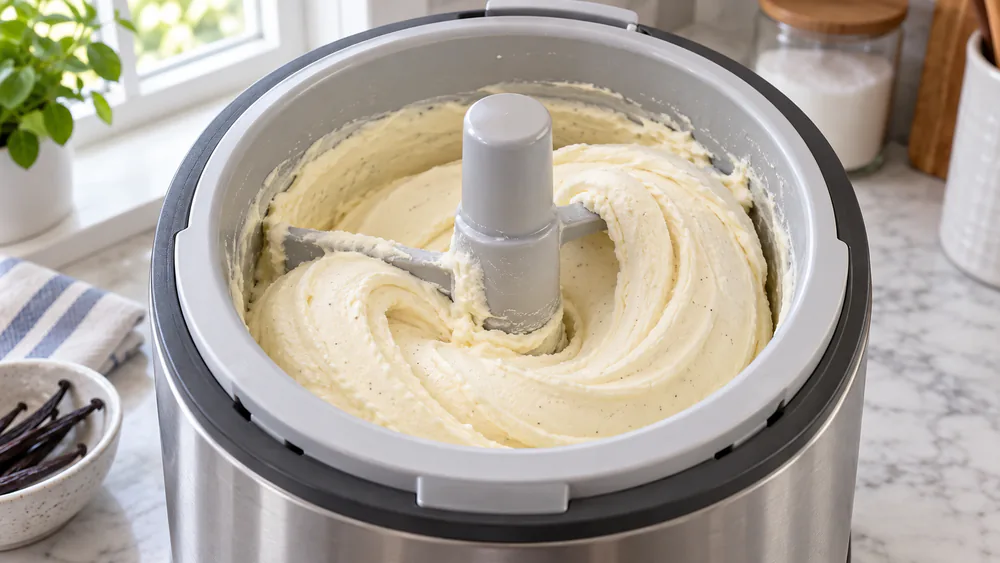
Churning to soft-serve takes roughly 15 to 40 minutes depending on your machine and recipe. Watch the texture rather than the clock. The base is done when it thickens to soft-serve, rises and expands in the bowl, and the motor slows or changes sound.
Resist the urge to over-churn. Running the machine long past the soft-serve stage warms and overworks the base, another common path to a grainy, icy texture. When it looks like thick, swirled soft-serve, stop.
Step 5: Add Mix-ins
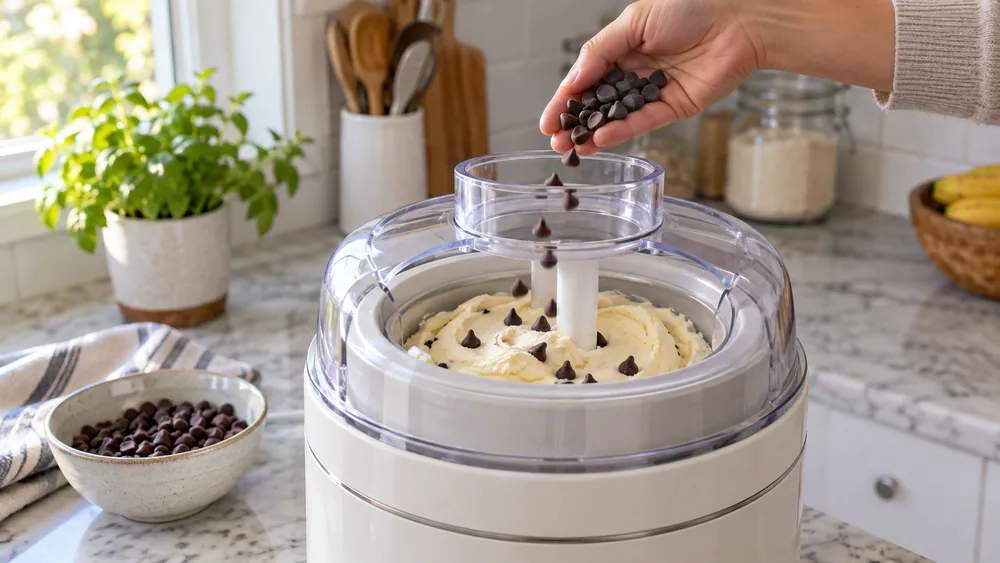
Chips, nuts, cookie pieces, and fruit go in near the end. Add solid mix-ins in the last 2 to 5 minutes of churning so they do not sink to the bottom or get broken up by the paddle. Scatter them in gradually while the machine runs so they distribute evenly.
Save any sauces or swirls, like caramel or fudge ribbons, for the transfer step instead. Layer them by hand as you pack the ice cream into its container so they stay distinct rather than blending in.
Step 6: Transfer and Harden in the Freezer
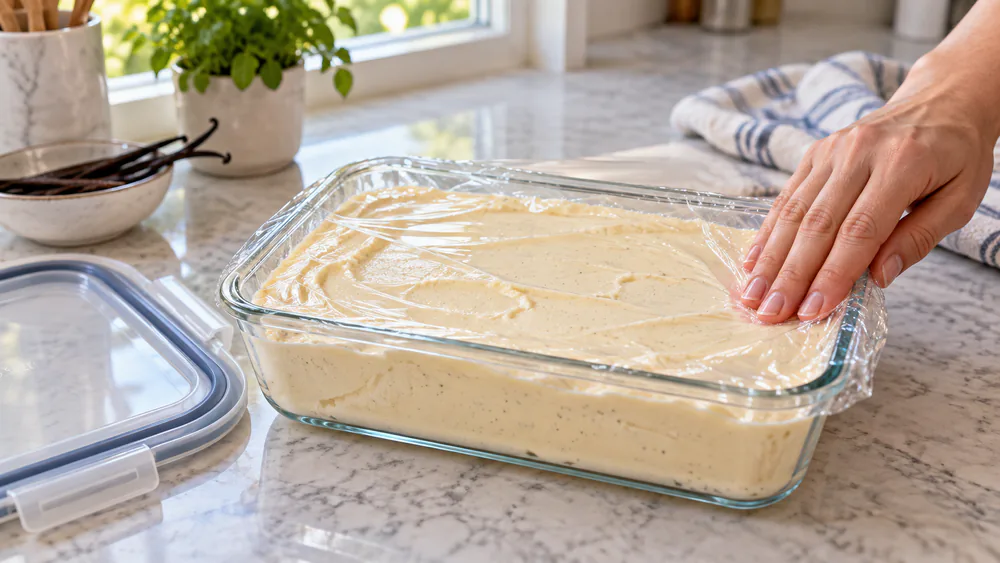
Fresh from the machine, your ice cream is soft-serve soft. Scrape it into a shallow, airtight container, press plastic wrap directly onto the surface, and freeze. Harden the churned soft-serve in the freezer for 2 to 4 hours, or 6 hours plus, for a firm, scoopable texture.
This is the step people skip when they are impatient, and it is the one that turns soft-serve into real ice cream. The machine gets you most of the way; the freezer finishes the job.
Custard-Style vs Philadelphia (No-Cook) Base
There are two classic ways to build a base, and choosing between them comes down to time versus richness.
A custard base, also called French-style, cooks egg yolks with milk and sugar for a smoother, richer result. You warm it over medium heat until it reaches 170 F and coats the back of a spoon, then strain and chill it. The yolks give it a dense, luxurious body, and it is the style most premium scoops use. The tradeoff is time: cooking and cooling a custard adds an hour or more.
A Philadelphia base, the no-cook style, simply mixes milk, cream, sugar, and flavorings with no eggs. It is faster and lighter, with a cleaner dairy flavor and no risk of scrambling eggs. For a weeknight batch or a first attempt, we usually reach for the no-cook base. When we want something special, the custard earns its extra effort.
Best Easy Recipes to Try (Vanilla, Chocolate, Fruit/Sorbet)
Once you know the method, flavors are just variations on the base. Three good starting points:
- Vanilla: A no-cook base of cream, milk, sugar, and a good splash of vanilla extract or a scraped bean. It is the best way to judge your technique, since there is nowhere for a flaw to hide.
- Chocolate: Whisk cocoa powder and a little extra sugar into the warm milk before chilling, or melt in chopped dark chocolate for a deeper, fudgier result.
- Fruit sorbet: Skip the dairy. Puree ripe fruit with a simple syrup and a squeeze of lemon, chill, and churn. Sorbet benefits even more from a spoonful of corn syrup or honey to keep it from freezing hard.
Flavor Variations and Mix-in Ideas
Homemade ice cream is where you get to play. Steep the milk with coffee beans, toasted nuts, or fresh mint before chilling, then strain, for a flavor that beats store-bought.
For texture and surprise, fold in mix-ins during those final minutes: crushed cookies, chopped toffee, brownie chunks, or swirls of nut butter. Just remember that hard, cold mix-ins can dull the creaminess if you overdo it, so a lighter hand usually tastes better.
Tips for the Creamiest, Smoothest Texture
Creaminess comes down to controlling ice crystals and air. Everything on this list works toward one of those two goals.
The smoothest homemade ice cream is not about a fancy machine. It is a cold base, a frozen bowl, and knowing exactly when to stop churning.
- Start with a base chilled to about 39 F; cold in, smooth out.
- Do not over-churn. Stop at soft-serve, when the motor changes pitch.
- Add a stabilizer such as a spoonful of cornstarch, corn syrup, or honey to fight crystals.
- Keep the fat balanced. Rich is good; too much cream turns grainy from buttering.
- Freeze in a shallow container so the whole batch hardens quickly and evenly.
Warning. Do not fill the bowl past two-thirds, even if it looks like it will fit. The base needs room to expand as it whips in air, and a crowded bowl gives you a dense, heavy pint instead of a light, creamy one.
Troubleshooting Common Problems
Even seasoned cooks get the occasional bad batch. Almost every problem has a clear cause and an easy fix.
Ice Cream Too Soft or Won't Freeze
If the base never thickens in the machine, the bowl was almost certainly not frozen through. A freezer-bowl needs a full 12 to 24 hours, and a warm freezer needs longer. Check for sloshing before you start. If the finished ice cream stays soupy after churning, it just needs its freezer time; give it 2 to 4 hours to harden. Too much added alcohol can also keep a batch from setting, so keep it to 1 to 2 tablespoons per quart.
Grainy or Icy Texture
A coarse, icy texture that melts away fast on the tongue almost always traces back to a base that went in warm or a churn that ran too long. Chill the base thoroughly next time and stop churning at soft-serve. If the texture is grainy and almost buttery rather than icy, you likely used too much cream; add more milk to rebalance the fat.
Machine Stalls or Won't Churn
If a compressor machine stalls, do not pause it mid-churn. It will not restart the freezing cycle right away, and you end up with a soft, under-set batch. Let it run through in one go. On a freezer-bowl machine, a stall usually means the base froze to the walls before the paddle got moving, which is why you always start the machine before pouring.
Storing and Serving Homemade Ice Cream
Store your ice cream in a shallow, airtight container with plastic wrap pressed directly on the surface to limit ice crystals. Kept this way, homemade ice cream keeps up to 3 months, though texture is best within the first days. Homemade ice cream tastes best the day it is made; after a few days in the freezer it firms up hard and needs a longer counter rest before scooping.
To serve, let it soften at room temperature about 5 to 15 minutes before scooping. Store the container toward the back of the freezer rather than in the door, where temperature swings speed up crystal formation.
Cleaning and Maintaining Your Ice Cream Maker
Clean the machine as soon as you are done, before any residue dries on. Wash the paddle, lid, and removable parts in warm soapy water and dry them fully. Never submerge a freezer bowl or a motor base in water; wipe the bowl clean and let it come to room temperature before returning it to the freezer for next time. Keeping the seals and paddle in good shape is what keeps your batches churning evenly for years.
Frequently Asked Questions
How long should I freeze the bowl before churning?
Freeze a freezer-bowl machine at least 12 to 24 hours, and longer if your freezer runs warm or is packed full. Give it a shake first; if you hear liquid sloshing inside, it needs more time. Compressor machines skip this and only need about 15 minutes to pre-chill.
Why is my ice cream soupy or icy?
Soupy usually means the bowl was not frozen through or the ice cream just needs its 2 to 4 hours of freezer hardening. Icy, coarse texture almost always comes from a base that went in warm or a churn that ran too long, so chill the base to about 39 F and stop at soft-serve.
How long does churning take?
Roughly 15 to 40 minutes, depending on your machine and recipe. Watch the texture, not the clock. It is done when the base thickens to soft-serve, climbs the sides of the bowl, and the motor slows or changes sound.
Do I need eggs, or can I make a no-cook base?
You do not need eggs. A Philadelphia-style no-cook base of milk, cream, sugar, and flavorings is faster and lighter. A custard base cooks egg yolks in for a richer, smoother result, but both make excellent ice cream.
When should I add mix-ins?
Add solid mix-ins in the last 2 to 5 minutes of churning so they distribute evenly without sinking or breaking up. Save sauces and swirls to layer in by hand as you pack the container.
Can I use non-dairy milk?
Yes. Full-fat coconut milk gives the creamiest dairy-free result, while oat and cashew bases also work. Because they have less fat than cream, add a stabilizer like a spoonful of cornstarch or a little extra sugar to keep the texture smooth.
Conclusion
Making ice cream at home comes down to a handful of habits: chill the base cold, freeze the bowl solid, fill it no more than two-thirds, stop churning at soft-serve, and let the freezer do the hardening. The machine gets you to soft-serve every time; the results you get from there are in your hands. Once you taste a scoop made from scratch, the store-bought pint is hard to go back to.
Read next
Ready to make ice cream from scratch?
Start with a cold base and a frozen bowl, and let our tested guides walk you through the rest.