
Kitchen Appliances
Keurig Coffee Maker Not Working: 11 Troubleshooting Fixes
As an Amazon Associate we earn from qualifying purchases. We may earn a commission from links on this page, at no extra cost to you. Learn more.

Nothing kills a morning like a Keurig that won't brew. You slide in a K-Cup, press the button, and nothing happens. Before you order a new brewer, try a few simple fixes. The good news: most of these problems have known causes, and most take under 10 minutes to solve. The 11 fixes cover the usual suspects: power problems, clogged needles, stuck sensors, and mineral scale. You already own the tools: a paper clip, a damp cloth, and vinegar or descaler. Start with number one.
Quick Diagnosis: What to Check First
Start with the 30-second checks. Confirm the brewer is plugged in, the reservoir is seated until it clicks, and the K-Cup holder is empty. Many failures are seating and power issues.
| Symptom | Likely cause | Fix | Time needed |
|---|---|---|---|
| Won't turn on | Dead outlet or cord, tripped fuse | Test outlet, unplug 30-60 sec | 5-35 min |
| Won't brew or partial cup | Clogged needle, air bubble, scale | Paper-clip needles, water-only brews | 5-15 min |
| "Add Water" with full tank | Float stuck, mis-seated tank | Tap tank, clean magnet, reseat | 2-10 min |
| Leaking | Tank not seated, dry O-ring | Reseat, clean valve, replace O-ring | 5-15 min |
| Weak or lukewarm coffee | Scale, clogged needles | Descale, clean needles, preheat mug | 30-60 min |
| Descale light stays on | Incomplete cycle | Finish cycle, soak, rinse, reset | 30-90 min |
| Blinking lights or beeping | Stuck error, sensor can't read water | Power cycle, reseat reservoir | 5-10 min |
Tip. Try the free checks first: unplug for 30 to 60 seconds, reseat the reservoir, and run a water-only brew.
1. Keurig Won't Turn On
Symptoms and Likely Causes
No lights, no sound, and the power button does nothing. The likely causes: a dead outlet or cord, a tripped thermal fuse, or auto-off.
Fix 1: Test the Outlet and Power Cord
- Plug a lamp into the same outlet.
- Inspect the cord for kinks or cuts.
- Plug the brewer directly into the wall.
- Press the power button.
Lamp works but brewer does not? The problem is the machine.
Fix 2: Reset the Thermal Fuse (Wait 30 Seconds)
Every Keurig has a thermal fuse that cuts power when the machine overheats. It resets once the unit cools: 30 to 60 seconds for a basic error, up to 30 minutes for a hot one. We've seen this after power surges.
Fix 3: Try a Full Power Reset
A full power reset clears most frozen states.
- Unplug the brewer.
- Wait 30 to 60 seconds, or 5 minutes for stubborn errors.
- Hold the power button for 5 seconds.
- Plug it back in and press power.
2. Keurig Won't Brew
Fix 1: Clean the Brew Needles
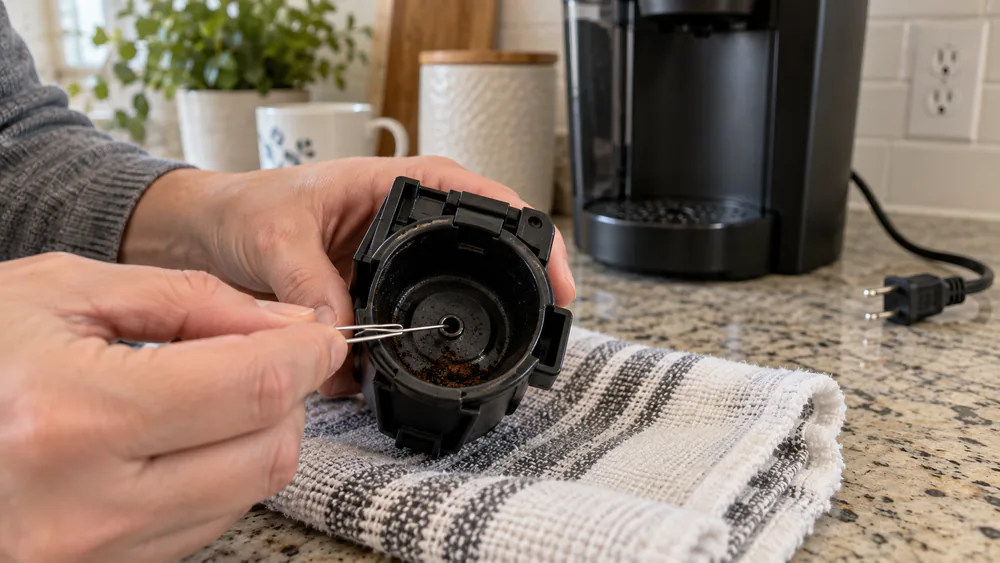
When a Keurig won't brew, or stops at half a cup, the exit needle is the first thing we check. A few stray grounds stop the flow; a paper clip clears it.
Warning. Unplug before cleaning the needles. They are sharp and can scratch skin.
- Unplug the brewer and open the lid.
- Remove the K-Cup holder.
- Push a paper clip into the exit needle and twist.
- Wipe the entrance needle under the lid.
- Replace the holder and run a water-only brew.
Fix 2: Clear Air Bubbles From the Water Line
An air bubble in the line can stall a brew. Refill the reservoir and seat it until it clicks.
Fix 3: Run a Priming Cycle Without a K-Cup
A water-only run primes the line and confirms a fix without wasting a pod.
- Place a mug under the spout.
- Remove the K-Cup and press the 8 oz brew button.
- Repeat until the flow is steady.
3. Keurig Is Leaking Water
Fix 1: Check the Reservoir Seal and Base
Leaks usually start at the reservoir, not the internals, so that is the first place we look. The tank is not seated, the O-ring dried out, or the tank warped in the dishwasher.
- Remove the reservoir and wipe the base dry.
- Seat the tank firmly until it clicks.
- Check the O-ring and the tank for cracks.
- Run a water-only brew and watch the base.
If the tank is cracked or warped, replacement reservoirs run about $12 to $35 and swap easily.
Tip. Reseat the reservoir until you hear the click. A half-seated tank leaks even when it looks fine.
Fix 2: Empty and Re-seat the Drip Tray
A full or unseated drip tray overflows onto the counter. Empty it, wash it, and push it back until it locks. Leaks during brewing can also come from a clogged needle's backpressure, so clean it per Fix 1 under Won't Brew.
4. Keurig Brews Weak or Lukewarm Coffee
Fix 1: Descale Your Keurig (Step-by-Step)
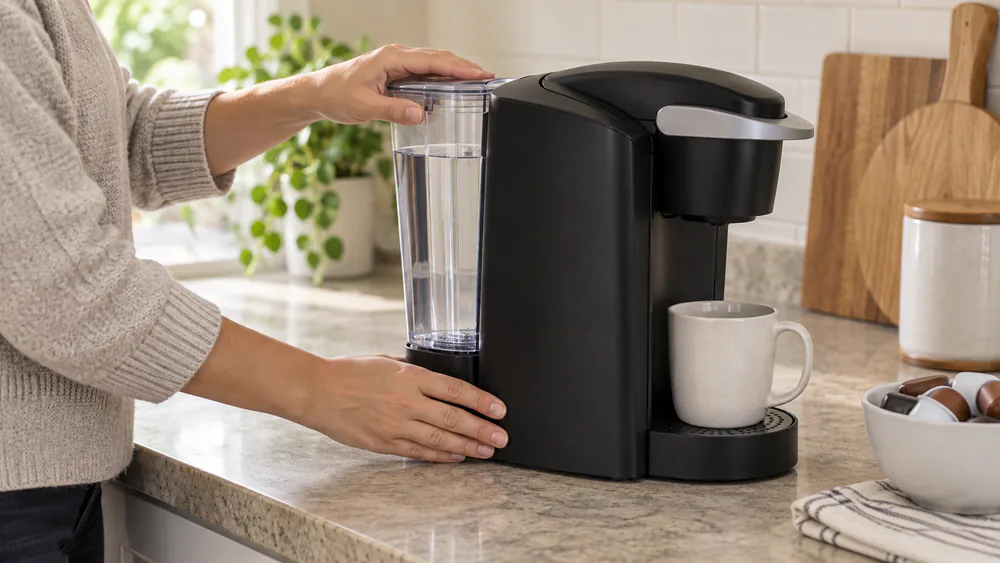
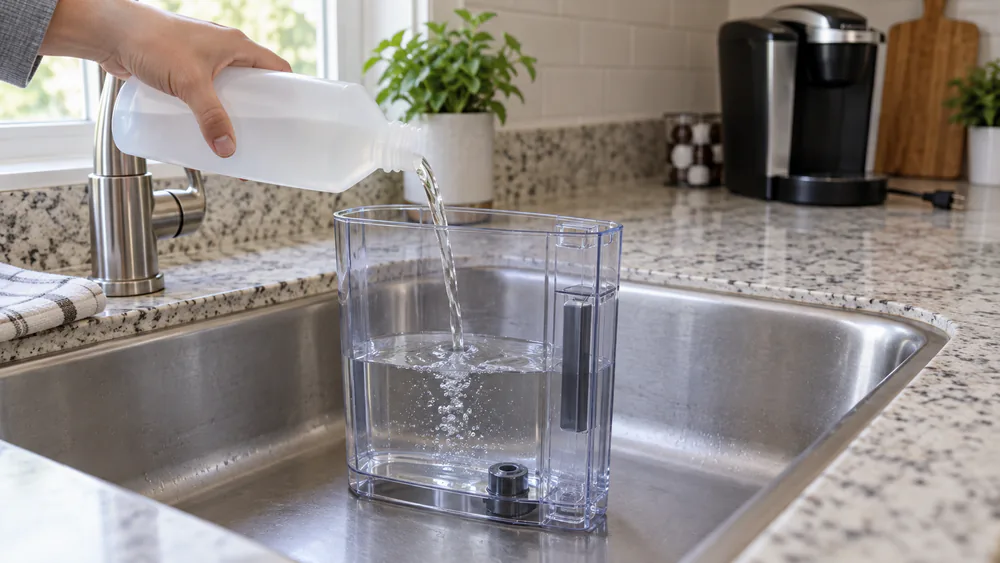
Scale is a Keurig's biggest enemy: it brews slower, runs louder, and pours weaker, cooler coffee. Descale before you suspect the heater. Follow Keurig's official descaling recommendation with a bottle of Keurig descaling solution, or use a 1:1 white vinegar mix.
- Empty the reservoir and drip tray.
- Pour in the full 14 oz bottle, then add equal water.
- Run brew cycles without a K-Cup until empty.
- Let the machine sit 30 minutes with the power on.
- Refill and run water-only cycles until clean.
Warning. Handle descaling solution per the label. Do not leave a vinegar soak running for hours.
Fix 2: Change the Water Filter
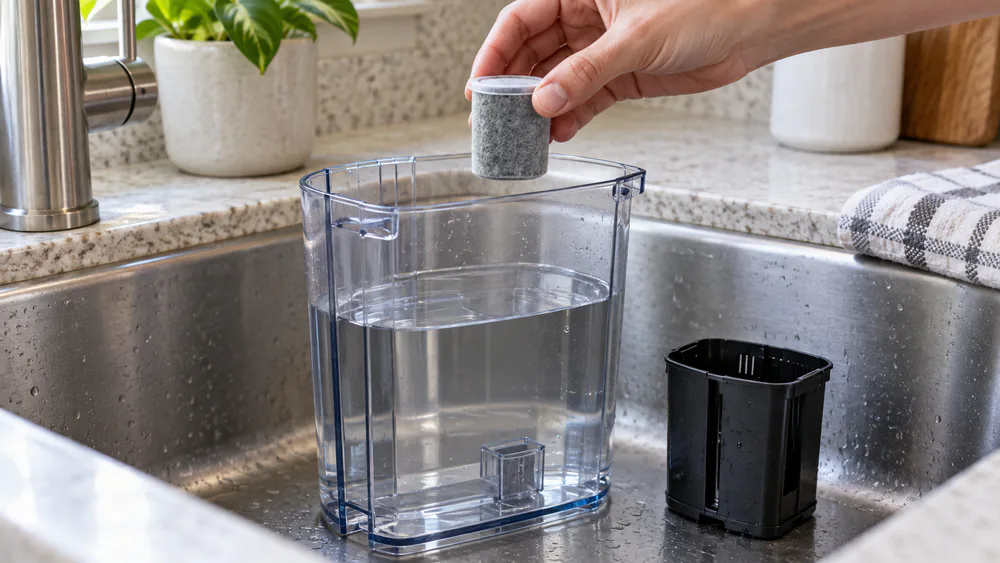
A tired charcoal filter lets more minerals through. Change it every 2 months or after 60 reservoir refills, whichever comes first. Keep a pack of Keurig water filter cartridges. A new filter can briefly block the float, so a false Add Water alert after a change means section 8.
5. Keurig Coffee Tastes Bad
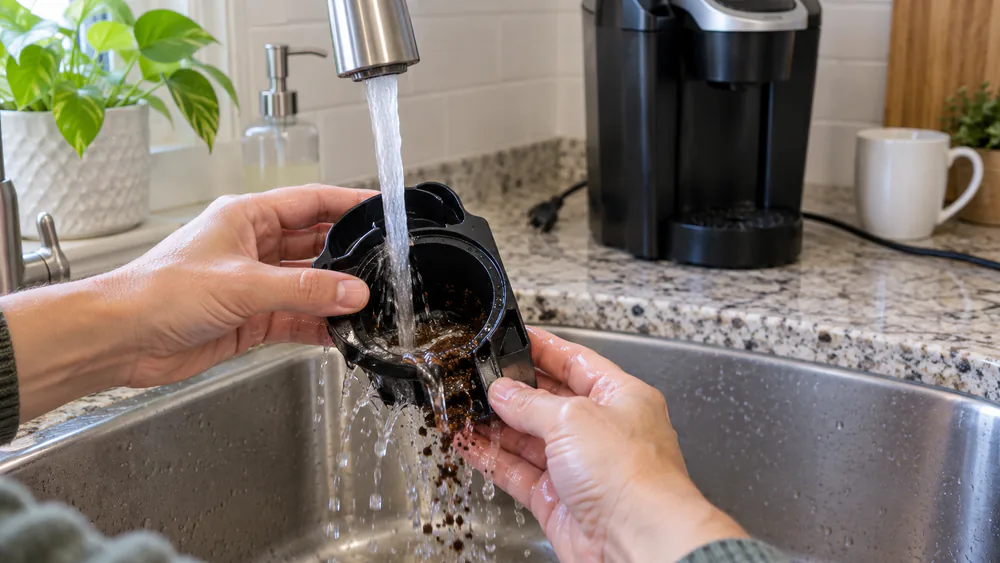
Fix 1: Deep-Clean the K-Cup Holder and Puncture Needles
Off flavors come from old grounds and coffee oils baking into the brew path.
- Unplug the brewer and remove the K-Cup holder.
- Wash the holder in warm, soapy water.
- Clear the exit needle with a paper clip.
- Wipe the puncture needles and replace the holder.
- Run two water-only brews.
Fix 2: Use Filtered or Bottled Water
Heavy minerals or chlorine in tap water ends up in your coffee. Bottled or filtered water keeps flavor and scale in check.
6. Keurig Lights Are Blinking or Machine Beeps
What Each Blink Pattern Means
Blinking lights and beeps mean the machine is stuck. The usual triggers are a stuck error state, a sensor that cannot read the water, or blocked flow. Match the pattern to your manual.
Fix 1: Clear the Error and Power Cycle
- Unplug the brewer for 30 to 60 seconds.
- Reseat the reservoir until it clicks.
- Run a water-only brew.
- If the descale light is part of the pattern, run the descale in section 4.
7. Keurig Turns Off or Shuts Down Mid-Brew
Fix 1: Check the Auto-Off Setting
If your machine turns itself off between brews, that is often the auto-off timer. The K-Classic defaults to 2 hours and can be toggled but not customized. The K-Supreme and K-Supreme Plus are fixed at 5 minutes and cannot be disabled. The K-Elite is programmable in 15-minute increments up to about 2 hours, per generation. The K-Mini powers down about 90 seconds after its last brew, which varies by generation.
Fix 2: Let the Machine Cool, Then Power Reset
A shutdown mid-brew is usually overheating or air in the line. Let it cool up to 30 minutes, unplug for 30 to 60 seconds, and run a water-only brew. A new buzz or squeal usually means scale or trapped air.
8. Keurig Says "Add Water" When the Reservoir Is Full
Fix 1: Reseat the Reservoir and Check the Valve
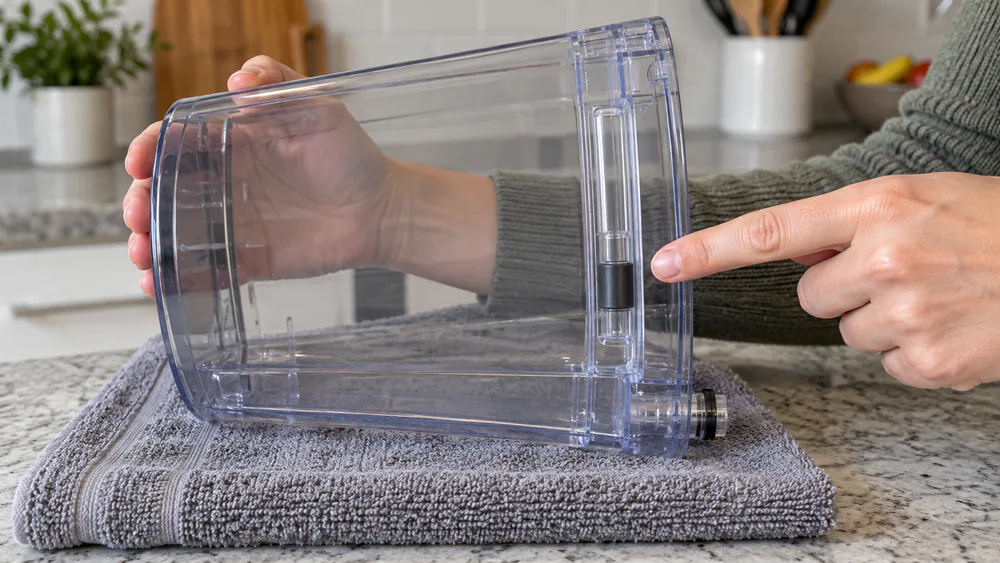
A false Add Water alert with a visibly full tank is almost always the magnetic float stuck down.
- Lift and reseat the reservoir until it clicks.
- Tap the side of the tank to free the float.
- Check the spring-loaded valve at the base.
Tip. Tap the side of the tank first. It frees most stuck floats in seconds.
Fix 2: Clean the Magnetic Float and Sensor Contacts
- Empty the reservoir and turn it upside down.
- Wipe the float and sensor contacts with a damp cloth.
- Refill, reseat, and brew water only.
If the alert persists, the sensor may be damaged, and a new reservoir is often the practical fix.
9. Keurig Dispenses Too Much or Too Little Water
Fix 1: Run a Water-Only Cycle to Recalibrate
Partial pours are almost always a flow problem.
- Remove the K-Cup and place a mug under the spout.
- Run a water-only brew and compare the output.
- Repeat until the pour settles.
Fix 2: Clean the Entrance and Exit Needles
Clean both needles per section 2 and check the level again. If the pour is still off, the water sensor is likely faulty, and that is a support call.
10. Keurig Leaves Grounds in the Cup
Fix 1: Clean the K-Cup Holder and Needles
Grounds in the cup usually mean a dirty or clogged needle.
- Unplug the brewer and remove the K-Cup holder.
- Clear the exit needle with a paper clip.
- Rinse the holder and dry it.
- Run two water-only brews.
Fix 2: Check the K-Cup and Basket Position
A pod that is not sitting flat shifts under the entrance needle. Center the K-Cup, close the lid fully, and try a fresh pod.
11. Keurig Is Stuck on Preheating or Not Heating
Fix 1: Power Cycle and Retry
- Unplug the brewer for 30 to 60 seconds.
- Plug it back in and press power.
- Run a water-only brew and watch the preheat.
If the preheat hangs again, the cause is usually scale or blocked lines.
Fix 2: Descale Blocked Water Lines
Keurig brewers heat water to 192 degrees F at the factory, and in-cup readings of 165 to 175 degrees F are normal heat loss. Consistently cooler coffee usually means scale, so run the full descale in section 4. On the K-Elite, the temperature control adjusts between 187 and 192 degrees F and only goes cooler.
How to Reset Your Keurig: Model-by-Model
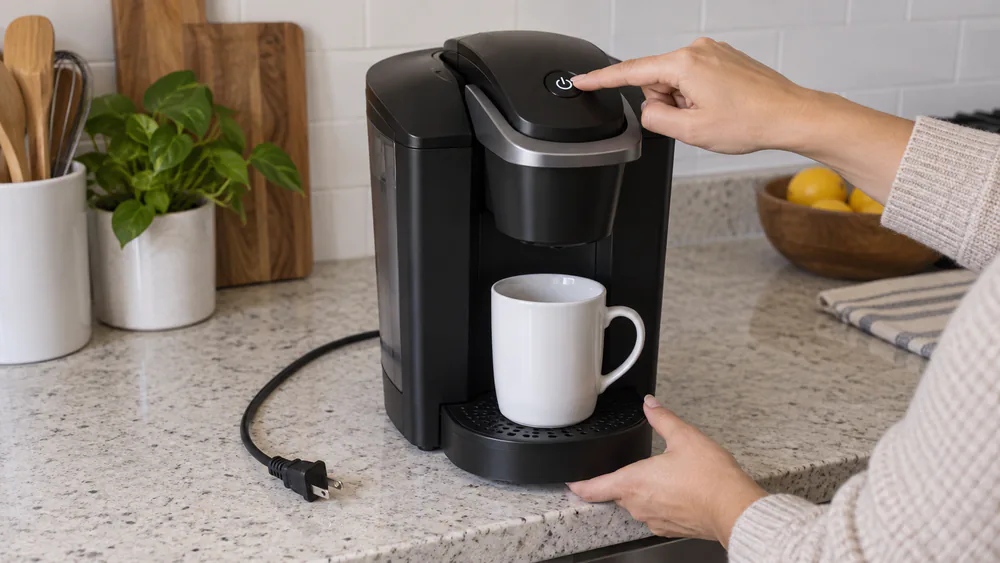
None of these models has a physical reset button. A reset means a button combination that clears stored errors, plus the universal power-cycle reset. If the same error returns after a reset, the problem is hardware.
Note. Button combos differ by model and generation. If your panel does not match, check your manual. Some K-Slim units respond to a 3-second power hold.
Reset the K-Slim and K-Mini
K-Slim: hold the 8 oz and 12 oz buttons for 3 seconds, or hold power. K-Mini: hold BREW and SELECT for 5 seconds.
Reset the K-Supreme, K-Elite, and K-Classic
K-Classic: hold power for 5 seconds while plugging in. K-Elite: hold Strong and 10 oz for 5 seconds. K-Supreme: hold Strong, 10 oz, and 12 oz for 5 seconds.
Preventing Future Keurig Problems
Descaling Schedule
Descale every 3 to 6 months, per Keurig's official guidance, and sooner with hard water. The official solution takes about 30 to 50 minutes with the soak; a 1:1 vinegar descale takes roughly 4 hours, and longer risks the rubber gaskets. Skipping the soak and rinses is why the descale light stays on.
Water Quality and Filters
Filtered or bottled water slows scale dramatically. Change the charcoal filter every 2 months or after 60 reservoir refills.
Routine Cleaning Checklist
Ten minutes a week prevents most of these fixes.
- Wipe the K-Cup holder and lid area after the last brew.
- Paper-clip the exit needle when the flow slows.
- Wipe the float magnet and sensor contacts monthly.
- Descale on schedule, and change the filter every 2 months.
When DIY Fixes Don't Work: Repair vs. Replace and Keurig Support
If you have worked through the 11 fixes and the machine still fails, you are at the repair-or-replace decision. Your Keurig carries a 1-year limited warranty, and connected brewers get 12 months more with the app. Refurbished units carry a 90-day warranty.
Keurig support is free and useful. Call 1-866-901-BREW, or submit a ticket to Keurig support online. An RMA number is required before returning any brewer, and out-of-warranty owners are often offered a partial-discount replacement.
Local bench repairs run about $40 to $75, and control boards about $40 to $60, though quotes vary. New brewers run about $80 to $130 for a K-Mini or K-Compact, $150 to $200 for a K-Classic or K-Elite, and $180 to $250 for a K-Supreme or K-Duo; street prices move week to week.
Pros
- Repairing is cheaper when the failure is one known part
- You keep a machine you already trust
Cons
- Bench repairs can cost half the price of a new brewer
- Internal parts are not sold to consumers, so deeper failures mean shipping the machine
Warning. Never open the brewer's case. There are no user-serviceable parts inside, and the warranty will not cover a DIY repair.
Keurig Troubleshooting FAQ
Why won't my Keurig turn on?
Check the outlet, then unplug for 30 to 60 seconds. If it stays dead, the warranty may cover it.
Why won't my Keurig brew with a K-Cup in place?
The exit needle is the usual culprit. Clear it with a paper clip.
Why does my Keurig say "Add Water" when the reservoir is full?
The magnetic float is usually stuck down. Tap the tank, wipe the magnet, and reseat the reservoir.
Why is my Keurig leaking?
Check the reservoir first: seated to the click, O-ring in place, drip tray empty. Water underneath points to a cracked tank.
Why won't the descale light turn off?
The cycle was probably not finished. Run the full cycle, including the soak and rinse brews, then use your model's reset.
Why is my Keurig producing weak or lukewarm coffee?
In-cup readings of 165 to 175 degrees F are normal. Cooler usually means scale or clogged needles.
How often should I descale my Keurig?
Every 3 to 6 months, per Keurig's official guidance, and sooner with hard water.
Why isn't my Keurig recognizing the K-Cup?
The entrance needle may be clogged, or the pod may not sit flat. Clean both needles and close the lid fully.
Conclusion: Get Your Morning Coffee Back
Most Keurig failures are boring, and that is good news. A stuck float, a clogged needle, or scale looks like a dead machine but responds to fixes that cost nothing. Do not skip the simple ones: a 30-second power reset and a paper clip fix more Keurigs than any replacement part. If nothing works, call Keurig at 1-866-901-BREW while it is under warranty.
Read next
Get Your Morning Coffee Back
Most Keurig failures fix in minutes with tools you already own. Browse our buying guides, or get the latest kitchen fixes in your inbox.