
Kitchen Appliances
Keurig K-Duo Not Turning On? Here's What Actually Works
As an Amazon Associate we earn from qualifying purchases. We may earn a commission from links on this page, at no extra cost to you. Learn more.
Is your Keurig K-Duo not turning on? Don't panic. In most cases the cause is one of four things: a dead outlet, a loose cord, a mis-seated reservoir, or a control board that just needs a reset. The good news is that none of these need a repair shop, and most take under two minutes to rule out.
In our experience, most no-power K-Duos trace back to the outlet, the cord, or a mis-seated reservoir, and a full reset plus reseating revives the majority of them. So before you shop for a replacement, run through the 60-second checks and the 7 fixes below. We have ordered them from the most likely cause to the least likely, and we flag the signs that mean it is time to call for service instead. Most of these machines come back with a free check, not a repair bill.
5 Things to Try in the First 60 Seconds
Before you dig into the steps below, run these five checks. Each one takes seconds, and any one of them can bring the panel back without a single tool.
- Press the power button once. Auto-off can switch the panel off after a brew, and one press of the power button wakes it. Do not assume the button is broken; press it firmly and watch the display.
- Test the outlet with a lamp. Plug a lamp or a phone charger into the same outlet. If the lamp works, the outlet is live and the problem is somewhere else.
- Push the plug fully home. A plug that looks seated can still sit half out of the receptacle. Push it in until it clicks, and try a second outlet if the machine stays dark.
- Reseat the reservoir. Lift the tank off, set it back down, and press until it clicks. A mis-seated tank can keep the board from waking.
- Give the machine a moment to boot. The board needs a few seconds after power returns. Wait a slow count of ten before you judge it dead.
If one of these wakes the machine, you were dealing with a loose connection or a confused control board, not a broken brewer. If the panel stays dark, move to the priority guide below.
Troubleshooting Priority Guide: Start Here to Save Time
Most no-power cases trace back to the outlet, the cord, or a mis-seated reservoir. Work the table top to bottom before you touch anything else, and in our experience most dead K-Duos come back long before Step 7.
| Cause | Likelihood | Time to Fix |
|---|---|---|
| Dead outlet or tripped GFCI | High | Under a minute |
| Loose power cord or plug | High | Under a minute |
| Mis-seated reservoir or stuck float magnet | High | 1 to 2 minutes |
| Overheating or thermal shutdown | Medium | 30 to 60 minutes |
| Internal component failure | Low | Service or replacement |
The first four rows map to Steps 1 through 6, and they cost nothing to check. The last row is why Step 7 exists.
Most no-power K-Duos are not actually broken. They are unplugged, tripped, mis-seated, or asleep.
Step-by-Step Troubleshooting: From Most Likely to Least Likely Fix
Work through the steps in order. Each one rules out a cause, and skipping ahead sends you to the wrong end of the machine.
Step 1: Verify Your Power Source (Outlet, GFCI, Surge Protector)
The brewer needs a live outlet, and the kitchen is the one room where that is not guaranteed. GFCI protection has been required on kitchen countertop receptacles since 1987, and a tripped GFCI looks exactly like a dead outlet. These devices can prevent over two-thirds of the roughly 300 home electrocutions that still happen each year, so the protection is worth keeping. Press the TEST button on the receptacle, press RESET, then try the brewer again.
Tip. Plug a lamp or a phone charger into the same outlet before you blame the brewer. If the lamp works, the outlet is live and you can move on to the cord.
Warning. Power strips and smart plugs can drop power silently and fake a dead machine. Plug the brewer directly into a wall outlet. Keurig's guidance calls for the brewer's own grounded outlet, because an overloaded circuit can make the machine behave erratically.
Step 2: Inspect the Power Cord and Plug
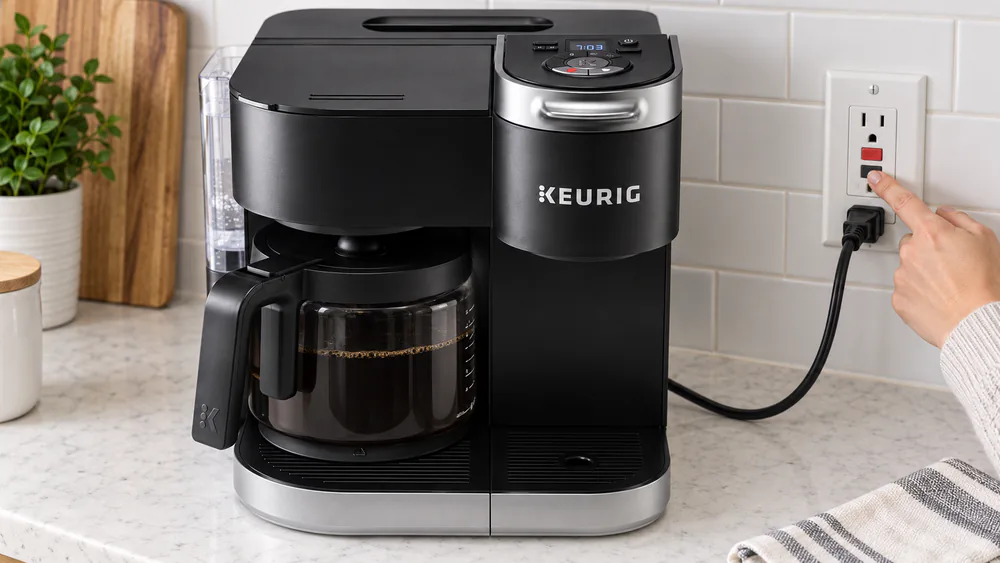
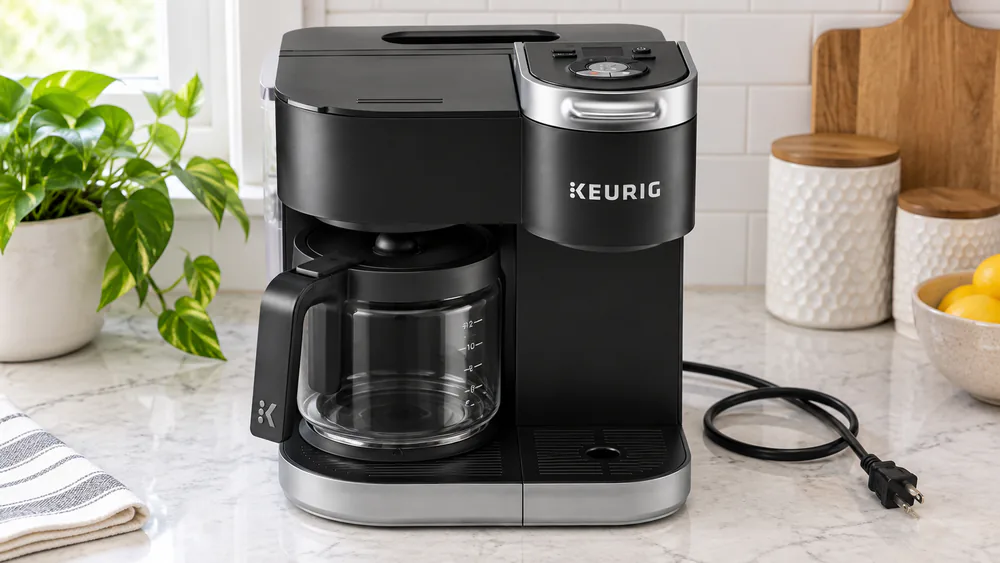
Start with the simple checks. Push the plug fully into the outlet until it seats, then follow the cord to the base of the machine and make sure that end is secure too. Try a different outlet entirely; a worn receptacle can fail to make contact even when the plug looks seated.
Then inspect the cord end to end. Run your fingers along its full length and look for soft spots, nicks, or a scorched smell. Any of those three means stop: the cord is damaged, the brewer is not serviceable beyond its listed cleaning, and cord repair is not a DIY job. Arrange service and stop using the machine.
Step 3: Perform a Hard Reset (Power Cycle)
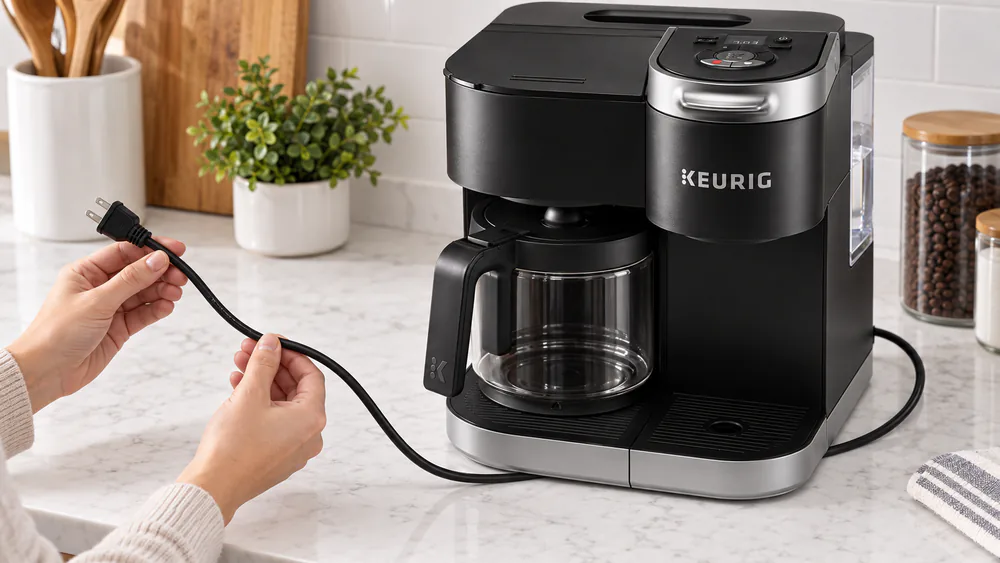
The K-Duo has no reset button, and that surprises a lot of owners. The documented reset is simpler: unplug the brewer for at least 5 minutes, then plug it back in. This is the single most reliable step in this guide, and it clears the majority of no-power cases.
Tip. Set a timer for the 5 minutes. A quick unplug-and-replug is often too short for the control board to fully discharge.
If the 5-minute reset does not do it, try the processor reset: unplug the brewer, wait 60 seconds, hold the power button for 10 seconds, then plug back in. After power returns, the board needs a few seconds to boot, and a cold brewer takes about 4 minutes to reach brewing temperature on first power-on, so give it time before you judge it dead. The full reset procedure is in the K-Duo Use & Care Guide.
Step 4: Check the Water Reservoir Magnet and Lid Interlock
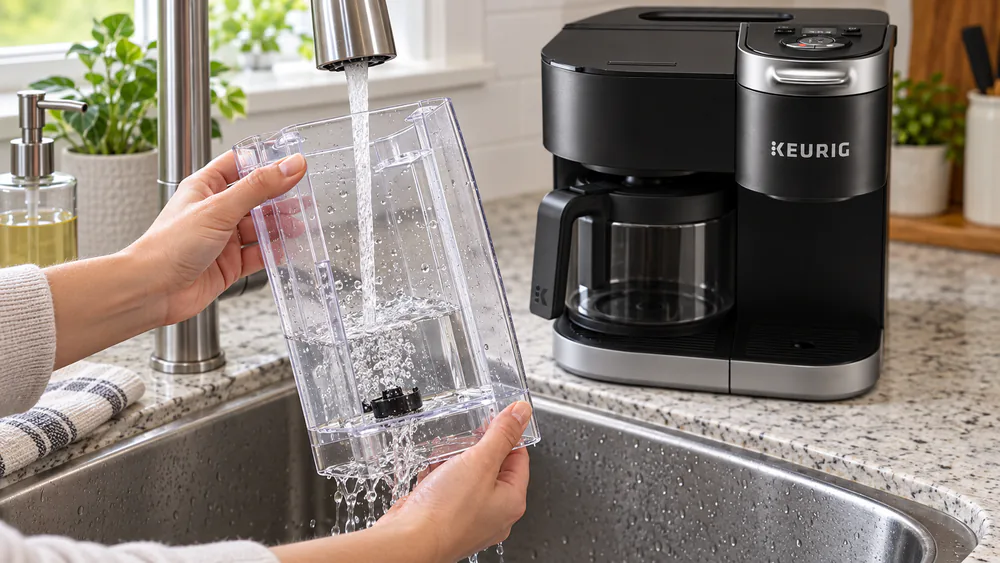
The K-Duo's 60 oz. reservoir does more than hold water. A magnet in the tank talks to the control board, and when that magnet sticks, the board can stay asleep or refuse to heat. This is one of the most common no-power causes on this family of brewers.
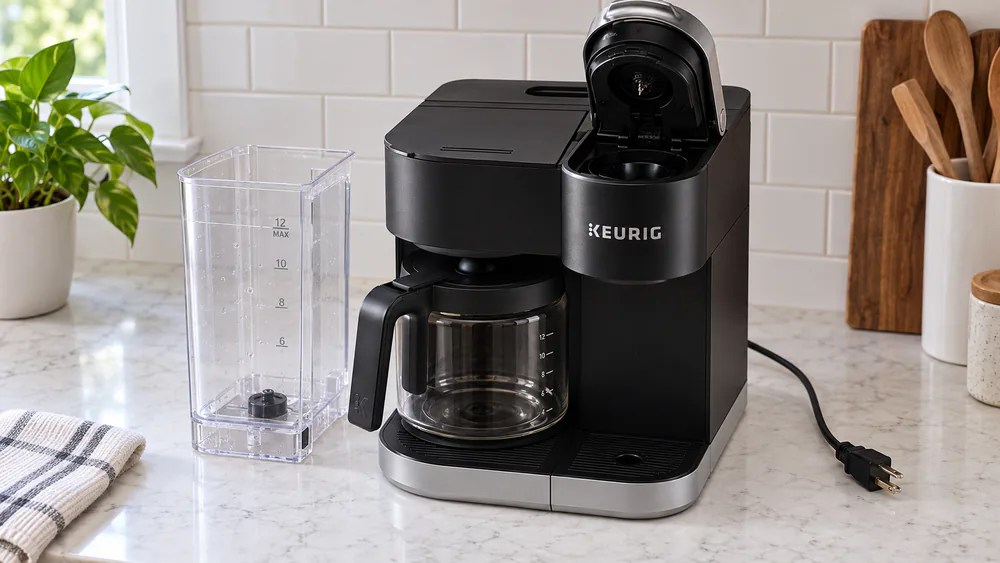
Lift the tank off, shake it gently, and rinse the magnet channel with warm water and a drop of soap. Mineral deposits are the usual culprit; they jam the float and cause phantom empty readings. Then set the tank back and press down until it clicks. Proper seating resolves most of these cases, so take this step seriously before you go further.
Tip. Listen for the click. If the tank does not click into place, the magnet has not re-engaged and the machine may stay dark.
Step 5: Rule Out Auto-Off and Sleep Mode Confusion
Auto-off is the most convincing fake dead machine you will ever see. On the standard K-Duo, the single-cup side switches itself off 5 minutes after the last brew, and the heating plate goes off 2 hours after the last carafe brew. The panel goes dark, and the machine looks broken. It is not. One press of the power button wakes it, and the board needs a few seconds to boot.
Note. The Essentials is the champion of false alarms: it shuts itself off 60 seconds after the last single-cup brew. It is easy to mistake that for a dead machine. Press the power button and wait a few seconds for the board to boot.
Step 6: Allow Full Cooling After Overheating, Then Descale If Needed
If the machine worked, shut itself off mid-heat, and now wakes only after a long rest, you are looking at heat protection tripping. The usual causes are scale on the heater, a failing thermostat, or poor airflow around the unit. Give the brewer a full cooldown before you test anything else.
Tip. Wait 30 to 60 minutes with the brewer unplugged after a thermal trip. A machine that comes back only after a long rest and then dies again while heating usually needs descaling or service.
Once it cools, run a descale cycle. Keurig recommends descaling every 3 months, and the full procedure takes about 75 minutes; follow Keurig's official descaling guidance. Foam during descaling is normal. A heavily scaled brewer may dispense very little and sound like air is blowing, which is the scale working loose.
If the machine shut down during or after descaling, unplug it for 30 to 60 minutes with the reservoir off and the lid open, then try again. A second descaling pass with a 30-minute soak restores full flow. If the descale light stays on, press and hold the 8-cup and 10-cup buttons for about 5 seconds to clear it.
Step 7: Identify an Internal Component Failure (Thermal Fuse, Switch, Capacitor)
Warning. Water and electricity do not mix. The K-Duo is not user serviceable beyond the cleaning steps in its guide, and opening the case voids the warranty. Internal parts like a blown thermal fuse are not DIY replacements; arrange service instead.
After Steps 1 through 6, the remaining suspects live inside the machine. The usual internal causes of a no-power condition are a blown thermal fuse, a failed thermal cutoff or thermostat, a faulty power switch, or a dead control board. A one-time fuse such as the thermal fuse blows once and needs service-level replacement. A failed capacitor is also on the list of possible internal causes, but it is not a failure point the K-Duo family is known for.
Two patterns tell you the problem is internal. Continuous clicking with no lights at all points to unstable power or an internal fault. A machine that wakes only after a long cooldown and then dies again while heating points to heat protection tripping. Both mean service, not more DIY.
Symptom-Based Diagnosis: Identify Your Exact Case
Not sure which step applies? Match your situation below, then jump to the step that fits.
Machine Worked Yesterday but Is Now Dead
Machines that worked fine and died overnight usually fail on the easy causes first. Work Steps 1 through 4 in order: the outlet and cord checks, the reservoir reseat, and the 5-minute reset. If the machine was left plugged in through a long power outage, the surge when the grid came back can destroy the control board; that is a service-level failure, not a reset problem.
Machine Shut Off During Brewing
A mid-brew shutdown with no lights afterward is a heat protection trip more often than not. Full-pot brews are the stress point on this family; machines have died mid-cycle with no lights after repeated full-pot use, and a brewer still under warranty is worth a support call. Recurring mid-brew shutdowns can also return even after warranty replacement on the Plus, which points past a single bad part.
Machine Stopped After Descaling
If the machine died during or right after descaling, it is usually a sensor or float issue, not a bricked board. If this sounds like your machine, jump to Step 6 for the recovery procedure.
No Lights or Response at All
No lights at all after every check means the board is not getting clean power. Run the processor reset in Step 3 one more time, and give the board a full ten seconds to boot. If it stays dark, the failure is internal; Step 7 covers the internal suspects and when that means service.
K-Duo vs K-Duo Plus vs K-Duo Essentials: Model-Specific Notes
All three Duo family models reset the same way: unplug for at least 5 minutes, then plug back in. The differences decide what you check next.
The standard K-Duo has a fixed 60 oz. tank, a 12-cup glass carafe on a heating plate, and a single-cup side that auto-offs 5 minutes after the last brew. Cup sizes run 6, 8, 10, or 12 oz., carafe sizes run 6, 8, 10, or 12 cups, and auto-brew is programmable up to 24 hours ahead.
The K-Duo Plus brews the same sizes, but it swaps the glass carafe for a 12-cup thermal carafe with no heating plate. Coffee never sits on a burner, so it never picks up burnt flavor, and the thermal carafe holds a comfortable drinking temperature for about two hours. The tank mounts left, right, or back, and auto-off runs 5 minutes after the last brew.
The K-Duo Essentials is the simpler, cheaper option. Single-cup sizes skip the 6 oz. setting, there is no auto-brew timer, and auto-off fires 60 seconds after the last single-cup brew, the easiest way to fake a dead machine on this list. Button-only controls suit some households, and Essentials units can run for 8 years before replacement. Dead-out-of-the-box units do happen on this line; if yours never worked, that is a return, not a repair.
All three run 1500W on a standard 120V outlet, and all three share the 1-year warranty. At elevations at or above 5,000 feet, enable the high-altitude mode by holding the POD and CARAFE buttons for 3 seconds. For a full look at the standard model, read our Keurig K-Duo review.
Repair vs. Replacement Decision Guide
Most no-power cases end at Steps 1 through 4, and they cost nothing. When the machine does not come back, the math changes. A standard K-Duo sells for roughly $130 to $170, though street prices move week to week and vary by retailer. A service call on a brewer at that price rarely makes sense, especially once the 1-year warranty has passed.
With regular cleaning and descaling, a K-Duo typically runs 3 to 5 years before the needles clog or mineral buildup wins. That context frames the decision: a brewer that fails inside its first year is Keurig's problem to fix, while a brewer that dies in year 4 or 5 after heavy daily use is a replacement candidate.
Pros
- Every free check in this guide takes minutes and costs nothing
- A hard reset and reservoir reseat revive most no-power cases
- Descaling extends the machine's life instead of ending it
Cons
- Internal parts like the thermal fuse are not user-serviceable
- Recurring mid-brew shutdowns can return even after warranty replacement
- Opening the case risks damage around water and electricity
Try every free check first, then weigh the repair against the price of a new machine. On a brewer this affordable, replacement usually wins past year 3.
When to Stop Troubleshooting
Four signs mean stop and arrange service: a cord with soft spots, nicks, or a scorch smell (Step 2); continuous clicking with no lights at all (Step 7); a machine that wakes only after a long cooldown and dies again while heating (Step 6); and a GFCI that trips every time the brewer powers up (Step 1).
None of those are DIY territory. The brewer is not user serviceable beyond its cleaning steps, so call Keurig's support line at 1-866-901-BREW (2739) before you reach for tools.
Warranty and Support Options
Every K-Duo family model carries a 1-year limited warranty. If the brewer fails with a defect during that year, Keurig repairs or replaces it on proof of purchase, and a replacement gets a fresh 1-year warranty of its own. You will need an RMA number before you return anything.
Start at Keurig's official support page, or call 1-866-901-BREW (2739). Contact support before you open the case; any disassembly voids the warranty and puts you inside a machine that mixes water and electricity.
Prevent Future Power Issues
Most no-power returns are preventable, and the habits cost minutes a week.
- Keep it on its own outlet. Plug the brewer directly into a grounded wall outlet. An overloaded circuit can make the machine behave erratically.
- Descale on schedule. Every 3 months in a hard-water home; scale is the top cause of heating element failure.
- Unplug it during outages. The surge when the grid comes back is what damages control boards, and a brewer left plugged in through a long outage is the classic victim.
Three habits cover most of the ground: a dedicated outlet, a 3-month descaling schedule, and unplugging through outages. Add a weekly poke through the needle holes with a straightened paper clip, and you prevent most clogs and the false add-water errors that follow.
Frequently Asked Questions
Does the Keurig K-Duo have a reset button?
No, and that surprises most owners. The documented reset is unplugging the brewer for at least 5 minutes, then plugging it back in. The time matters: the control board holds residual charge after the power is cut, and that charge keeps the machine locked in its confused state. Five minutes is long enough for the board to drain so it boots clean.
Is a clicking sound after plug-in normal?
A few quiet clicks while the board boots are normal; those are the switches settling as power comes up. Continuous clicking with no lights at all is the exception, and it is the first sign listed in "When to Stop Troubleshooting" below.
My K-Duo arrived dead out of the box. What should I do?
Dead-out-of-the-box units happen on this line, and a unit that never powers on is a return, not a repair. Contact the retailer you bought it from and arrange a replacement or refund, and leave the case closed on a unit you intend to send back; disassembly voids the warranty. If the retailer's return window has closed, Keurig's support team will issue an RMA number before anything ships back.
How long should a K-Duo last?
Dead panels are reported at any age, from months to a couple of years in, sometimes stopping mid-brew with no lights, and nothing predicts which units fail early. With regular cleaning and descaling, a K-Duo typically runs 3 to 5 years, with clogged needles and mineral buildup as the usual end-of-life causes. The 1-year warranty is the safety net for the early failures; the maintenance habits are the safety net for the long haul.
What is the difference between the 5-minute reset and the 60-second processor reset?
The 5-minute reset is the first-line fix, and it clears the majority of no-power cases. The processor reset is the second level, aimed at a board that stays stuck: unplug for 60 seconds, hold the power button for 10 seconds, then plug back in. After a heat protection trip, there is a third level, the cooldown: 30 to 60 minutes unplugged before the next test. Work them in that order.
Final Takeaway: Most Keurig Power Issues Are Easily Fixable
The good news is that most Keurig power issues never reach a repair shop. The majority of the no-power cases we see clear with the checks in the first minutes: a dead outlet, a loose cord, a mis-seated reservoir, or a board that just needs a reset.
Work the 60-second checks, run the 5-minute reset, and reseat the tank until it clicks. If the machine comes back, keep the maintenance habits above in place and it should run for years. If it does not, you now know the exact signs that mean service, and you know what the warranty covers. That is a better place to be than the day the panel went dark.
The cheapest fix in this guide costs nothing: unplugging for five minutes.
Read next
Ready to upgrade your kitchen?
Browse our tested buying guides, or get the latest kitchen fixes in your inbox.