
Kitchen Appliances
How to Make Ice Cream in a Cuisinart Ice Cream Maker: Recipes, Tips & Troubleshooting

As an Amazon Associate we earn from qualifying purchases. We may earn a commission from links on this page, at no extra cost to you. Learn more.

Making ice cream in a Cuisinart comes down to three things: a bowl frozen rock-solid, a cold base with the right ratio of cream to milk to sugar, and about twenty minutes of churning. Get those right and you get smooth and creamy homemade ice cream that beats most store-bought pints. This guide covers how the machine works, the base ratios we lean on, the step-by-step method, five recipes, and the fixes for soupy batches and an icy, grainy scoop.
We have run these machines through enough batches to know the notes below reflect what actually happens at the counter, not just what the manual promises. Whether you own the freezer-bowl ICE-21, the larger ICE-30BC, or the compressor ICE-100, the core method is the same.
How a Cuisinart Ice Cream Maker Works
A Cuisinart ice cream maker keeps a cold mix moving against an even colder surface until air whips in and it firms to a soft-serve texture. The paddle, called the dasher, turns slowly and scrapes the frozen wall so a thin layer freezes, gets shaved off, and folds back in. Those tiny crystals are the secret to a creamy texture.
The cold comes from one of two sources: freezer-bowl models store it in a double-insulated bowl you pre-freeze, while compressor models chill the bowl on demand with a small built-in refrigeration unit.
Freezer-Bowl vs. Compressor Models
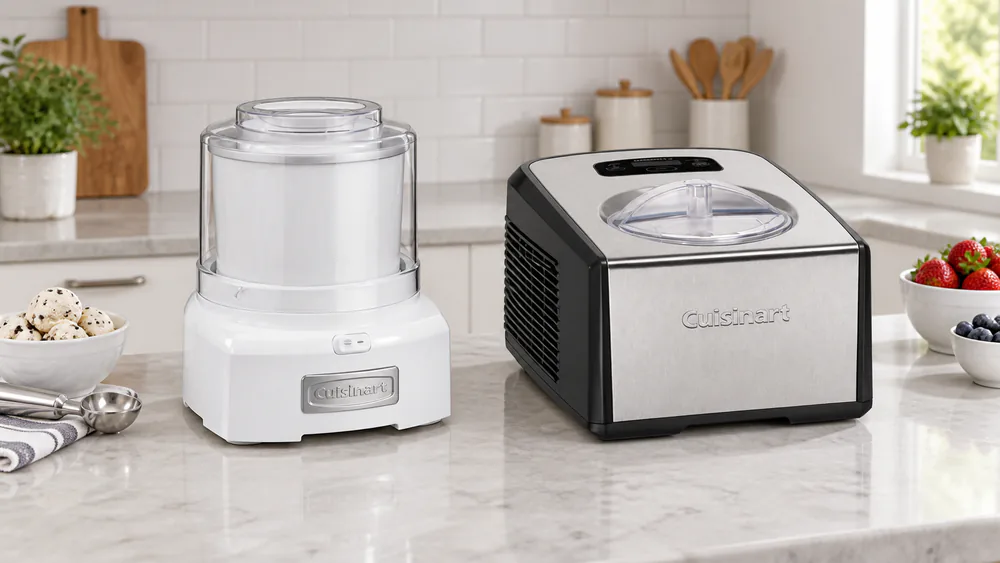
The freezer-bowl design is the one most people own: you keep a gel-filled bowl in your freezer, drop it onto the base, and the stored cold does the work. It is light, affordable, and reliable, but the frozen bowl eats a lot of freezer space, and you cannot run a second batch until it refreezes fully. That refreeze wait is the real limit of the budget models, so plan one batch per day unless you keep a spare bowl on ice.
The compressor design skips the pre-freeze. A machine like the ICE-100 chills its own bowl, so you can churn back-to-back batches on a whim. That is the upgrade you feel when you want a second flavor, but the unit is heavy at over twenty pounds and each churn runs longer.
What You Need: Ingredients and Base Ratios
The beauty of Cuisinart ice cream is the short shopping list: heavy cream, whole milk, sugar, and a flavoring like vanilla. The ratio between the dairy components is what separates a creamy scoop from an icy one.
The Basic Ice Cream Base (Cream-to-Milk-to-Sugar Ratio)
Our go-to no-cook base is 2 cups heavy cream, 1 cup whole milk, 1/3 cup granulated sugar, and 2 tsp vanilla extract. That is a 2:1 ratio of heavy cream to whole milk, the standard creamy no-cook base, plus about 1/3 cup sugar for every three cups of dairy. Fat coats the water in the mix and blocks large ice crystals, so a cream-heavy base freezes smoother than a milk-heavy one.
Sugar also lowers the freezing point, which keeps the ice cream soft enough to scoop straight from the freezer. Cut it too far and you trade creaminess for a hard, icy block. Whisk until the sugar fully dissolves before the base touches the machine.
Tip. Whisk the sugar into the cold cream and milk until you cannot feel any grit on a spoon. Undissolved sugar is a quiet cause of a grainy finish, and it takes only a minute to fix.
No-Cook vs. Custard (Cooked) Bases
A no-cook base, sometimes called Philadelphia-style, blends raw cream, milk, and sugar with no heat. It preps in about five minutes and gives a clean, bright flavor, which is why it is our weeknight default. A custard base cooks egg yolks into the dairy for a richer, denser scoop that holds its smoothness longer, but it adds work.
If you go the custard route, cooking the yolks until the base thickens also brings them to a safe temperature, so follow standard safe-handling guidance for egg-based custard bases and chill the custard thoroughly before churning. For most people starting out, the no-cook base is the smarter first move.
Pros
- No-cook base preps in about five minutes with no eggs
- Cleaner, brighter dairy flavor straight from the whisk
Cons
- Custard base is richer and holds its smoothness longer
- Custard requires gentle cooking and full chilling before churning
Step-by-Step: Making Ice Cream in Your Cuisinart
Here is the method we use for every freezer-bowl batch. The compressor steps are identical except you skip the pre-freeze. Read all four steps first, because the timing overlaps.
Step 1: Freeze the Bowl (16-24 Hours)
Freeze the bowl 16-24 hours, with overnight as the bare minimum, and make sure it is completely solid. Give it a shake near the end: if you hear liquid sloshing inside the walls, it is not ready. A bowl that is not rock-solid frozen is the single most common reason a batch turns out soupy or milkshake-thick, so overnight is the floor and a full day is safer. We keep our bowl in the freezer permanently so it is always ready.
Warning. If the gel inside still shifts when you shake it, the bowl has not reached temperature, and churning now will give you soup instead of soft-serve. When in doubt, give it a few more hours.
Step 2: Prepare and Chill the Base
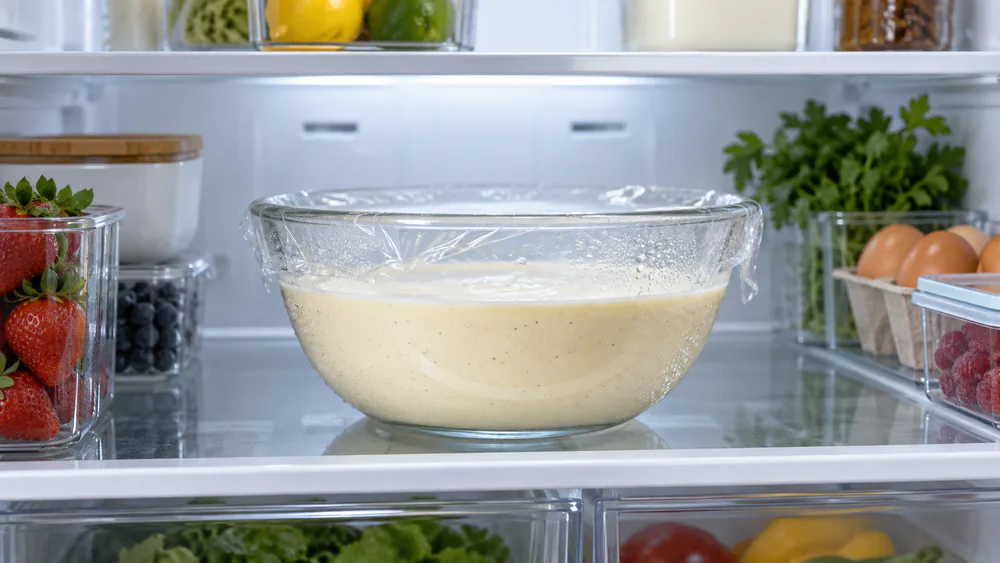
Whisk your base until the sugar dissolves, then chill it 1-2 hours, ideally down to about 39F, before it hits the bowl. Chilling the base close to fridge-cold gives noticeably creamier results than a warm mix, because a cold base starts freezing the instant it touches the wall. A shortcut: mix the base the same night you set the bowl to freeze, and both are ready the next day.
Step 3: Churn (20-25 Minutes)
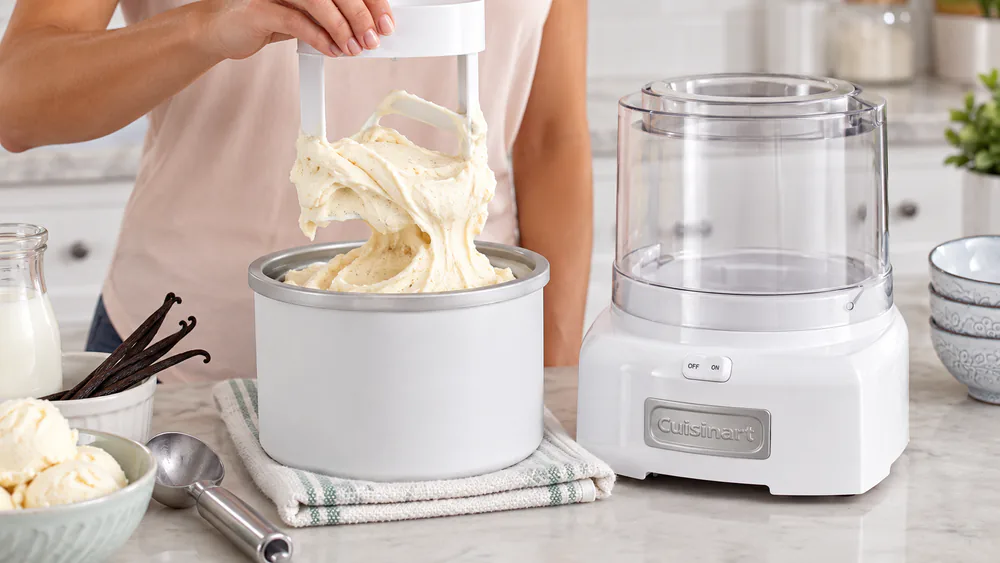
Set the frozen bowl on the base, start the dasher turning, then pour the cold base in through the spout. Always start the motor before you add the base, or the mix can freeze to the wall and jam the paddle. Churn 20-25 minutes, watching it climb from liquid to a thick, glossy soft-serve that mounds on the dasher. That soft-serve stage is your finish line. Resist pushing further, because over-churning a high-fat base can butter the cream into little fat lumps and turn the texture grainy.
Step 4: Ripen in the Freezer for Scoopable Texture
Fresh off the machine, the ice cream is soft-serve soft, which is delicious but hard to scoop into neat rounds. Transfer it to a chilled airtight container and ripen it in the freezer 2-4 hours to firm it into a scoopable texture. Press plastic wrap directly onto the surface before you seal the lid, which keeps a hard shell of ice crystals from forming while it sets.
Best Cuisinart Ice Cream Recipes to Try
Each recipe starts from the same no-cook base, so churn and ripening times match the steps above. Add extract and dry flavorings before chilling; save chunky mix-ins for the last few minutes of churning.
Classic Vanilla Bean
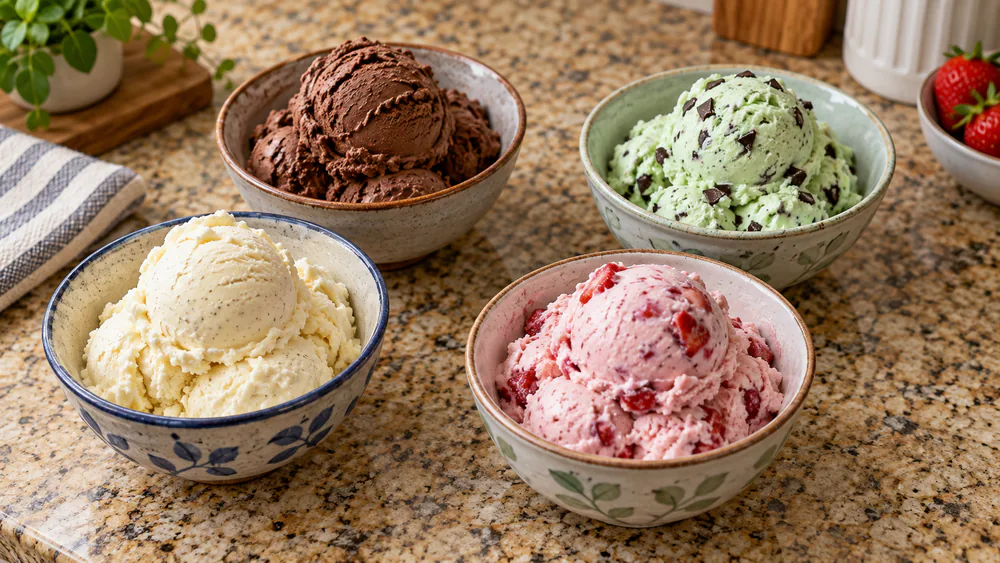
Start with the base you know: 2 cups heavy cream, 1 cup whole milk, 1/3 cup sugar, and 2 tsp vanilla extract, or the scraped seeds of one vanilla bean. This is the recipe we test every new machine on, because plain vanilla hides nothing.
Rich Chocolate
Whisk 1/3 cup unsweetened cocoa powder into the sugar before adding the dairy to prevent lumps, and bump the sugar slightly to balance the cocoa. For a deeper scoop, stir a couple ounces of melted dark chocolate into the warm base, then chill as usual.
Strawberry
Mash about a cup of ripe strawberries with a spoonful of sugar, let it sit fifteen minutes, then stir the fruit and juices into the base before chilling. Frozen berries work out of season; thaw and drain them first so you are not adding extra water.
Mint Chocolate Chip
Swap the vanilla for 1 to 1.5 tsp peppermint extract, starting low because mint extract is strong. In the last two minutes of churning, stream in a few ounces of finely chopped dark chocolate. Chopping it small keeps the chips from freezing into hard shards.
Dairy-Free / Vegan Coconut
Full-fat canned coconut milk stands in for the cream-and-milk mix. Use about three cups of well-shaken coconut milk, 1/3 cup sugar or maple syrup, and 2 tsp vanilla. The coconut fat blocks ice crystals for a creamy vegan scoop, with a light coconut note that pairs well with chocolate.
Tips for Perfectly Creamy Texture
Creamy is not luck. It is the sum of a few small choices that each nudge the crystals smaller.
Preventing Ice Crystals
Crystals form when water in the base freezes slowly and clumps. Everything that speeds freezing or ties up that water helps: a rock-solid bowl, a well-chilled base, a high cream fraction, and enough sugar. One more surprises people. On the freezer-bowl machines, the small 1.5-quart bowl actually makes smoother ice cream, because more of the mix touches the frozen wall, so it firms fast and leaves less time for crystals to form. Do not overfill the bowl; a thinner layer freezes finer.
Tiny crystals are the whole game. A rock-solid bowl, a cold base, and plenty of cream do more for texture than any fancy ingredient.
Adding Mix-Ins the Right Way
Add chunky extras like chips, cookie pieces, or nuts in the last few minutes of churning, once the base has thickened. Too early and the dasher grinds them to dust; after churning and they clump instead of spreading evenly. Keep mix-ins small and roughly equal in size, and pre-chill anything heavy.
Tip. Fold a swirl of sauce like caramel or fudge by hand as you pack the container, not in the machine. The dasher would blend a swirl into a muddy monotone; layering it by hand keeps distinct ribbons.
Troubleshooting Common Problems
Almost every failed batch traces back to one of three causes.
Ice Cream Too Soft or Soupy
If the base never thickened past a drinkable milkshake, the bowl was almost certainly not frozen solid, so freeze it a full day and shake-test it first. A warm base causes the same result, because it spends the bowl's stored cold just getting cold itself. If a batch still comes out soft, ripen it longer and give the next bowl more freezer time.
Icy or Grainy Texture
A gritty or icy scoop means water crystallized instead of staying locked in fat and sugar. Check your ratio: too little cream or sugar both push the texture toward ice. Undissolved sugar leaves grit too, so whisk until smooth. And watch the clock, because over-churning past soft-serve makes the fat read as grainy.
Machine Grinding or Not Churning
A grinding noise or stalled paddle is almost always a jam, not a broken motor. Most often the base was poured in before the dasher started turning, so it froze to the wall and locked the paddle, so always start the motor first. On durability, the motor handles thick mixtures without the gear slipping, and worn replacement parts are cheap and easy to find, which is a big part of why these machines last for years.
Cleaning and Storing Your Cuisinart
Cleanup is easy, with one catch: let the residual ice cream melt off the bowl first, then wash the dasher and lid in warm soapy water. Do not force frozen scraps off a cold bowl, and do not put the freezer bowl in the dishwasher, because the heat can damage the gel sealed in its walls. Wipe the bowl dry and return it to the freezer.
For storing the ice cream, an airtight container in the coldest part of the freezer holds texture best. Pressing plastic wrap directly onto the surface before sealing is what actually keeps a hard shell of ice crystals from forming on stored homemade ice cream. With no stabilizers, it is best within a week or two, while the texture is still soft and fresh.
Choosing the Right Cuisinart Model (ICE-21 vs ICE-30BC vs Compressor)
Which Cuisinart you want depends on how often you churn and how much freezer space you can spare. All three make excellent ice cream with the method above; they differ mostly in capacity and convenience.
The ICE-21 is the classic entry point: a 1.5-quart freezer-bowl model that weighs about 9.9 lb, runs a paddle near 32 rpm, and needs the bowl pre-frozen between batches. It runs a bit loud, around 79-82 decibels, but for one batch at a time it is hard to beat on value. The ICE-30BC is its bigger sibling, a 2-quart freezer bowl at about 13.5 lb, ideal if you feed a crowd but still tied to the pre-freeze cycle.
The ICE-100 is the step up in convenience: a 1.5-quart compressor model with no bowl pre-freeze, so it churns back-to-back batches, plus separate ice cream and gelato paddles and a 60-minute timer. It churns in 30-45 minutes and weighs about 22 lb. If you make ice cream a few times a season, a freezer-bowl model is plenty. If you make it weekly, the compressor earns its keep.
| Feature | ICE-21 (freezer-bowl) | ICE-30BC (freezer-bowl) | ICE-100 (compressor) |
|---|---|---|---|
| Batch capacity | 1.5 quart | 2 quart | 1.5 quart |
| Pre-freeze bowl | Yes, 16-24 hours | Yes, 16-24 hours | No, built-in compressor |
| Churn time | 20-25 minutes | 20-25 minutes | 30-45 minutes |
| Back-to-back batches | No | No | Yes |
| Weight | ~9.9 lb | ~13.5 lb | ~22 lb |
Frequently Asked Questions
Why is my Cuisinart ice cream soft or not freezing?
Nine times out of ten the freezer bowl was not frozen solid. Freeze it a full 16 to 24 hours and shake it first; if you hear liquid inside the walls it is not ready. A warm base has the same effect, so chill it to about 39F before churning, then ripen the finished ice cream 2 to 4 hours in the freezer.
How long do I freeze the bowl before churning?
Freeze the freezer bowl 16 to 24 hours, with overnight as the practical minimum. It must be completely solid, with no sloshing when you shake it. Many people keep the bowl in the freezer full time so it is always ready.
Can I make ice cream without eggs (Philadelphia-style)?
Yes. A no-cook, Philadelphia-style base skips eggs and blends cream, milk, sugar, and flavoring. It preps in about five minutes and gives a clean, bright flavor. It is the base we recommend to anyone starting out.
Can I make it without heavy cream?
You can, but expect a firmer, icier scoop, because cream fat is what blocks large ice crystals. For a lighter dairy version use more whole milk and a touch more sugar. For a dairy-free route, full-fat coconut milk brings enough fat to stay creamy.
Why is my ice cream icy or grainy?
Icy usually means too little cream or sugar, or a bowl that was not cold enough. Grainy often means undissolved sugar or over-churning past soft-serve. Fix the ratio, whisk until smooth, and stop churning at soft-serve.
How long does homemade ice cream last?
Because it has no commercial stabilizers, homemade ice cream is best within a week or two. Store it airtight in the back of the freezer with plastic wrap pressed onto the surface.
Final Thoughts
Making ice cream in a Cuisinart is far easier than the results suggest. The method never really changes: freeze the bowl until it is rock-solid, chill a cream-forward base, churn to soft-serve in about twenty minutes, and ripen a few hours for a scoopable finish. Nail those four beats and the flavors are yours, from classic vanilla bean to dairy-free coconut. Keep the bowl frozen, keep the base cold, and you are always one afternoon away from a better scoop than anything store-bought.
Read next
Ready for a better scoop?
Freeze the bowl tonight, chill a cream-forward base, and you are one afternoon from homemade ice cream that beats the store.