Helping you create a kitchen you love.

Appliances

Best Manual Espresso Machines: 7 Lever and Portable Picks Compared

As an Amazon Associate we earn from qualifying purchases. We may earn a commission from links on this page, at no extra cost to you. Learn more.

Best Manual Espresso Machines: 7 Lever and Portable Picks Compared

We scored seven lever and hand-pump machines on shot quality, effort, build, and cleanup. "Manual" here means you supply the pressure with a lever, a spring piston, or a hand pump, usually landing somewhere around 6 to 9 bar at the coffee. Our top pick is the Flair Pro 3, because it gives full control without a counter full of hardware. If you are weighing these against our espresso machine reviews, the short version is that manual machines trade convenience for control, and the right one depends on how much ritual you want in your morning.

Every machine in this guide asks something of you. You heat the water, choose the grind, and set the pressure yourself, so each shot reflects what your hands did. That is the appeal, and it is also the learning curve.

Our Top Picks at a Glance

Here are all seven picks in ranked order. Each one earns its place for a different kind of cook, so read the "who should skip it" notes further down before you buy.

RankProductBest forTypeBuy
1

Flair Pro 3

Best Overall
Home baristas who want full control Direct lever View on Amazon
2

Flair NEO Flex

Best for Beginners
Newcomers with pre-ground coffee Direct lever (plastic) View on Amazon
3

Wacaco Picopresso

Best Portable
Travelers who want real espresso Hand pump View on Amazon
4

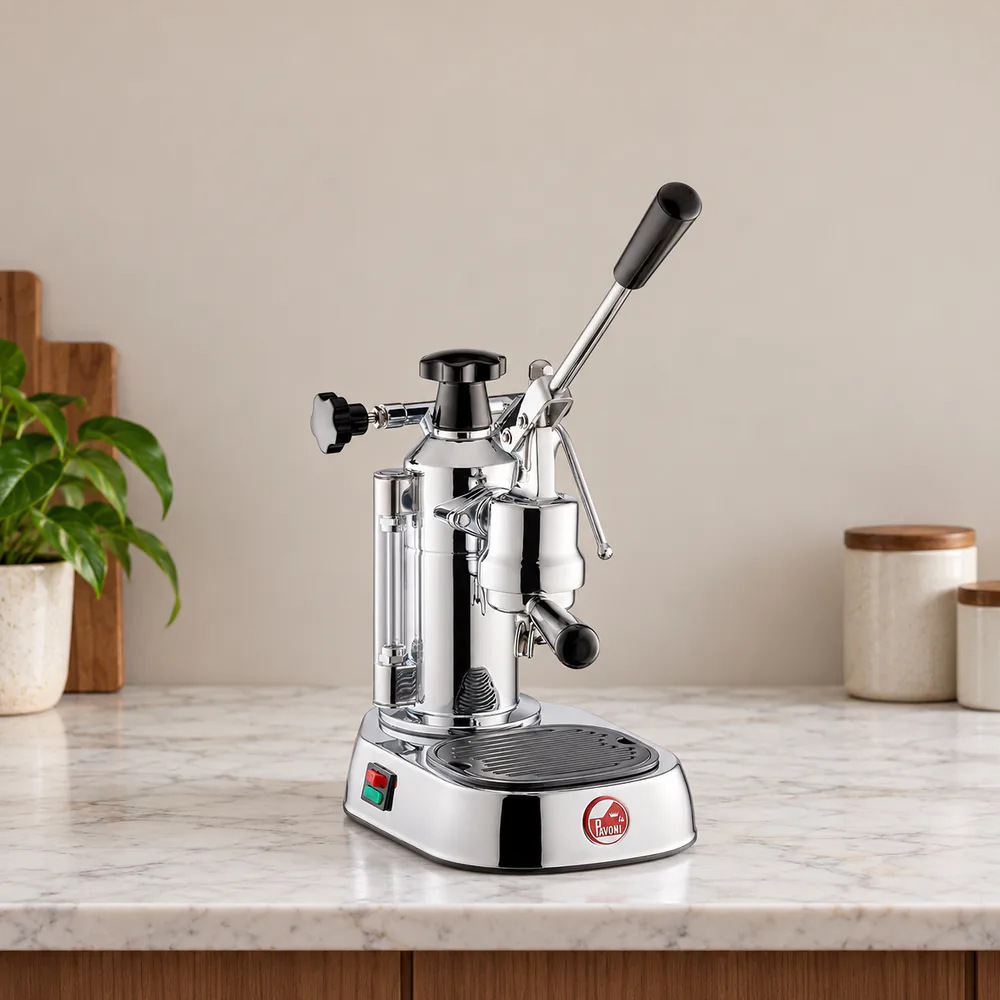
La Pavoni Europiccola EPC-8

Best Classic Lever
Lovers of a daily ritual and steam Direct lever, electric boiler View on Amazon
5

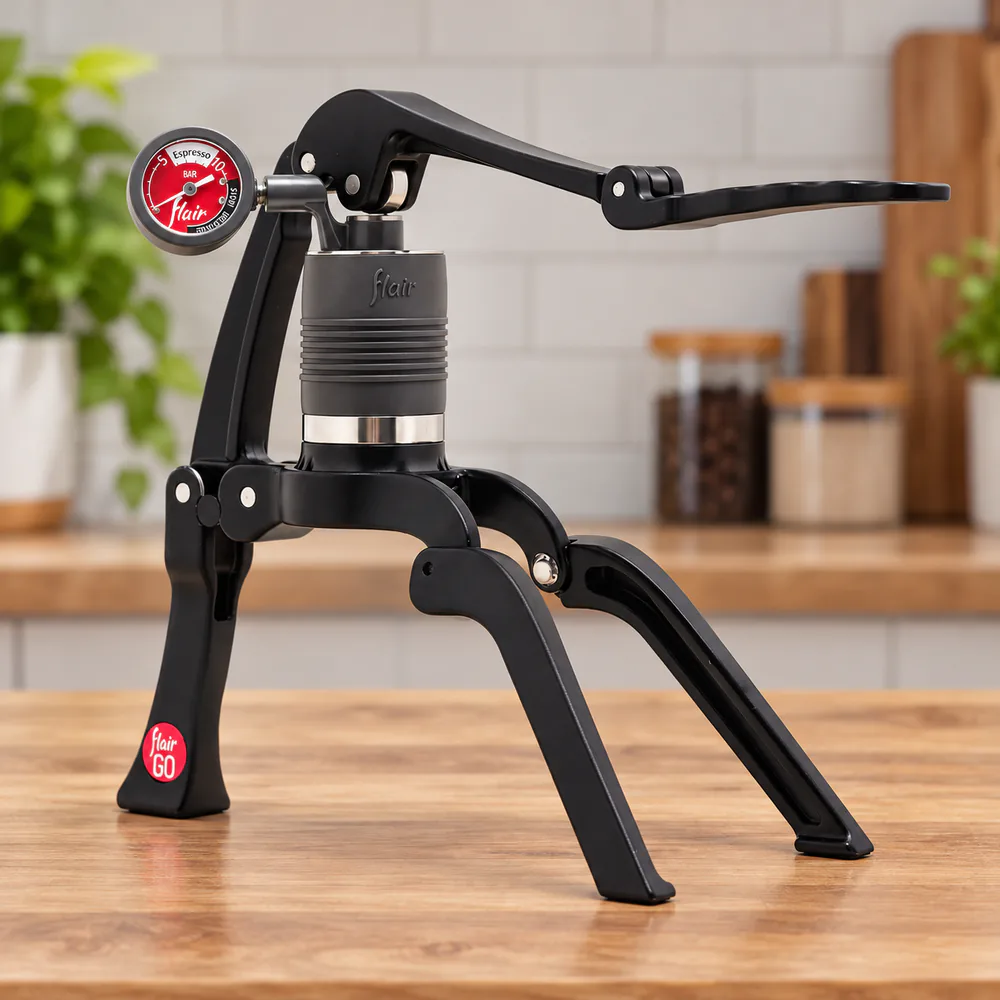
Flair 2GO

Best for Travel
Camping and travel with a folding frame Direct lever, folding View on Amazon
6

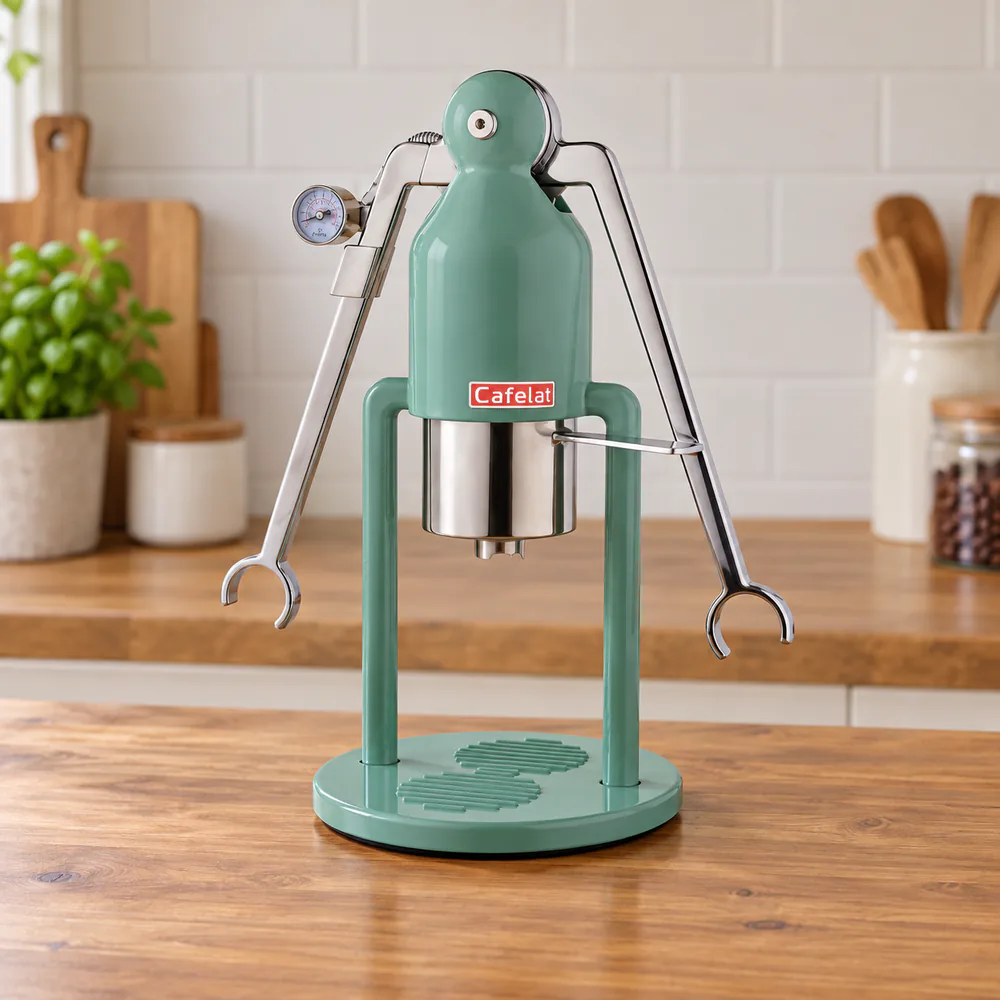
Cafelat Robot

Best for Control and Pressure Profiling
Tinkerers who want to shape the shot Direct lever View on Amazon
7

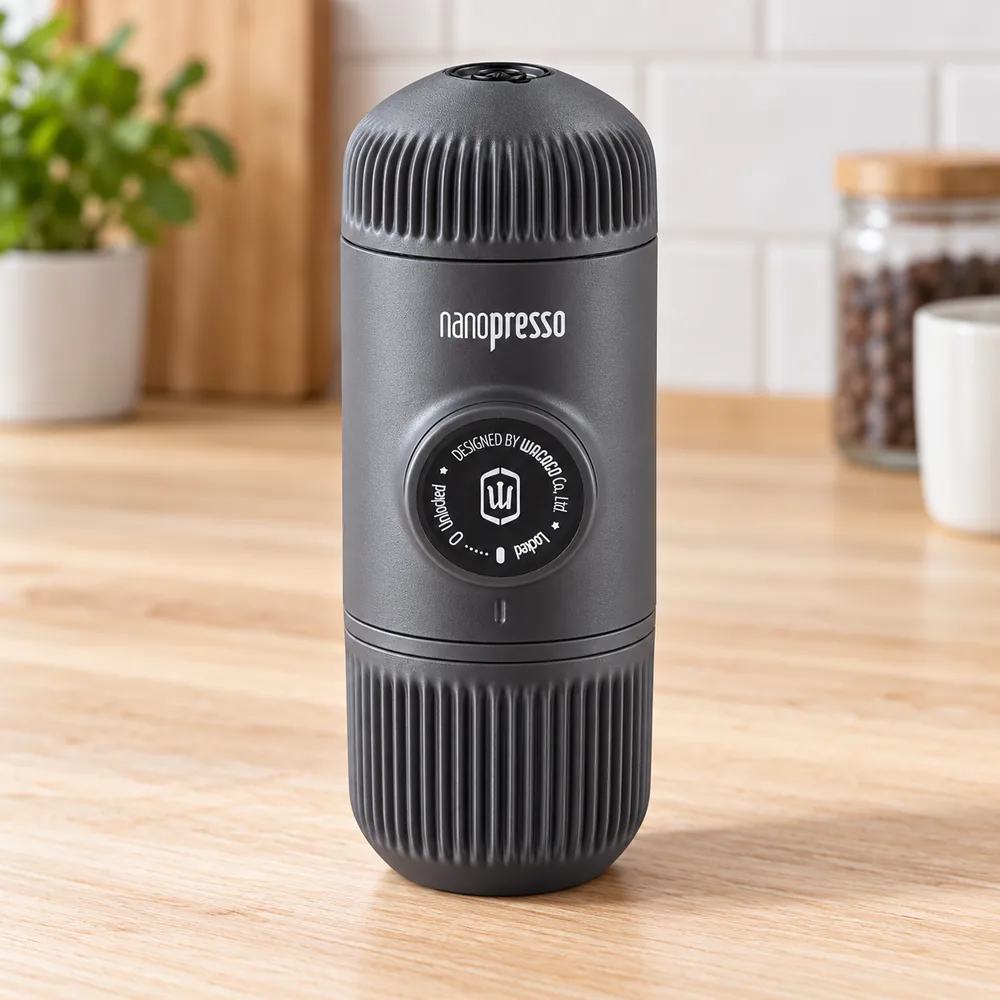
Wacaco Nanopresso

Best Budget Portable
Low-cost, on-the-go shots Hand pump View on Amazon

We earn a commission if you make a purchase, at no additional cost to you.

See full comparison table

Comparison Table

The table puts the seven machines side by side so you can match type, pressure, and grinder need to your routine.

SpecFlair Pro 3Flair NEO FlexWacaco PicopressoLa Pavoni EPC-8Flair 2GOCafelat RobotWacaco Nanopresso
Type Direct lever Direct lever (plastic) Hand pump Direct lever, electric boiler Direct lever, folding Direct lever Hand pump
Pressure 6-9 bar gauge zone Manual, no gauge 18 bar pump, 7-9 at puck Set by lever 6-9 bar gauge zone 6-9 bar 18 bar pump
Weight 7 lbs Light 350g Heavy brass build Folds small 3 kg Under 12 oz
Basket Bottomless and pressurized Pressurized and bottomless 52mm Commercial style 40 mm 58mm Pressurized
Grinder need Burr grinder required Optional (pressurized) Burr grinder required Burr grinder required Burr grinder required Burr grinder required Optional
Best for Overall control Beginners Portable quality Classic ritual Travel Pressure profiling Budget portable

How We Tested Manual Espresso Machines

We judged every machine on the same five questions: how good the shot tastes, how much effort it takes, how well it is built, how easy it is to clean, and how forgiving it is when the grind or tamp is off. No brand shaped a score, and each verdict below is ours.

Three habits guide the scoring. Cold metal lowers the water temperature and affects the shot, which is why so many of our reviews discuss preheating. Grind matters just as much, so we note which machines demand a fine burr grind and which forgive a coarse one. We also weigh what happens after the shot: the rinse, the wear parts, and how easily a machine packs back into its case or cabinet.

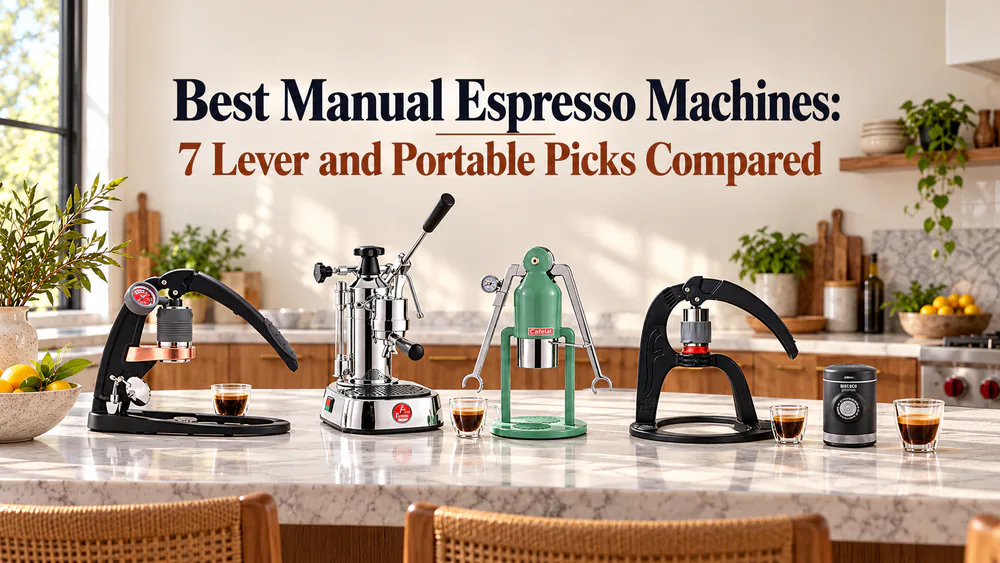
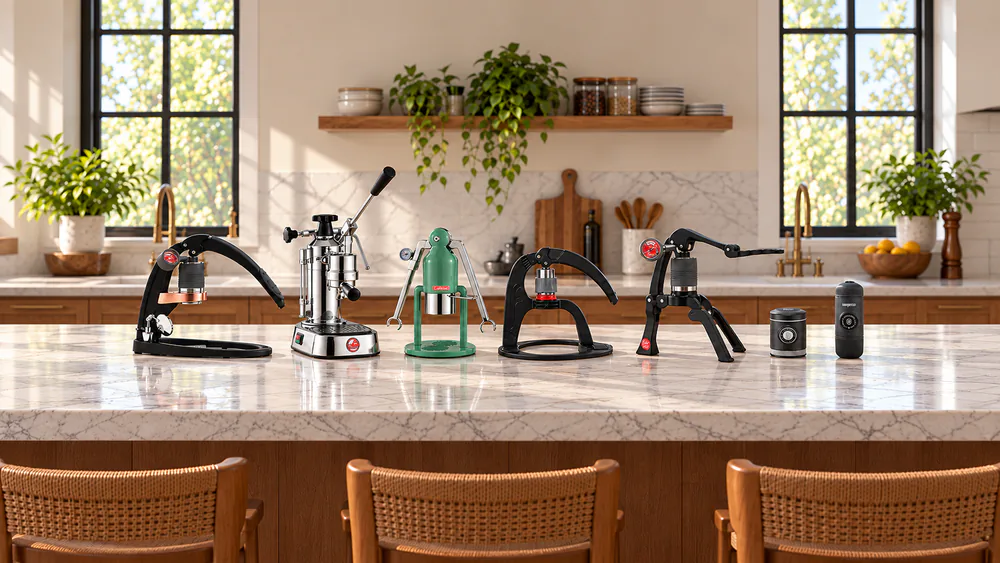
Seven manual espresso machines, lever and hand-pump, lined up side by side on a kitchen counter
The seven machines in this guide, from full-size lever to pocket pump.

We score on how a machine behaves across a routine, not on a single great shot. A machine that makes one superb cup but needs twenty minutes of fuss does not belong on a "best" list for most people.

The Reviews

Our seven picks run from a full-size lever to a pocket-size pump. We put the strongest all-rounder first and ordered the rest by how many cooks each one suits.

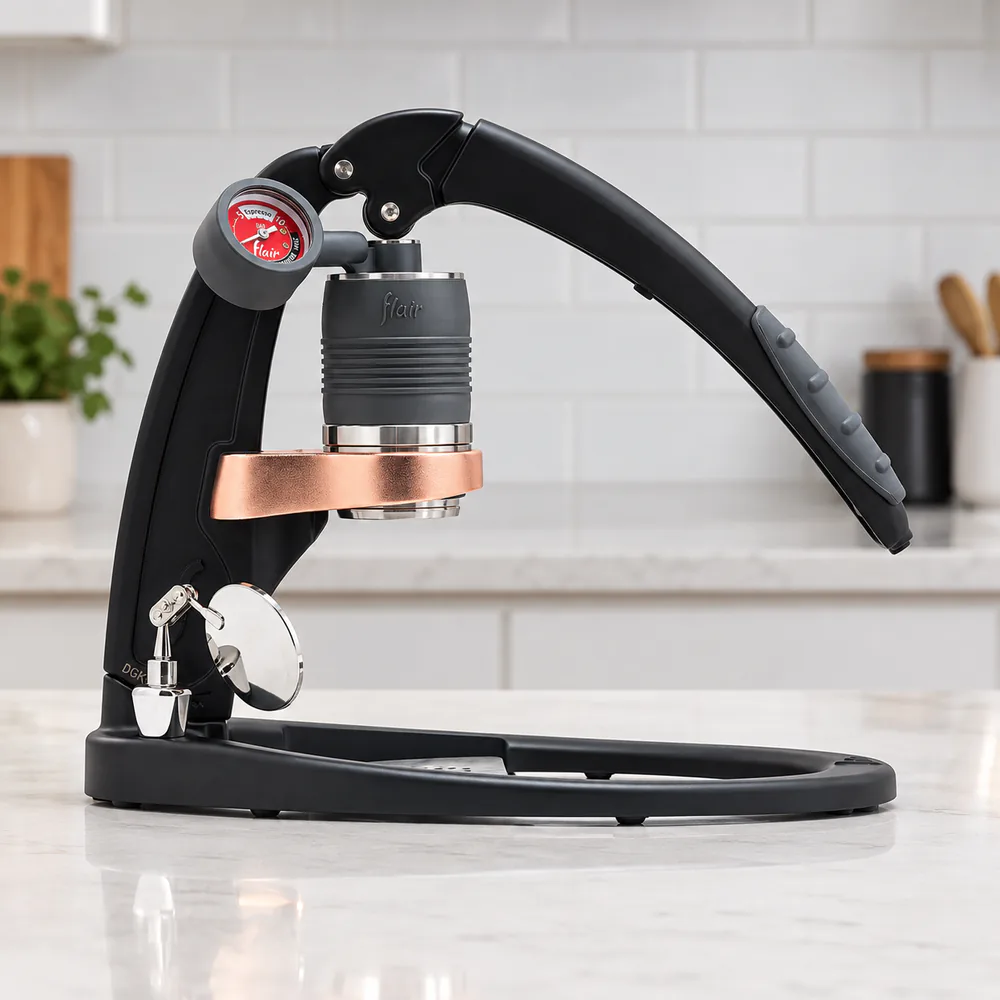
1. Flair Pro 3: Best Overall

Flair Pro 3
1

Flair Pro 3

Best Overall
Check Price on Amazon

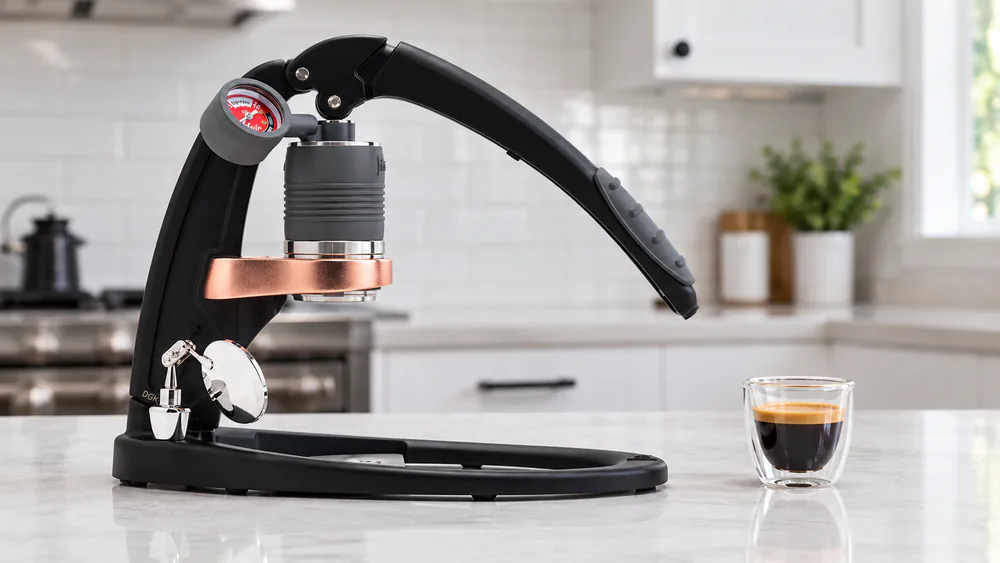
The Flair Pro 3 is the manual machine we would hand to most people who are ready to learn. A pressure gauge marks a 6-9 bar espresso zone, so you can see what your arm is doing instead of guessing. With a 15 g dose we pulled a 29 g shot in 34 seconds at about 9 bar, after roughly 5 seconds of pre-infusion, and the cup tasted balanced and sweet.

  • Bottomless and pressurized baskets included
  • Works with no electricity

Specifications

Weight
7 lbs
Dose
12-20 g
Warranty
5 year limited
Type
Direct lever

The Pro 3 advertises that you can skip preheating, and that claim does not hold in our kitchen. Unheated shots tasted sour, so we preheat the cylinder and portafilter every time. Once that is a routine, it adds only a minute or so of waiting while the kettle works.

It also needs a capable burr grinder. Coarse or uneven grounds will not build pressure, and the gauge shows it immediately. Leveling the tamp is the hard part. A WDT tool, which is a thin needle for breaking up clumps, helps a lot.

Cleanup is quick. We empty the cylinder, knock out the puck, and rinse the portafilter and screen; no descaling is needed. Two small annoyances: the drip tray is too small for most scales, and the travel case is hard to repack.

The step up is the Flair 58, which uses a 58mm portafilter, weighs 12 lbs, and adds an electric preheat controller with 85, 90, and 95 degree C settings (you unplug it to brew). It carries a 5-year limited warranty on the frame and metal brew head. It costs far more, and for most home cooks the Pro 3 is the better value.

Pros and Cons

Pros

  • Gauge teaches you pressure and pacing quickly
  • Fully stainless brew path with no plastic contact
  • Fast, descale-free cleanup
  • Strong 5 year warranty

Cons

  • Needs a preheat, despite the marketing
  • Needs a good burr grinder
  • Leveling the tamp takes practice
  • Small drip tray and awkward travel case

Who Should Buy It

Buy it if you want the clearest path from curiosity to excellent shots at home. Skip it if you want a one-button routine, or if you do not own a burr grinder and do not plan to buy one.

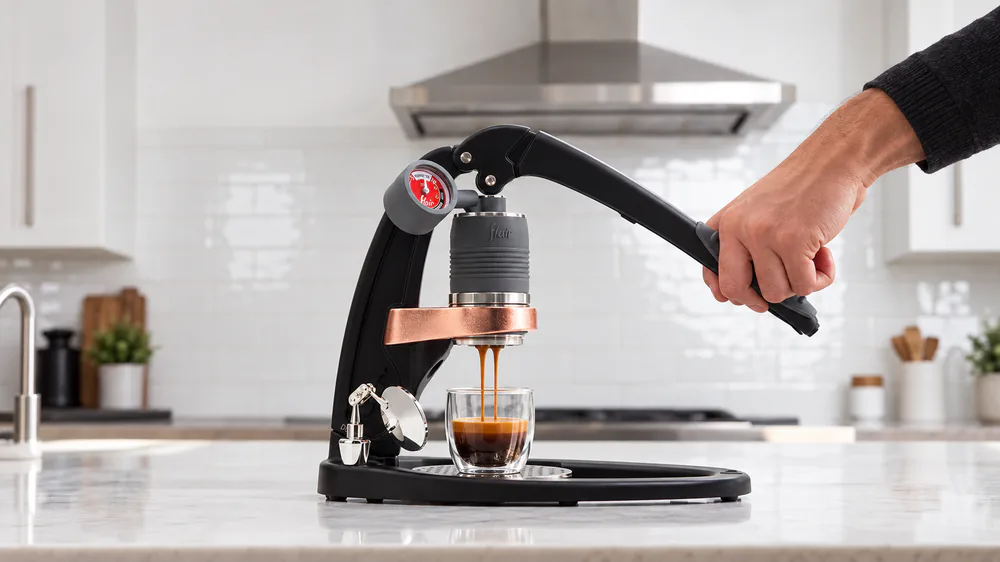
Flair Pro 3 lever pushed down with the pressure gauge needle sitting in the 6-9 bar zone as espresso drips into a glass cup
The gauge needle sitting in the 6-9 bar zone mid-shot.

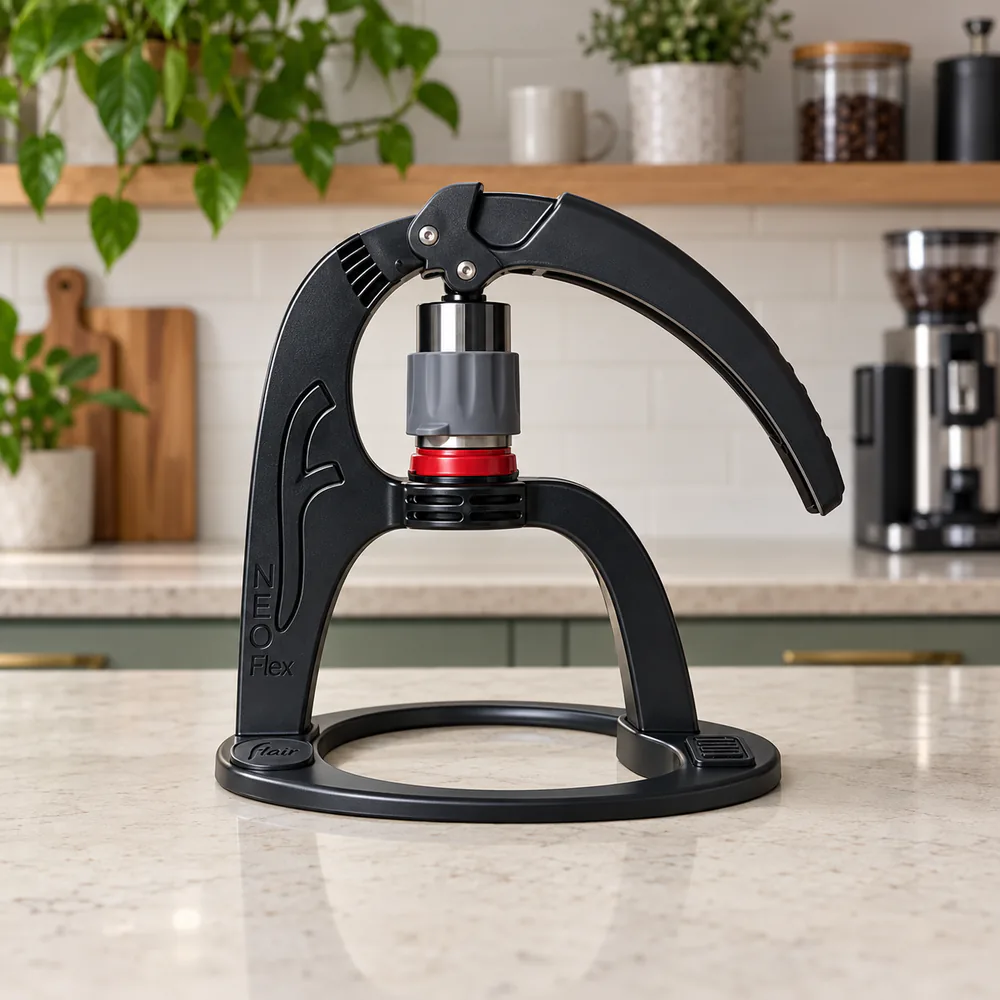
2. Flair NEO Flex: Best for Beginners

Flair NEO Flex
2

Flair NEO Flex

Best for Beginners
Check Price on Amazon

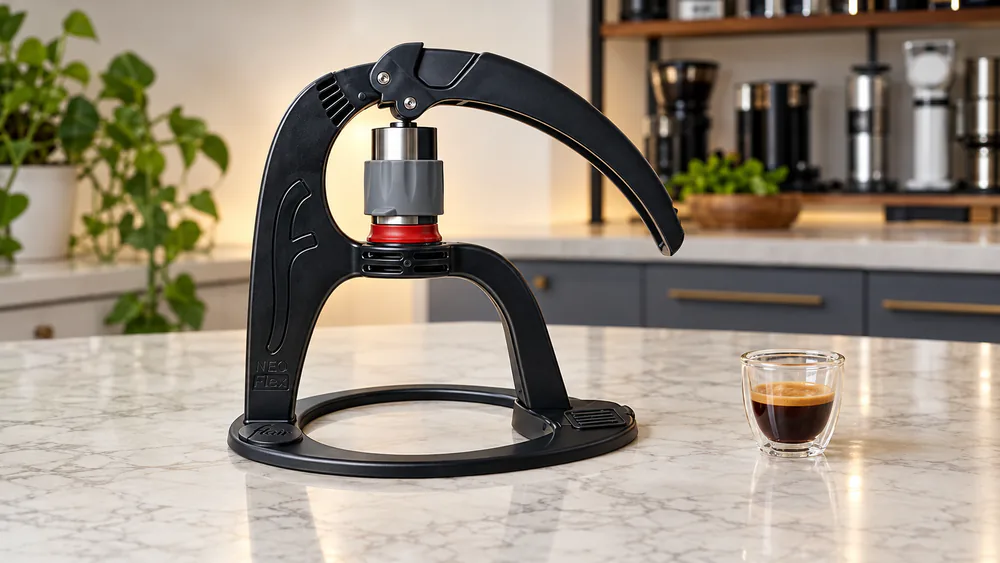
The NEO Flex is the easiest way into lever espresso. It ships with a pressurized Flow Control portafilter that tolerates coarse or pre-ground coffee, so a beginner can brew a decent cup without buying a burr grinder first. The trade is fine control: the pressurized basket smooths over grind mistakes, and it also limits how much you can shape the shot.

  • Pressurized Flow Control portafilter for coarse or pre-ground coffee
  • Bottomless 2-in-1 portafilter for when your grinder improves
  • Replaceable pressure-release valve in the piston
  • Lighter polycarbonate frame

Specifications

Frame
Polycarbonate
Type
Direct lever
Gauge
Not compatible with the Pressure Gauge Kit
Grinder
Optional with pressurized basket

The frame is polycarbonate, where other Flair models use aluminum. It creaks a little in use, though it held up through our testing. If you plan to pull shots every day for years, a steel-frame Flair suits that pace better.

The standard basket is narrow and wants a coarser grind than most espresso baskets. Light roasts are hard to extract in it, so reach for a more developed roast. With that adjustment the shots are good, close to the Flair Classic.

The pressure-release valve in the piston is a one-use weak point. A spare seal ships in the box, but later replacements are a worry, so keep that spare somewhere safe. The NEO Flex is also not compatible with the Pressure Gauge Kit or the custom carrying case, which is a real limit if you want to grow into gauge-guided brewing.

Pros and Cons

Pros

  • Pressurized basket forgives coarse or pre-ground coffee
  • Bottomless portafilter included for later upgrades
  • Shots are good once you use a more developed roast
  • Lightest way into lever brewing

Cons

  • Plastic frame can creak
  • Pressure-release valve is a weak point
  • No gauge kit or custom case support
  • Pressurized basket limits fine control

Who Should Buy It

Buy it if this is your first manual machine and your grinder is basic or nonexistent. Skip it if you already own a good burr grinder and want to profile pressure, since the Pro 3 will serve you better.

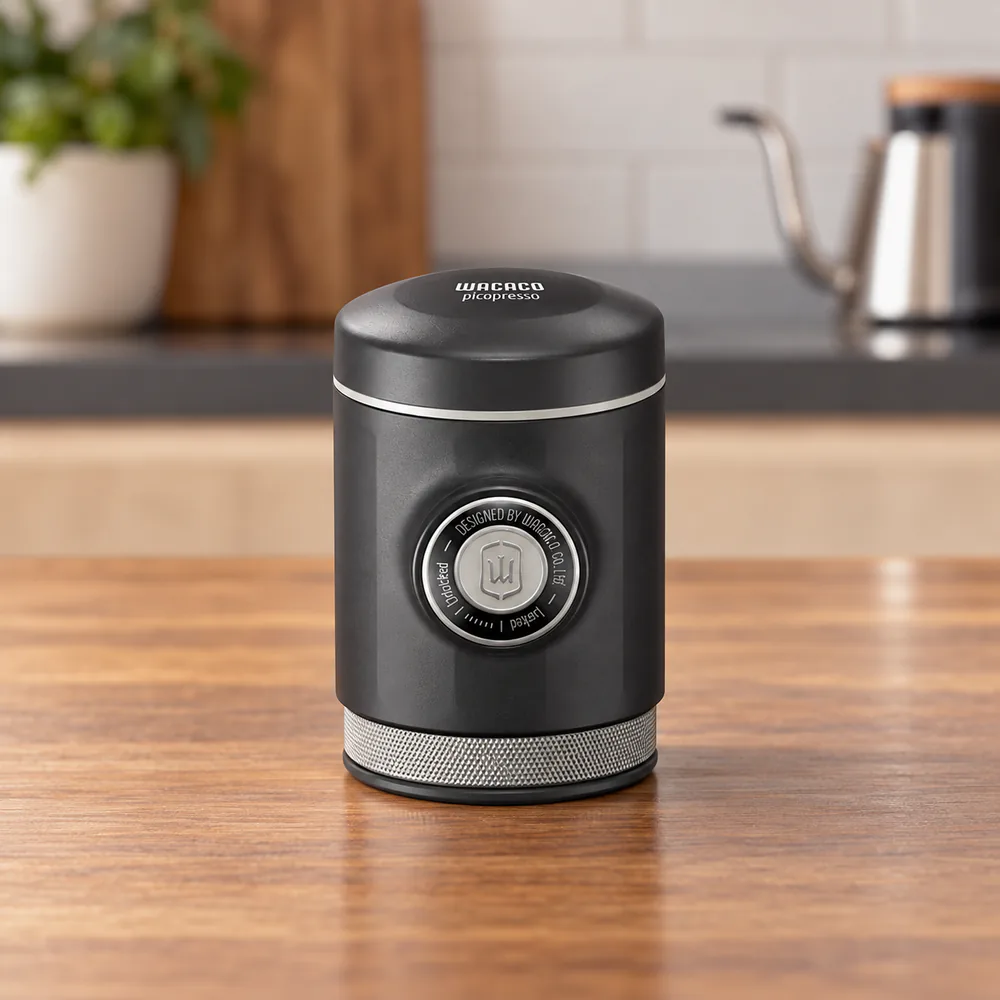
3. Wacaco Picopresso: Best Portable

Wacaco Picopresso
3

Wacaco Picopresso

Best Portable
Check Price on Amazon

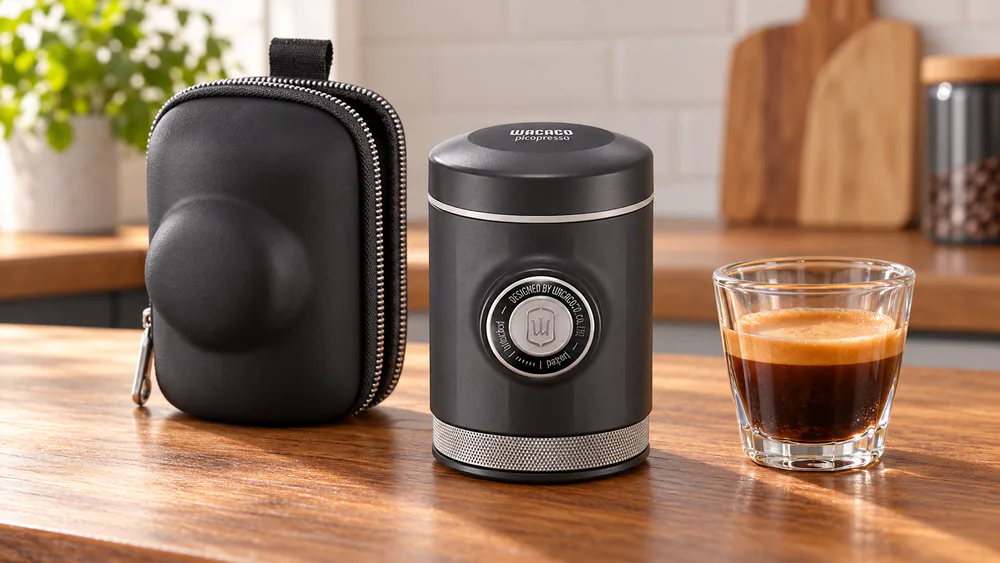
The Picopresso is the portable pick that comes closest to a proper café shot. It builds 18 bar at the pump, roughly 7-9 bar at the puck, through a 52mm commercial-style basket, with a maximum dose of 18g. At 350g it slips into a bag without a second thought, and the shots have the body and sweetness that pressurized baskets cannot deliver.

  • Naked unpressurized portafilter
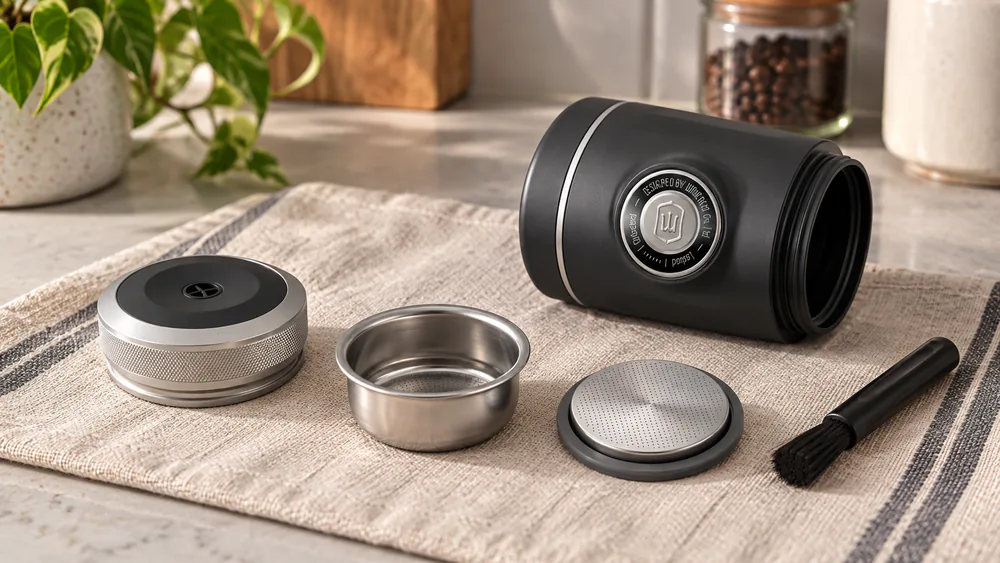
  • Stainless steel parts that disassemble for rinsing
  • Rubber base cap for stable pressing
  • No electricity needed, only hot water

Specifications

Basket
52mm
Max dose
18g
Weight
350g
Pressure
18 bar at the pump

It survives backpack travel. The metal parts feel solid, and the plastic WDT tool and scoop are the weak spots. A full clean takes under 5 minutes because the device comes apart for rinsing.

The catch is the grind. Shots need a fine burr grind, and if no espresso appears after about 10 pumps, grind coarser. Stale or pre-ground coffee tastes poor in its unpressurized basket, so this is not a machine for casual bags from the supermarket shelf.

Heat is the other thing to plan for. The outer body gets very hot after several shots in a row, and a sleeve helps. The whole device also needs a boiling-water preheat, so you need a kettle wherever you go.

Pros and Cons

Pros

  • True espresso in a travel-size body
  • Metal parts feel solid
  • Comes apart for a sub-5-minute clean
  • Rewards good beans with real sweetness

Cons

  • Needs a fine burr grinder
  • Outer body gets very hot after repeat shots
  • Plastic WDT tool and scoop feel flimsy
  • Needs a kettle and ideally a scale

Who Should Buy It

Buy it if you want café-style shots on a trip and you already grind fresh. Skip it if you rely on pre-ground coffee or want milk drinks without extra gear.

Wacaco Picopresso taken apart into its stainless steel pieces on a dish towel beside a small brush
The Picopresso comes apart for rinsing.

4. La Pavoni Europiccola EPC-8: Best Classic Lever

La Pavoni Europiccola EPC-8
4

La Pavoni Europiccola EPC-8

Best Classic Lever
Check Price on Amazon

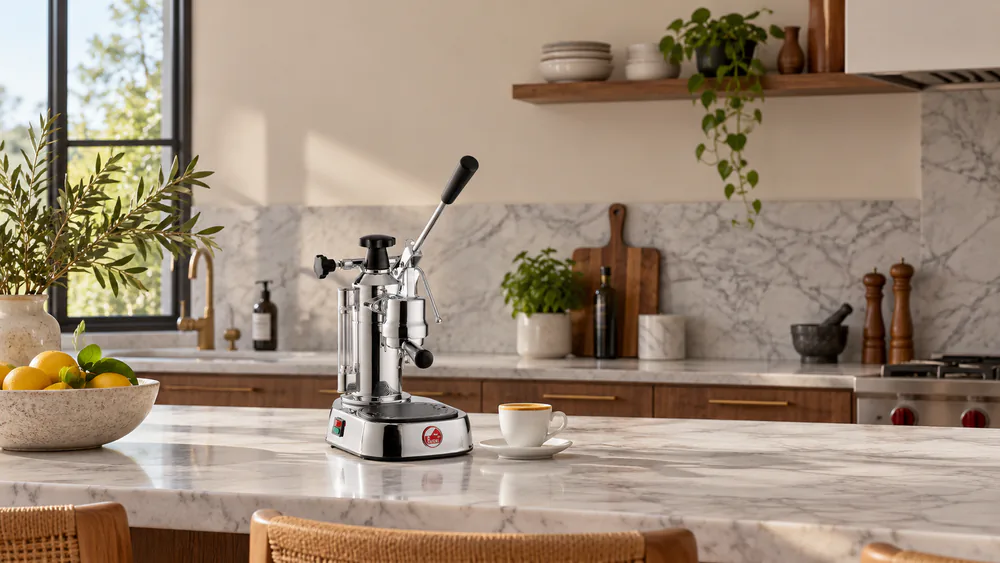
The Europiccola is the one machine here that looks like it belongs in a café. It pairs a brass, chrome-plated boiler with a direct lever and a steam wand, so it can also make milk drinks. The 20 ounce boiler is good for about eight 2-ounce shots before you refill it, which is plenty for a morning at home.

  • Direct lever that you pull for each shot
  • Steam wand for milk
  • Commercial-style portafilter
  • Brass chrome-plated boiler with a stainless heating element

Specifications

Boiler
20 ounce
Type
Direct lever, electric heating
Power
Plugged in
Maintenance
Decalcify twice a year

This is a hands-on ritual that suits 4 to 6 shots a day. Good shots arrive within days, and great shots arrive within weeks, but mastering the machine takes a long time despite its simple design. There is no frothy cappuccino without effort either, so expect to practice with the steam wand.

A cold first pull can come out barely warm. The second pull is usually fine, so pre-warm the group before you start. Turn the boiler off when it is idle, and decalcify about twice a year.

The steel and brass build can last over a decade of daily use. The weak spots are the chrome finish, the sight-glass protector, and the steam-release spout and valve, which can crack or leak. Gaskets are a routine rebuild item, typically every 3 to 5 years, so budget for them. Pricing varies widely by retailer and version, so check the buy button for the current figure.

Who Should Buy It

Buy it if you want a lasting centerpiece and enjoy a slow morning routine. Skip it if you want travel portability, quick milk drinks, or a low-maintenance machine.

5. Flair 2GO: Best for Travel

Flair 2GO
5

Flair 2GO

Best for Travel
Check Price on Amazon

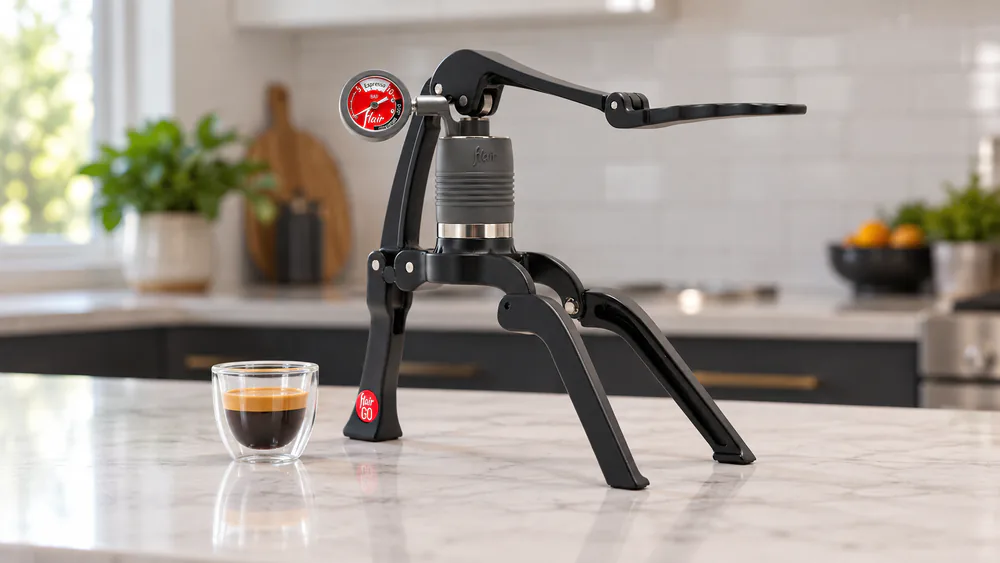
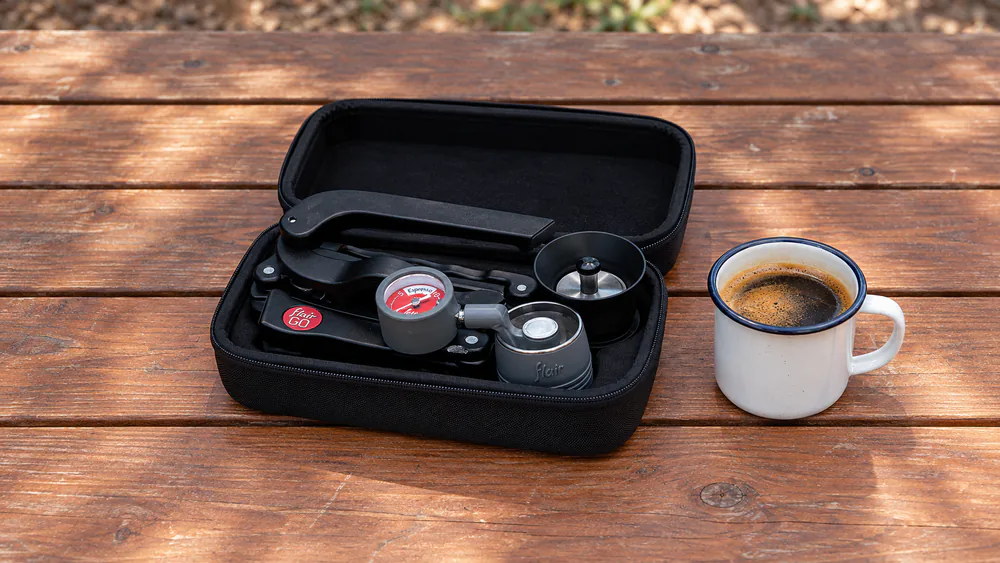
The Flair 2GO folds down to about 3.5 x 7 x 3.25 in and rides in a molded carrying case, yet it keeps the pressure gauge that makes Flair machines easy to learn. Its 40 mm bottomless 2-in-1 portafilter takes a 12-18 g dose, uses about 60 ml of water, and yields about 45 ml. It works with ground coffee and pods, and the gauge zone is about 6-9 bar.

  • Collapsible frame with a molded carrying case
  • Pressure gauge
  • Stainless tamper and dispersion screen
  • Works with ground coffee and pods

Specifications

Dose
12-18 g
Portafilter
40 mm
Folded size
About 3.5 x 7 x 3.25 in
Warranty
1-year limited

Like the Pro 3, it wants a burr grinder and a preheat. The small 40 mm basket means a smaller shot, so think of it as a one-cup machine. The warranty is 1-year, shorter than the 5 year coverage on the Pro 3.

If you pack light and still want a gauge to guide you, the 2GO is the most complete travel setup in this guide. It costs more than the Picopresso for a very different reason: the folding lever gives you more leverage and less hand fatigue than a pump. Skip it if you mainly brew at home, where the Pro 3 gives a bigger basket for similar effort.

Flair 2GO folded flat inside its molded carrying case next to a camp mug
The 2GO folded for travel.

6. Cafelat Robot: Best for Control and Pressure Profiling

Cafelat Robot
6

Cafelat Robot

Best for Control and Pressure Profiling
Check Price on Amazon

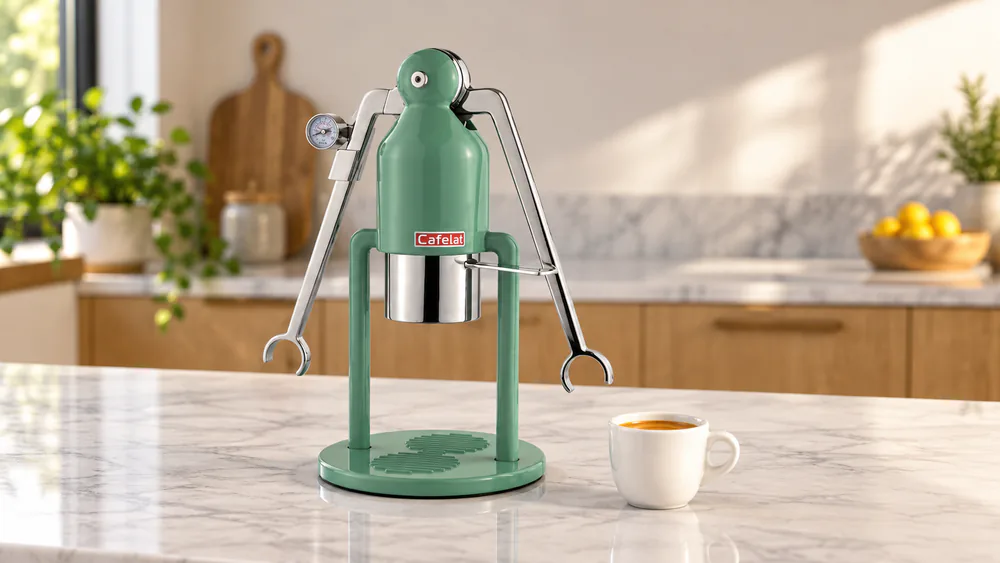
The gauge is the reason to pick the Robot: it reads inside the basket, so you can hold pre-infusion at 1 to 2 bar and then climb to 6 to 9 bar. It has no pump, boiler, or electronics, only a lever, a 58mm basket, and a gauge. It weighs 3 kg, handles up to 25 g, and its 6-9 bar range is typically more like 6 to 7 bar in practice.

  • 58mm basket
  • Gauge that reads inside the basket
  • No pump, boiler, or electronics
  • No descaling

Specifications

Basket
58mm
Weight
3 kg
Pressure
6-9 bar manual
Max dose
Up to 25 g

If the gauge reads low, the grind is usually too coarse.

Each shot takes physical effort and a near-boiling water pour, and light roasts need hotter water. Shot-to-shot turnaround is fast with no teardown, which is a pleasure when you are dialing in. The weak points are the silicone piston gasket and the dispersion screen. A 2021 rubber tip helps the screen resist bending, and replacement parts are cheap.

Pros and Cons

Pros

  • Gauge reads inside the basket for true pressure profiling
  • No electronics to fail and no descaling
  • Fast turnaround between shots
  • Cheap replacement parts

Cons

  • Needs a burr grinder and kettle
  • Real physical effort on every shot
  • Silicone gasket and screen are wear parts
  • Steep learning curve

7. Wacaco Nanopresso: Best Budget Portable

Wacaco Nanopresso
7

Wacaco Nanopresso

Best Budget Portable
Check Price on Amazon

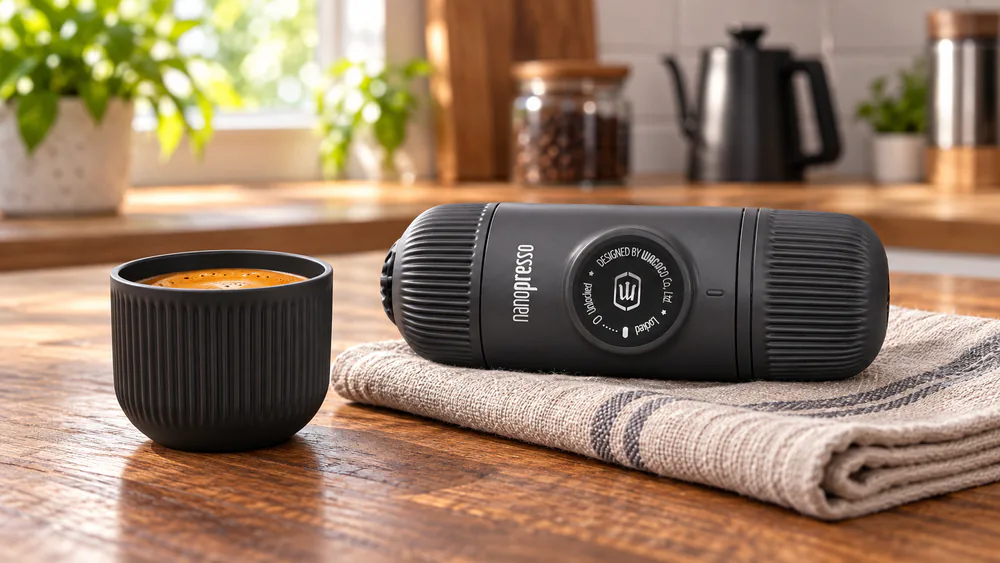
The Nanopresso makes one small shot, and it does not match the crema of a full home setup. What it offers is the lowest-cost way into hand-pump espresso. It makes 18 bar at the hand pump (7-9 bar at the puck), and fill lines at 50 ml and 80 ml guide the water. A pressurized basket forgives grind mistakes and gives decent crema, which is why it suits newcomers.

  • Pressurized basket that forgives grind
  • Built-in cup
  • Fill lines at 50 ml and 80 ml
  • Takes ground coffee or Nespresso pods with an adapter

Specifications

Pressure
18 bar at the pump
Water
50 ml and 80 ml fill lines
Body
Plastic

It is slow when you make several shots in a row, and pumping is tiring. It takes about 8 pumps to build pressure and 20 to 30 for a full shot. Grounds are easiest to spill while loading the basket, and the small cleaning brush is easy to lose.

Durability is the concern. The plastic body can crack at the joints or fail within months for some units, and the pump can get harder to push as pressure builds. Shots come out only lukewarm, and the tank can leak hot water under pressure when filled with fully boiling water, so fill it a little below boiling.

Grounds under the orange seal cause pressure leaks, so clean the rim and seal. A deep clean about every 20 shots keeps it working, and it cleans up easily otherwise. It takes some time to dial in the dose and method.

Who Should Buy It

Buy it if you want a cheap experiment or an occasional travel shot. Skip it if you want daily espresso for years, since the Picopresso and 2GO are better built.

What Is a Manual Espresso Machine?

A manual espresso machine is any machine where your muscle, not an electric pump, generates the brewing pressure. You still need hot water and finely ground coffee. The pressure is what turns that into espresso rather than strong coffee.

Direct Lever vs. Spring Piston vs. Hand-Pump Portable

A direct lever, such as the Flair line, the Cafelat Robot, and the Europiccola, lets you push a piston down by hand, so you control the pressure and pacing yourself. A spring piston machine stores energy in a spring that you load, then releases it for a steady push. The seven machines here are direct levers and hand pumps, since those are the designs a home cook can run without a dedicated pressure setup.

A hand-pump portable, like the Picopresso and Nanopresso, uses a small pump handle that you press repeatedly. It builds the pressure for you in stages, which helps in a tiny body but tires your hand on repeat shots.

How to Choose a Manual Espresso Machine

Start with where you will brew and how much effort you will accept. Everything else follows from that.

Lever vs. Portable Hand-Pump

A full lever gives you more leverage, a bigger basket, and a better chance at a second cup. A portable hand pump gives you a pocket-size machine at the cost of smaller shots and more hand fatigue. If you brew mostly at home, choose a lever. If you travel, the Picopresso and the 2GO are the two to weigh.

Do You Need an Espresso Grinder?

For five of these seven machines, yes. A burr grinder that can grind fine and evenly is not optional on the Pro 3, Picopresso, Europiccola, 2GO, or Robot. The NEO Flex and the Nanopresso are the exceptions because their pressurized baskets tolerate coarser or pre-ground coffee. If you are shopping for one, see the best manual coffee grinders for a pairing that fits a manual setup.

Pressure, Basket Size and Build Materials

Look for a machine that can reach roughly 6 to 9 bar at the puck. A gauge helps you see it. Larger baskets, such as 58mm, give more room for a proper dose, while 40 mm baskets suit single cups. For materials, stainless and brass last longest, aluminum is a sensible middle, and plastic bodies save weight at the cost of long-term durability.

Budget and Cost

The machine is only part of the bill. Add a burr grinder, a scale, and a kettle. For a tight budget see budget espresso machines if you would rather spend on an electric option. If you are happy to spend on a manual setup, the Pro 3 is the best value in this guide.

How to Pull a Shot on a Manual Machine

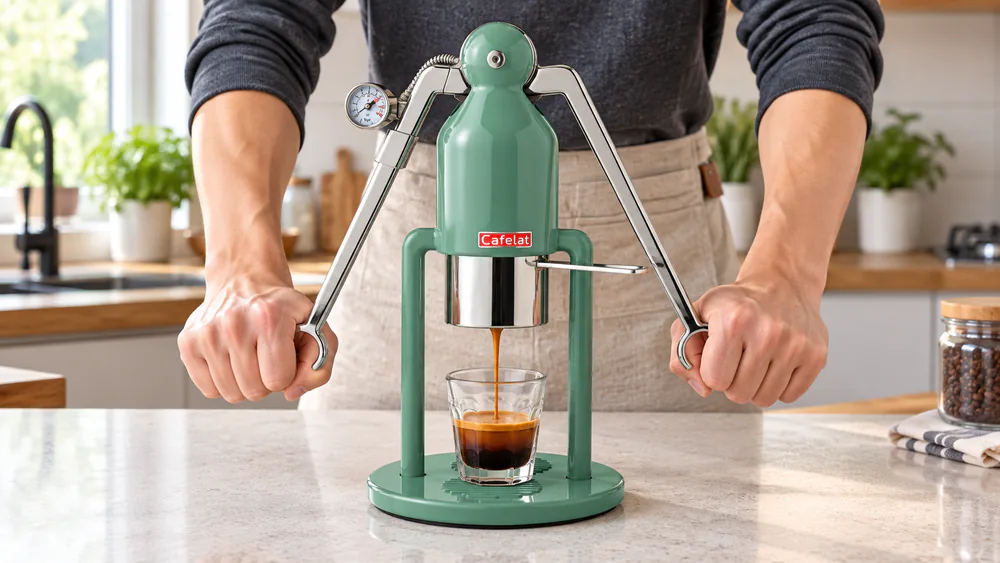
Cafelat Robot lever pressed down over a 58mm basket with espresso flowing into a cup
Pulling a shot on the Robot.

The routine is short once you learn it, and the steps are the same on every machine.

  1. Heat the water and preheat the machine so the metal is warm.
  2. Grind fresh beans fine and weigh your dose.
  3. Level the grounds and tamp evenly.
  4. Add near-boiling water and lock in the portafilter.
  5. Pre-infuse gently, then press steadily until the shot looks right.
  6. Stop, release the pressure, and rinse everything right away.

Tip. If a shot gushes, grind finer. If nothing comes out, grind coarser. Change only one thing at a time so you know what helped.

Dialing in is the sweet spot of manual brewing. The first few shots will teach you more than any guide, because you feel what the pressure is doing in your hand.

Common Mistakes

Buyers most often pair a good machine with a poor grinder, and the shot suffers. Another common mistake is buying an unpressurized machine, then using stale pre-ground coffee in it. Others skip the preheat, which is why we saw sour shots on the Pro 3 and a weak first pull on the Europiccola. Finally, many people choose a portable for daily home use, when a full lever would be more comfortable.

If you would rather skip the learning curve, our main espresso machine roundup and automatic espresso machines cover simpler options.

Frequently Asked Questions

Are manual espresso machines worth it?

Yes, if you enjoy the process. You get full control over pressure and timing for a lower price than a comparable electric machine. They cost you time and effort, and you need a decent grinder.

Can a manual machine make real crema?

Yes. A properly dialed lever with fresh coffee makes real crema. Pressurized baskets, such as on the Nanopresso, make decent crema but not the same as a full home setup.

What water temperature should I use?

Near-boiling water on the Robot, and hotter still for light roasts. The Nanopresso is the exception: fill it a little below boiling, because a fully boiling tank can leak under pressure.

Can a manual machine make milk drinks?

The Europiccola is the one here with a steam wand, so it is the natural choice, though frothy milk takes practice. The rest pull espresso only, so heat and froth milk separately.

How often does a manual machine need maintenance?

It depends on the model. The Europiccola wants decalcifying about twice a year and gasket rebuilds every 3 to 5 years, the Nanopresso a deep clean about every 20 shots, and the Robot an occasional new silicone gasket or dispersion screen.

Final Verdict: Which Manual Espresso Machine Should You Buy?

Beyond our top pick, the right machine depends on your routine. Beginners who want an inexpensive way to start should look at the NEO Flex. Travelers have two real choices: the Picopresso for the best shot quality, the 2GO for the gauge and folding case. The Europiccola is a lasting ritual for the person who wants steam and a classic look. The Nanopresso is the budget experiment, and the Robot is the tinkerer's tool.

Key takeaway. A manual machine rewards practice more than money. Pick the one whose routine you will actually repeat, and budget for a good burr grinder.

Manage your expectations on day one. The first week will include sour, gushing, and weak shots, and that is normal. Skip a manual machine if you want a push-button cup in thirty seconds. For everyone else, the control is worth it. For a broader look at the category, see Breville espresso machines or espresso machines with a built-in grinder.

Read next

Ready to upgrade your kitchen?

Browse more tested buying guides, or join our newsletter for new picks.