
Knives & Cutlery
How to Sharpen a Knife With a Whetstone: Angle, Burr, Edge
As an Amazon Associate we earn from qualifying purchases. We may earn a commission from links on this page, at no extra cost to you. Learn more.
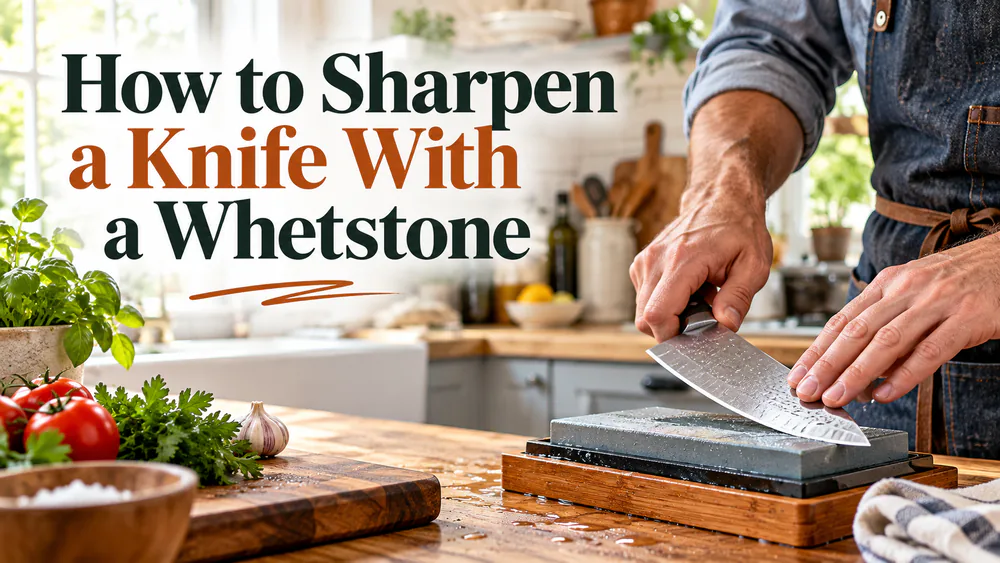
A dull knife slips on tomato skin and crushes herbs instead of cutting them. A whetstone fixes that by grinding away worn steel and rebuilding a fresh edge. This guide covers ordinary double-bevel kitchen knives, the kind with an edge ground on both sides. It takes a few sessions to feel natural, and every session builds the skill.
What You Need Before You Start
Gather your gear before the knife touches the stone. A waterstone is the core item, and a finer stone is optional. You also need a stable holder or a damp towel to keep the stone from sliding, a container of water, a cloth for wiping the blade, a flattening tool for the stone, and a sheet of paper for checking the edge.
Use a dedicated wiping cloth rather than a good kitchen towel. Sharpening leaves dark metal residue that stains fabric, and in our kitchen a cheap rag has been far more practical than anything we cared about. A raised stone holder helps too, because it keeps your knuckles clear of the counter and makes hand positioning easier.
If you are shopping for gear, our guide to knife sharpeners compares the other ways to put an edge on a blade. This article sticks to the stone.
Choose a Whetstone Grit for Your Knife's Condition
Grit is the coarseness of the stone. A lower number removes steel faster and leaves a rougher edge, while a higher number removes less and leaves a smoother one. The right starting grit depends on how worn your edge is.
For ordinary sharpening of an intact edge, a 1000 grit stone is a practical starting point. For a very dull edge, a 400 grit stone is a useful coarse start before you move to medium grit. A 3000 grit stone works as an optional finishing stage once the basic edge is in place.
Skipping straight to a very fine stone is a common mistake. A very fine stone can feel busy under a dull knife while removing too little steel to restore the apex, which is the very thin line where the two sides of the edge meet.
| Knife condition | Starting grit | Refinement |
|---|---|---|
| Very dull, intact edge | 400 | 1000, then optional 3000 |
| Routine dullness, intact edge | 1000 | Optional 3000 |
| Edge already formed, refinement only | 3000 | Deburr and test before adding any finer stage |
| Deep chips, broken tip or unfamiliar geometry | Professional assessment | Outside this beginner procedure |
These numbers are examples, not a required progression. If your knife has deep chips or a broken tip, have a professional look at it before you practice on it.
Check Whether Your Stone Needs Soaking or Surface Water
Stones differ here, and grit alone does not tell you which kind you own. Some stones need to soak before use, while others are splash-and-go and only need water on the surface.
Published advice conflicts on soak time, which is why we will not give you one number. Some guides call for 45 minutes or more, others suggest 10 to 15 minutes for rough and medium stones, and some makers warn against prolonged soaking altogether. Read the instructions for your exact stone and follow them.
Note. Soaking stones and splash-and-go stones need different preparation. If you lost the paperwork, look up the maker's care page for your model before you submerge anything.
How to Sharpen a Knife With a Whetstone: 8 Steps
Work through these in order the first few times. Once the pattern is familiar, the burr check and the edge test will tell you when to move on, not a stroke count.
Step 1: Prepare the Stone and Secure Your Work Area
Wet the stone according to its instructions, then seat it on a holder or a damp towel so it cannot shift. Put the water container and your cloth within reach. Make sure you can stand or sit with your elbows free.
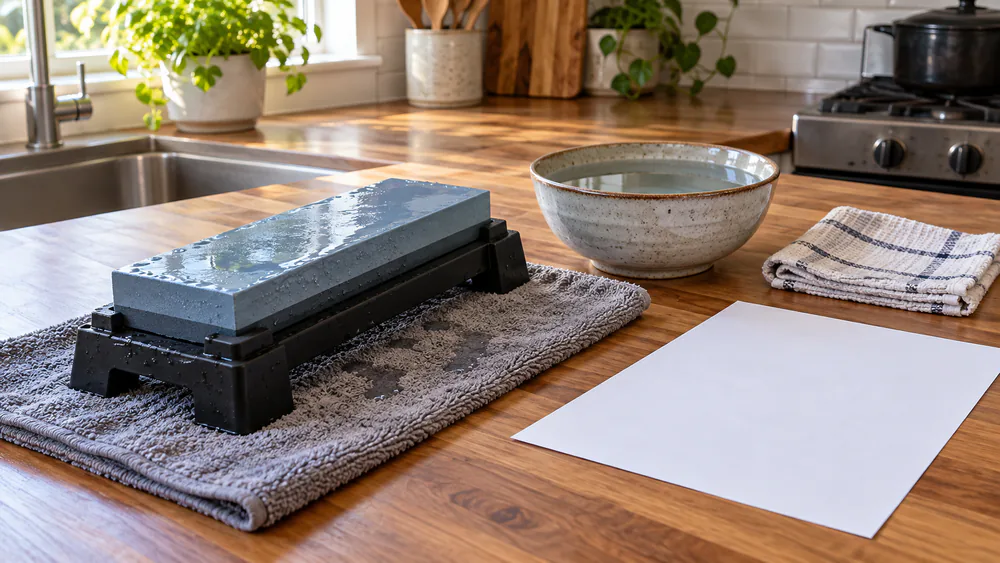
A wet stone develops dark slurry as you work. That changing surface is normal and not a sign the stone is ruined. Keep it wet, adding splashes of water when the surface starts to dry.
Step 2: Find and Hold the Knife's Sharpening Angle
The sharpening angle is how steeply the blade meets the stone. There are two ways to describe it, and mixing them up causes confusion. The per-side angle is the angle of one bevel against the stone. The total included angle is both sides added together. For a symmetrical edge, 15 degrees per side makes a 30-degree total included angle.
A common reference range is 15 to 20 degrees per side, but it is not a specification for every kitchen knife. Match the existing bevel or follow the knife maker's instructions, because the correct angle depends on the knife and how you use it. Some double-bevel Japanese knives are even asymmetric, so equal angles on both sides are not a given.

Here is a reliable way to find your angle. Rest the bevel flat against the stone, then lift the spine slightly until you feel the edge settle in. Another check is to color the bevel with a marker and make a few light strokes. If the ink disappears at the shoulder, your angle is too low. If it disappears only at the apex, your angle is too high. Ink removed across the whole bevel means you match it.
Tip. Keep the blade at the same angle on each stroke. Holding it steady matters more than hitting an exact number.
Step 3: Sharpen the First Side From Heel to Tip
The heel is the back of the blade near the handle, and the tip is the front. Place the knife on the stone with the edge facing away from you, and push it forward with light, even pressure so the contact point travels from heel to tip.
Work the full cutting edge, not just the middle. You can use full-length strokes or work in overlapping sections, whichever lets you hold the angle better. Lifting and lowering the spine between strokes rounds the bevel and leaves inconsistent sharpness along the edge, so keep the spine at a steady height. Around the curve of the tip, keep the bevel in contact with the stone and move the handle as the blade sweeps, rather than lifting.

Stroke count alone cannot tell you when this side is done. Some guides prescribe a set number, and counting can help you balance the work, but the edge itself gives the real answer in the next step.
Step 4: Check for a Burr Along the Full Edge
A burr is a thin ridge of displaced waste metal that forms on the side opposite the stone. When the stone has ground the first side all the way to the apex, steel folds over to the far side, and that fold is your signal.
Warning. Stop sharpening and set the knife down before you inspect it. Never slide a finger lengthwise along the cutting edge.
To check safely, gently brush a fingertip from the blade face across and away from the edge, perpendicular to it, on the side opposite the stone. You are feeling for a faint catch. Magnification is a good visual alternative if you cannot feel it.
Check the heel, the middle, and the tip separately. A burr in only one area does not confirm that the whole edge has reached the apex. A burr can also be subtle enough to miss by touch, especially as the abrasive gets finer, so look as well as feel.

Step 5: Sharpen the Other Side
Turn the knife over and work the opposite bevel at the same angle. Your goal is to raise a small, continuous burr on the first side, the side you just finished. Use that edge feedback rather than a stroke count to know when to stop.
If the burr shows up in some places but not others, work only the portions without a burr. That brings an uneven edge into the same stage of sharpening instead of grinding the finished sections further.
Keep your pressure light as the burr forms. Heavy pressure does not make the edge sharper, and it makes the angle harder to hold.
Step 6: Refine the Edge on a Finer Grit if Needed
Progress from coarse to fine only when your knife needs it. If you started on 1000 grit and the edge already cuts cleanly, you may be done. If you want a smoother finish, move to a 3000 grit stone and repeat the same motions with lighter pressure.
Wash coarse residue from the blade and your hands before you change stones. Otherwise stray coarse particles can scratch the finer stone and undo your refinement.
If you started on a 400 grit stone for a very dull edge, step up through 1000 first, then add 3000 if you want it. Each stage should be shorter than the one before it, because you are polishing an edge that already exists.
Step 7: Remove the Burr With Light Finishing Strokes
The burr that proves you reached the apex must now come off. Finish with very light alternating strokes at the established angle, one side then the other, checking both sides for any remaining burr.
This matters because a leftover burr can feel keen at first and then fold during cutting, quickly losing its apparent sharpness. If a knife feels great for ten minutes and then goes dull, a surviving burr is the likely reason.
A leather strop is optional here. You can complete deburring on the stones themselves, and a strop should never replace reaching and cleaning up the apex.
Step 8: Test the Edge, Then Wash and Dry the Knife
Hold a sheet of paper clear of the blade's path and slice its free edge. Keep your other hand away from where the knife will travel. A smooth cut is useful feedback. Catching or tearing can reveal a remaining wire edge, so test different portions of the knife, not just the belly.
Paper is only the first check. An edge that passes a paper cut can still resist tomato skin, so we always follow the paper test with a quick tomato or onion slice. Food prep is the honest second opinion.
Then hand-wash the knife, dry it thoroughly, and protect the edge in storage. Keep it off glass, stone, and metal cutting surfaces, and avoid twisting thin, hard edges in food.
Why Your Knife Still Isn't Sharp
Most trouble comes from the same few causes. Here are the three most common symptoms.
You Can't Raise a Burr
Symptom: you have sharpened for a while and feel no burr anywhere.
Cause: no detectable burr can mean the bevel has not reached the edge, or the sharpening angle is too low. A very fine stone on a dull knife can also be the culprit, since it removes too little steel to get there.
Fix: use the marker test from Step 2 to check your angle, raise the spine slightly if the ink is vanishing at the shoulder, and drop to a coarser stone if the edge is badly worn.
The Edge Is Uneven or the Tip Stays Dull
Symptom: part of the blade cuts well while another section, often the tip, still drags.
Cause: the spine rose and fell between strokes, or the tip never made contact with the stone. Both leave inconsistent sharpness along the edge.
Fix: work only the portions without a burr until the burr runs the full length, and slow down through the curve at the tip while keeping the bevel in contact.
The Knife Feels Sharp but Still Tears Paper
Symptom: the edge bites your thumbnail lightly but snags when you slice paper or tomato skin.
Cause: a wire edge, the leftover burr, is still attached. It can feel keen at first and then fold during cutting.
Fix: return to Step 7 with lighter strokes at the established angle, alternating sides, and test again on a different section of the blade.
Clean, Flatten, and Store Your Whetstone
Rinse debris off the stone and let it dry according to the maker's instructions. For some stones, such as Shapton, avoid hot water, detergent, dishwashers, direct sun, and forced rapid drying.
Stones wear unevenly, and a dished stone makes it harder to hold a consistent angle. To check, draw a pencil grid across the surface and rub it with a compatible lapping tool. The grid disappears where the tool contacts the surface, and the lines that remain show the low spots. Uneven wear calls for flattening, so keep going until the grid vanishes evenly.
Skip oil as a general cleaner for waterstones. Follow the lubricant and care instructions from your stone's manufacturer, because they take precedence over general advice.
Keep Your Knife Sharp Between Sessions
Sharpening and honing are different jobs. Sharpening abrades steel to rebuild an edge, while honing maintains an edge that already exists. A honing steel can help a rolled edge, but it cannot replace sharpening a worn bevel.
Be careful with rods on hard steel. A honing rod is not suitable for every Japanese knife, so follow the knife maker's guidance. Hard or brittle edges may do better with a finishing stone or a strop than a rod.
For timing, sharpen when cutting performance declines rather than on a calendar. Between sessions, a few light passes on a fine stone can freshen an edge that has only slightly faded, and good habits protect it longer: a wooden or soft board, hand washing, and a safe place in the drawer or on a magnetic strip.
Final Check Before You Put Your Knife Away
Run through this short list. You found and held a steady angle. You raised a burr along the full edge, then removed it. The knife slices paper cleanly in several spots and handles a tomato without pressing. It is washed, dry, and stored with the edge protected, and the stone is rinsed and drying.
Frequently Asked Questions
How Long Does It Take to Sharpen a Knife on a Whetstone?
It depends on the damage to the edge, the steel, the stone, and your skill. Your first sessions will take noticeably longer than later touch-ups, so go by the burr and the edge test instead of a clock.
How Often Should You Sharpen a Kitchen Knife?
Sharpen when cutting performance drops, not on a fixed schedule. If the knife starts crushing tomato skin or slipping on onions, it is time.
Can You Use This Method on Serrated or Single-Bevel Knives?
Not as written. Single-bevel knives need a different procedure that preserves the hollow back and the bevel geometry. Serrated knives need a method adapted to the scallops, so this flat-stone workflow is not their general procedure.
Do You Need a Leather Strop After Sharpening?
No. A strop is optional because you can complete deburring on the stones. It never substitutes for reaching and cleaning up the apex.
Read next
Final Check Before You Put Your Knife Away
Explore more guides to choosing and caring for the tools in your kitchen.