
Knives & Cutlery
How to Sharpen a Knife: A Beginner's Guide

As an Amazon Associate we earn from qualifying purchases. We may earn a commission from links on this page, at no extra cost to you. Learn more.
When your knife crushes a tomato instead of slicing it, the edge is telling you it needs help. For an ordinary straight-edged kitchen knife, the fix is simple: rebuild the edge on a whetstone, or use a guided sharpener if you want less fuss, then keep it true with a honing rod. This guide walks through each method, the angle, the burr, and the edge test. It also flags the knives that need a different approach, such as serrated, ceramic, and single-bevel blades.
Does Your Knife Need Sharpening or Honing?
Honing and sharpening get confused constantly, and the difference decides what you do next. A conventional honing steel maintains an edge that is already there. It cannot replace a worn edge or repair a chip. Sharpening removes steel to rebuild the cutting edge, and that is the job for a stone or a sharpener.
The quickest check is the cut itself. A dull blade crushes delicate ingredients and needs more effort to start a cut. If a few passes on a honing rod bring the bite back, you only needed to hone. If the knife still skids on tomato skin or mashes a soft herb, honing no longer restores it, and it is time to sharpen.
Do not trust the paper test alone. A blade can pass a basic paper test and still struggle with vegetable prep. In our kitchen, tomato skin and a sliced onion tell us more about real cutting resistance than a sheet of paper does.
Warning. Never slide a finger lengthwise along a cutting edge to test it. Any hands-on inspection should move across the edge and away from it, never along it.
Choose a Knife-Sharpening Method
You have three realistic options for a home kitchen, and none of them is the best choice for everyone. Compatibility, abrasive design, and technique matter more than any blanket ranking.
A whetstone gives you the most control. You choose the angle, you decide how much steel to remove, and you can refine the edge as far as you like. The tradeoff is practice. Holding a repeatable angle takes time, and a whetstone rewards that effort with control over the edge. Stones also make a mess with slurry, and they need occasional flattening.
A manual guided sharpener is the easiest way in. It supports the angle for you and uses preset sharpening and finishing stages. The limit is that the tool's geometry decides what you get, and you need to check that your blade is compatible. A pull-through can improve a very dull edge, but it will not deliver the same fine control as a stone.
An electric sharpener reduces effort even more, with powered abrasives and guides that take freehand angle work off your hands. Its preset geometry can limit which knives it suits, and extra passes remove steel you did not need to remove.
If you want to browse the tools themselves, our knife sharpeners section covers them in more detail. Whichever you pick, a honing rod belongs alongside it for upkeep.
How to Sharpen a Knife With a Whetstone
This is the method we recommend learning if you cook often. The steps below assume an undamaged, straight-edged, double-bevel knife. Work slowly. Your first session is about learning the feel, not speed.
Step 1: Gather Your Tools and Choose the Right Grit
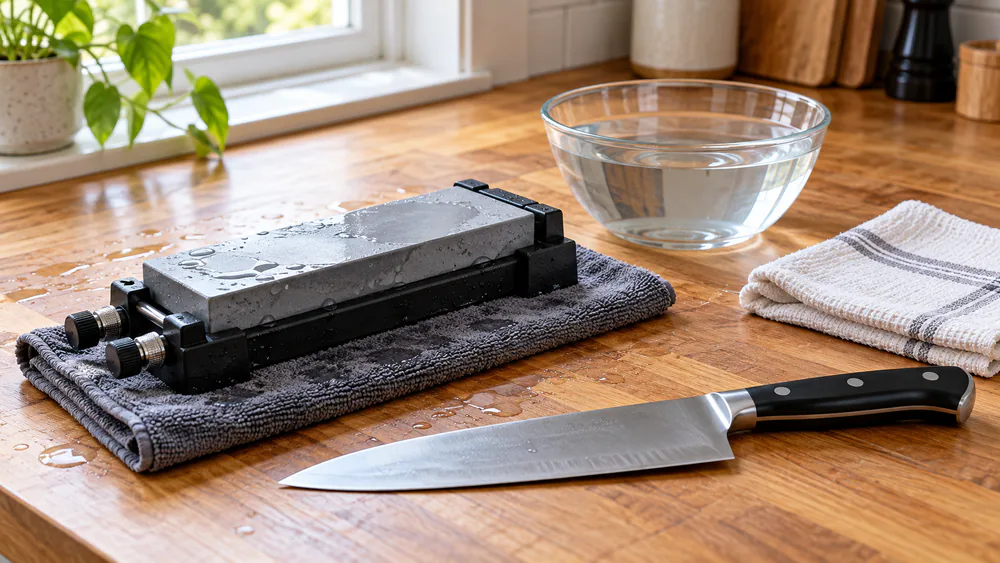
You need a whetstone, a stable base or holder, a damp towel, water, a second towel for cleanup, and the knife. A 1000-grit stone is a practical starting point for routine sharpening of an undamaged kitchen edge.
Lower grits remove material more quickly, while higher grits refine it. Coarse stones are for substantial dullness or damage. A fine finishing stone is optional for ordinary kitchen work, so you do not need to buy one on day one.
Step 2: Prepare the Stone and Secure Your Work Area
Set the stone on a stable holder or a damp towel, and keep water nearby if you are using a waterstone. Even with a holder, we put a nonslip mat or damp towel underneath. Any movement in the setup interrupts controlled sharpening, and you will feel it in your wrists.
Not every stone is prepared the same way. Some waterstones require soaking, while others need only surface water during ordinary use. Follow the exact instructions for your stone, because prolonged soaking can damage some of them.
Expect a mess. Slurry and metal debris build up fast, and the grit can stay embedded in a cleanup towel, so use one you do not mind retiring.
Step 3: Find and Maintain Your Knife's Sharpening Angle
Many kitchen knives use a sharpening angle around 15 to 20 degrees per side, measured between the blade and the stone. Match your knife maker's recommended angle where one is given. That range is a general guide, not a universal setting, and it is not the combined angle of both bevels.
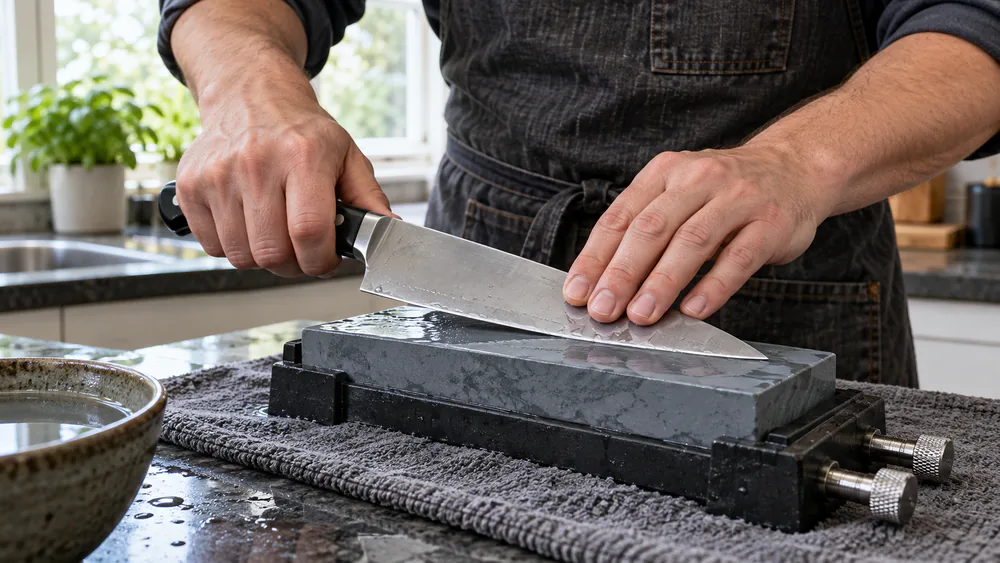
Holding a repeatable angle is the hardest skill here. Rest the blade flat on the stone, then raise the spine until the bevel sits snug against the surface. That is your angle. Keep the supporting fingers on the blade face and away from the cutting edge.
Tip. Stack coins or a folded piece of card under the spine to set a rough angle at the start, then remove them and match the feel. Check the angle every few strokes, because it drifts when you get comfortable.
Step 4: Sharpen the First Side From Heel to Tip
Keep the bevel angle steady and cover the heel, middle, and tip. A sweeping heel-to-tip stroke is one method, and working in sections is another. Pick the one that lets you hold the angle better, and stay with it for the whole session.
Use light pressure and let the stone do the cutting. Around the curved tip, keep contact without rolling the blade onto a different bevel. That curve is where beginners most often lose their angle.
There is no magic number of strokes. The count depends on how damaged the edge is, the steel, the abrasive, and your angle. Judge progress by edge condition and burr development, and do not keep grinding just to reach a number.
Step 5: Check for a Burr and Sharpen the Other Side
A burr is a thin lip of metal pushed over to the opposite side of the edge. It tells you the stone has reached the apex of the bevel. After sharpening one side, check the opposite side along the full blade before you switch.
To feel for it, move a fingertip across the edge and away from it, never along it. If you can detect a burr along the whole length, flip the knife and work the second side with the same angle and the same coverage. If the burr is missing in one spot, go back and spend a few more strokes there.
Step 6: Refine the Edge and Remove the Burr
Remove the burr with gentle passes and very little pressure. Heavy pressure here only pushes the burr back and forth and can leave a ragged edge.
If you move to a finer stone, clean coarse abrasive off the blade and your hands first. Otherwise you carry large grit onto the finer surface and undo your refinement. Many home cooks can stop at the 1000-grit stone and still get a useful edge.

Step 7: Clean the Knife and Test the Edge
Rinse the sharpening residue from the knife and dry it carefully. Then test it with a sheet of paper, keeping your fingers clear of the cutting path. A clean edge should slice without heavy pressure or persistent snagging.
Follow the paper test with a tomato or an onion. As we noted earlier, a blade can pass paper and still struggle with real food, so vegetable prep is the final judge. If the edge hesitates at the skin, return to the stone for a few more controlled passes.
How to Use a Manual or Electric Knife Sharpener
Guided sharpeners trade control for ease. They are a good fit for busy cooks and for anyone who has not yet developed a steady hand. Read the manual first, because designs differ more than most people expect.
Using a Manual Pull-Through Sharpener
Stabilize the sharpener on the counter, and check that your blade is compatible before you begin. Then follow the stages the maker prescribes, usually a sharpening slot followed by a finishing slot.
The motion and downward pressure depend on the design. One model calls for a pull in a single direction, while another specifies a back-and-forth motion. Follow the manual for your sharpener rather than a general instruction.
Resist the urge to keep going. A pull-through can improve a very dull edge, but unnecessary passes on an already useful edge can make the result worse. If the knife cuts well after a few passes, stop.
Using an Electric Sharpener
Powered abrasives and guides reduce freehand angle work, which is the main appeal. Use the stages prescribed for your blade, keep each pull moving, avoid twisting the knife, and apply only the pressure the maker specifies.
Matching the angle and blade compatibility matters more than matching brand names. An electric sharpener reduces effort, but its preset geometry can limit which knives it suits. Do not push a thin, hard Japanese-style blade through a slot built for a thicker German-style edge without checking that it is supported.
Serrated knives need their own procedure. A sharpener must explicitly support them, with the correct stage, and you should never run a serrated blade through a generic straight-edge coarse sequence.
How to Hone and Maintain Your Kitchen Knife
Honing keeps a good edge good. Done regularly, it stretches the time between sharpening sessions. It is not a repair, though, and it cannot fix a chip.
How to Use a Honing Rod
Rest the tip of the rod vertically on a stable work surface and grip the handle. Draw the blade down the rod from heel to tip at the appropriate angle, then repeat on the opposite side with controlled strokes. Light, even strokes work better than fast, hard ones.
Know what you are holding. A conventional honing steel maintains an existing edge, but abrasive ceramic rods can remove steel, so not every rod is simply an alignment tool. Check the maker's description before you assume.
Cleaning, Storage, and Signs It Is Time to Sharpen Again
Hand-wash and dry your knives carefully, since dishwasher movement can damage edges. Avoid cutting on glass, ceramic, or marble, and avoid twisting or forceful chopping with thin, hard edges. Store knives in a block, a suitable wall strip, or a drawer dock to preserve the edge.
Look after the stone, too. Low spots develop where a stone gets used most, which makes consistent sharpening harder until you flatten the surface with a compatible flattening tool. Keep the stone away from direct sun, and avoid forced rapid drying, hot water, and the dishwasher.
How often should you sharpen? There is no dependable schedule, because steel, cutting surface, workload, and care all change the interval. Sharpen when cutting performance declines and honing no longer restores it.
Next action: hone lightly as the knife starts to feel less keen, sharpen when honing stops working, and test the edge on a tomato before you put the stone away.
Common Sharpening Problems and How to Fix Them
Most sharpening trouble comes from the same few causes: an angle that wandered, a burr left behind, or an edge that was not covered end to end. Treat the fixes below as checks rather than certain diagnoses.
The Knife Still Feels Dull
First check your coverage. Run the blade through the heel, middle, and tip, and look for a spot where you never raised a burr. A missed section, usually near the tip, leaves a dull patch that makes the whole knife feel dull.
Next, confirm that you raised and then removed a burr on both sides. If the stone never reached the apex of the bevel, polishing the edge will not help, so go back to the 1000-grit stone for a few more controlled passes.
Finally, consider whether the knife is damaged. Chips and heavy wear need coarse stones, and a very worn edge may be beyond a beginner's first session. A guided sharpener can help a very dull edge, or you can hand it to a professional.
The Edge Cuts Unevenly or Loses Sharpness Quickly
An uneven edge usually points to an inconsistent angle, rolling the blade at the curved tip, or a stone that has developed a low spot. Flatten the stone, slow down, and keep the bevel snug against the surface through the whole stroke.
Rapid dulling is not proof of one cause. Check three things before you blame the steel: angle consistency, full-edge coverage, and complete burr removal. A burr left on the edge can fold over and make a new edge feel sharp for only a short while.
If you use a guided sharpener, remember that extra passes can remove steel you did not need to remove. Stop sooner, and test the edge on food between sessions.
Knife-Sharpening FAQs
Do all whetstones need soaking?
No. Some waterstones require soaking, while others need only surface water during ordinary use. Prolonged soaking can damage some stones, so follow the instructions that came with yours.
Can you sharpen serrated, ceramic, or single-bevel knives this way?
Not with the routine in this guide. Serrated knives need a sharpener that explicitly supports them. Single-bevel knives need asymmetric, blade-specific sharpening, so the double-bevel routine should not be applied equally to both faces. Ceramic blades need compatible diamond sharpening equipment or a suitable service, because a metal-knife sharpener is not automatically suitable.
When should you use a professional sharpening service?
Consider one when edge repair or unfamiliar geometry is beyond your skill, such as a chipped edge or a specialty blade. Confirm that the service handles your blade's material and geometry before you hand it over.
Read next
Ready to upgrade your kitchen?
Browse our kitchen guides or get more practical advice in our newsletter.