
Kitchen Appliances
How to Use a KitchenAid Stand Mixer: A Beginner's Step-by-Step Guide

As an Amazon Associate we earn from qualifying purchases. We may earn a commission from links on this page, at no extra cost to you. Learn more.
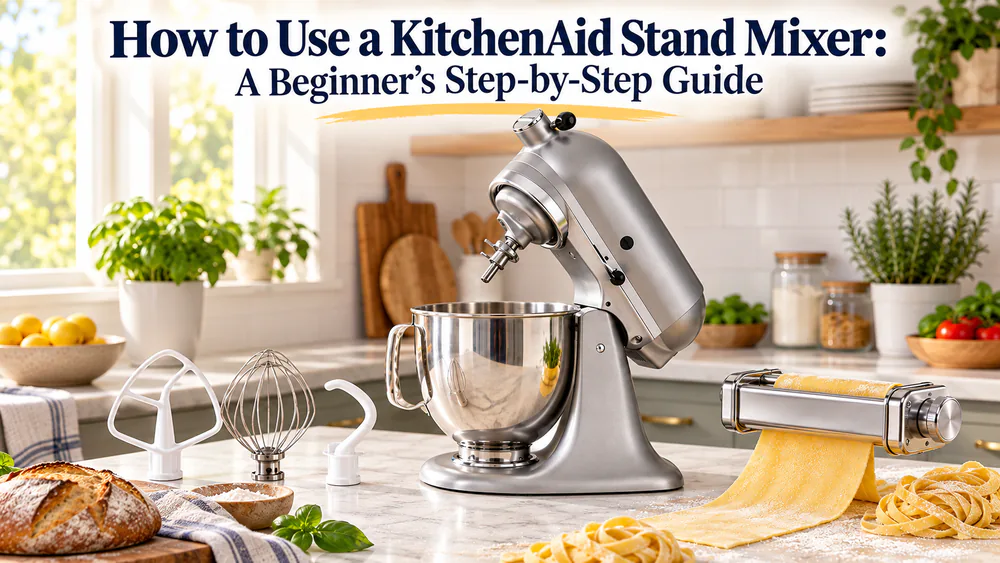
Just unboxed your KitchenAid and not sure where to start? You are in good company, and this machine is far friendlier than its heft suggests. Once you learn where the bowl locks, which speed does what, and how to clean it in a couple of minutes, the whole thing becomes second nature.
We have spent weeks living with these mixers in a working kitchen, running real bakes and opening up the top performers to check the motor and wiring, so the advice here comes from real use. Whether you have the compact Classic, the popular Artisan, or the big bowl-lift, the core moves are the same, and this guide walks you from first setup to the final wipe-down.
Getting to Know Your KitchenAid Stand Mixer
A five-minute orientation to your mixer's body style and controls prevents most beginner stumbles.
Tilt-Head vs. Bowl-Lift Models
KitchenAid builds two body styles. A tilt-head model, like the 5-Qt Artisan or the 4.5 Quart Classic, hinges backward so you can lift the head away from the bowl. A bowl-lift model, like the 7 quart machine, keeps the head fixed and raises the bowl up to the beater on a lever.
Tilt-head mixers are lighter, easier to store, and fine for most home baking. In our kitchen the Classic tilt-head still slides into a standard cabinet, which the larger bowl-lift will not do. The bowl-lift is a heavy machine with a big footprint, and moving it is a two-hand job, so give it a dedicated spot.
Note. Not sure which you own? If the top half tilts back on a hinge, it is a tilt-head. If the bowl rides up and down on two arms while the head stays put, it is a bowl-lift.
Key Parts and Controls
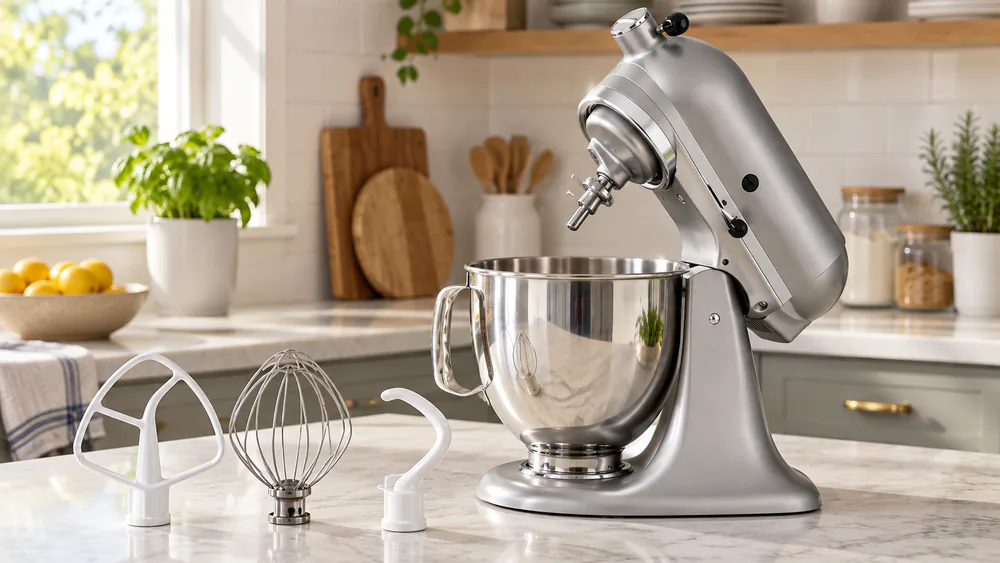
Every KitchenAid shares the same parts: the motor head, the speed control, the attachment hub up front, the bowl, and the beater shaft where attachments click on. The Classic packs 59 touchpoints around the bowl, which just means the beater sweeps close to the wall so ingredients get worked evenly.
That weight is not wasted metal: it plants the base so the mixer will not slide off the counter during a stiff dough batch, and we leaned on that stability plenty while kneading bread.
How to Use a KitchenAid Stand Mixer: 9 Easy Steps
Here is the full sequence from a cold start to a finished bowl. Follow it in order the first few times, and it soon becomes automatic.
Step 1: Place and Secure the Mixer Safely
Set the mixer on a stable, flat counter with room to lift the head or raise the bowl. Keep the 36 Inch power cord clear of the stove and the sink, and give the machine a push to confirm it does not rock.
Step 2: Attach the Bowl
Drop the bowl onto the base so the pins line up, then turn it clockwise until it locks with a firm click. On a bowl-lift the bowl clamps onto two pins and a rear peg. Some beginners worry a slightly loose feel means something is broken, but confirming the bowl clamps firmly before the first run settles that false alarm.
Step 3: Attach the Flat Beater, Whisk, or Dough Hook
Slide the attachment up onto the beater shaft, press it against the spring pin, then twist so it hooks under the pin and locks. A light downward tug confirms it. A loose beater is the most common cause of an uneven mix.
Step 4: Add Your Ingredients in the Right Order
For most recipes, cream fats and sugar first, then alternate wet and dry so flour does not dust up over the rim. Add flour with the head down and the mixer running slow to keep flour off your counter.
Step 5: Lock the Head and Adjust the Beater Height
On a tilt-head, press the head down until it clicks into the locked position. Never run the machine with the head tilted back.
Warning. Always lock the tilt-head down before you start, and always unplug the mixer before you change an attachment or reach into the bowl. The beater shaft has real torque, and a hand near a spinning hook is where injuries happen.
The flat beater should just clear the bottom of the bowl without scraping it. If yours rides too high or drags, the owner's manual explains the small screw adjustment near the hinge; check the manufacturer's recommended assembly and head-locking sequence if you are unsure.
Step 6: Choose the Right Speed Setting
Match the speed to the job. Both tilt-head models give you a 10 speed range from a gentle stir to a fast whip, while the 7-quart bowl-lift adds an 11 speed range with a delicate half speed for folding.
Step 7: Start Low and Increase Gradually
Always begin on the lowest setting, then climb. Starting on high throws flour, splashes batter, and strains the motor on a stiff load. Ease up one notch at a time until the mixture moves the way you want.
Step 8: Scrape Down the Bowl and Check Consistency
Stop the mixer, lift or tilt the head, and scrape the sides and bottom with a spatula. Ingredients cling to the wall no matter how good the beater is, so one or two scrape-downs keep the mix even. A standard batter usually comes together in about two minutes on a tilt-head.
Step 9: Turn Off, Detach, and Clean Up
Return the lever to off and wait for the beater to stop completely. Unplug, remove the attachment and bowl, and rinse them while the batter is still soft.
Understanding the Speed Settings
The speed control is where beginners hesitate most. You rarely need the top of the dial, and in our testing most bakers rarely push past speed 4 for everyday mixing.
What Each Speed Is For
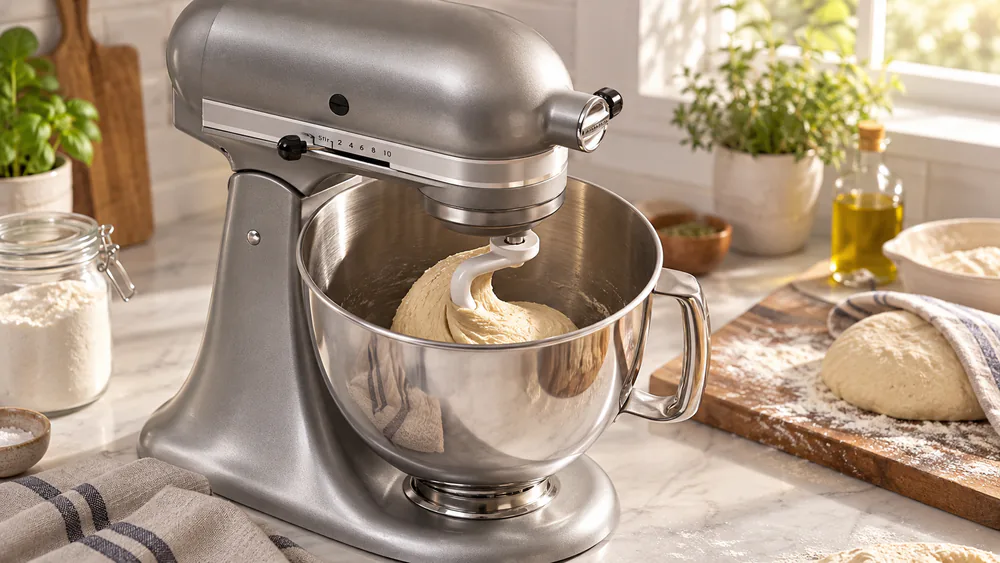
Use low speeds, stir through 1 and 2, to work flour into wet ingredients and start any dough. To cream butter and sugar, begin around speed 2 and climb to speed 4 for a light, fluffy result. For whipping cream or beating egg whites to stiff peaks, run high, around speed 6 to 8. Knead yeast dough with the dough hook on low, roughly speed 2, for about 8 minutes until smooth and elastic. Keep dough on the low settings, since pushing a heavy load fast is the quickest way to overwork the motor.
| Stir to 2 (low) | Adding flour, starting dough, kneading bread |
|---|---|
| 2 to 4 (medium-low) | Creaming butter and sugar, cake batter |
| 4 to 6 (medium) | Cookie dough, mashing potatoes |
| 6 to 8 (high) | Whipping cream, beating egg whites to stiff peaks |
For the exact recommendations that shipped with your model, the owner's-manual speed-control chart lists them task by task.
Powering On and Off Safely
Slide the lever gently, let the beater stop fully before you tilt the head or lift the bowl, and unplug whenever you step away.
Tip. If a recipe does not name a speed, default to low for anything dry or heavy and medium for anything you want to lighten. You can almost always get there without touching the high end.
Essential Mixing Techniques
Three techniques cover most of what a home baker does. Learn these and you can follow nearly any recipe.
Creaming Butter and Sugar
Creaming is the foundation of cookies and cakes. Use the flat beater with room-temperature butter, start on speed 2, then move up to speed 4. You are done when the mixture turns pale and fluffy, the point where it has trapped the air that gives baked goods their rise.
Beating Eggs and Whipping Cream
Swap to the wire whip for anything you want to aerate. Whipping cream and beating egg whites both climb to stiff peaks around speed 6 to 8. Watch the bowl closely near the end, because the jump from soft peaks to over-beaten happens quickly.
Kneading Dough with the Dough Hook
The dough hook is where a stand mixer truly earns its counter space. It noticeably beats hand mixing on stiff loads like pizza and bread dough, where a hand mixer would strain and stall. Run yeast dough on speed 2 for about 8 minutes, though real times land anywhere from 5 to 10 minutes by recipe. The dough is ready when it is smooth, elastic, and pulling cleanly off the sides.
On stiff bread and pizza dough, the stand mixer does in minutes what leaves you sweating with a hand mixer. That is the job it was built for.
Using Attachments and Accessories
Your mixer is really a small motor with a growing toolkit. The beaters handle baking; the front hub opens up everything else.
Flat Beater, Wire Whisk, and Dough Hook
These three ship with the machine and cover the daily work. The flat beater is your all-purpose tool for batters, cookie dough, and mashed potatoes. The wire whip aerates cream and egg whites. The coated dough hook kneads bread and pizza dough. The Classic includes a coated flat beater, a coated dough hook, and a 6-wire whip, while the bowl-lift adds a double flex edge beater and an 11-wire whip for its larger bowl.
Pasta Maker, Food Grinder, and Other Add-Ons
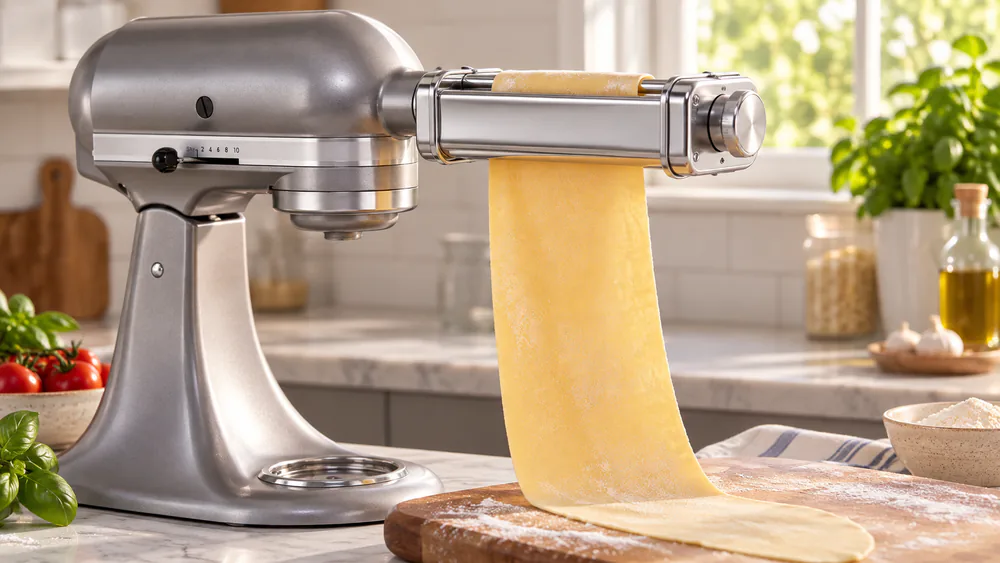
The chrome hub on the front of every KitchenAid accepts a long line of powered attachments, sold separately, and the Classic alone is compatible with 10-plus of them. With attachments you can roll fresh pasta, grind meat and vegetables, cut veggie noodles, or churn ice cream. Some cooks even use theirs for non-food jobs like DIY beauty products or shredding, which is why one machine can slowly replace a drawer of gadgets.
Cleaning and Maintenance
Cleanup is quick if you do it right after mixing, and it is the part that keeps a mixer running for decades.
Safe Detachment of Parts
Turn the machine off, wait for the beater to stop, then unplug it before you remove anything. Twist the attachment to release it from the spring pin, then unlock and lift out the bowl. Never reach for a part while the mixer is plugged in and the lever is live.
Washing and Drying Components
Wash the removable parts in warm soapy water right after use. Raw dough that bunches up on the beater lifts off and rinses away easily, so post-bake cleanup is genuinely fast. Never immerse the motor base; wipe it with a damp cloth instead, and dry everything before you store it.
Warning. Never submerge the mixer base or run it under the tap. Water in the motor housing is the one mistake that turns a repairable machine into scrap. Unplug first, then wipe the base only with a damp cloth.
Routine Care for Longevity
Wipe the hub and beater shaft now and then and keep the vents dust-free. In our weeks of daily use the tilt-head Artisan stayed quiet and smooth under load, even mixing yeast bread and pie crust, a good sign the drive is well seated.
Troubleshooting Common Problems
Most mixer trouble is simple to diagnose. Here is what we check first when something feels off.
Mixer Won't Start
Confirm the plug is seated and the outlet is live. On a tilt-head, the head must be locked down or the safety interlock keeps the motor off; on a bowl-lift, the bowl must be raised. If a brand-new unit does nothing or quits within the first few minutes, it may simply be faulty off the line. A minority of units fail early, so run a full test batch soon after you buy while a return window is open.
Unusual Noises, Smells, or Vibration
A steady hum is normal; grinding, rattling, or a burning smell is not. Stop and unplug immediately if you smell anything hot. As techs, we have opened up a dead-on-arrival mixer and found the fault was a motor brush installed incorrectly at the factory, something a repair shop can reseat by opening the head. If the machine is under warranty, let KitchenAid handle it so you keep your coverage.
Attachments Not Fitting Properly
If a beater will not seat or spins loose, it is almost always not twisted fully under the spring pin. Remove it, line it up, press up, and twist again until it locks with a light tug. A wrong or worn attachment for your bowl size can also feel loose, so use the beater that came with your model.
Tip. Note your model number. Ordering the correct replacement beater or bowl is far easier when you can match it to the exact machine.
Tips for Getting the Best Results
A few small habits separate a frustrating first week from a mixer you reach for daily. Start every batch on the lowest speed and climb. Bring butter and eggs to room temperature before creaming or whipping, since cold ingredients fight the beater. Scrape the bowl at least once mid-mix, because even 59 touchpoints leave a little on the wall. And clean up the moment you finish, while the batter still wipes away with a rinse.
Frequently Asked Questions
How do I attach the bowl and the beater?
Set the bowl on the base and turn it clockwise until it locks, or clamp it onto the pins on a bowl-lift. Then slide the beater up the shaft, press it against the spring pin, and twist so it hooks under. Give each a light tug before you start.
Which speed do I use for dry ingredients, creaming, and kneading dough?
Use low, stir through 2, for dry ingredients and to start dough. Cream butter and sugar from speed 2 up to speed 4. Knead yeast dough on speed 2 for about 8 minutes. Keep heavy dough on the low settings.
How do I clean the mixer and its attachments?
Unplug it first. Wash the bowl, beater, whip, and hook in warm soapy water right after use, since raw dough rinses off easily while soft. Never submerge the motor base; wipe it with a damp cloth and dry the parts before storing.
Can it knead bread dough, and how big a batch?
Yes, and this is where it shines over hand mixing. A tilt-head handles everyday loaves, while the 7 quart bowl-lift kneads over 8.5 pounds of bread dough per batch.
What can I make besides baked goods?
With hub attachments you can roll fresh pasta, grind meat and vegetables, cut veggie noodles, and churn ice cream. Some owners even use theirs for non-food jobs like DIY beauty products or shredding.
Conclusion
A KitchenAid stand mixer looks intimidating on the counter, but the routine is short: place it safely, lock the bowl and beater, start low, match the speed to the task, and rinse the parts while they are still soft. Do that and it rewards you with fluffy creamed butter, glossy whipped cream, and bread dough kneaded in minutes. Pick the body style that fits your kitchen, run a full test batch early to be sure your unit is sound, and the rest is just reps.
Read next
Ready to upgrade your kitchen?
From stand mixers to the small appliances that earn their counter space, our tested buying guides help you choose with confidence.