
Knives & Cutlery
How to Use a Knife Sharpener: Manual and Electric

As an Amazon Associate we earn from qualifying purchases. We may earn a commission from links on this page, at no extra cost to you. Learn more.
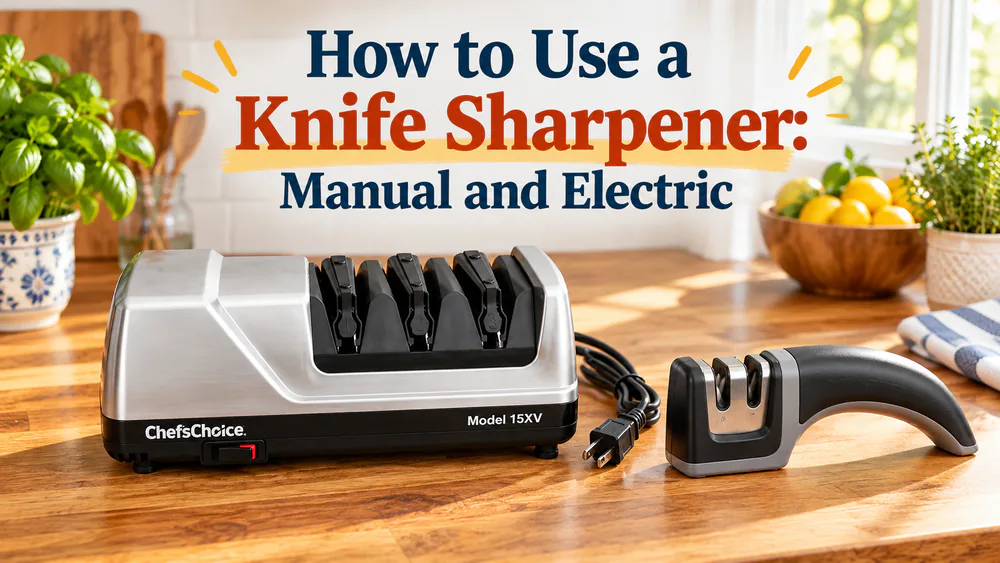
If your knife crushes a tomato instead of slicing it, the edge needs attention. For a simple, guided fix, use a manual pull-through sharpener; for a machine that holds the angle, choose an electric model. A whetstone or honing rod gives you more control. This guide walks through each route, step by step, and shows how to check your work. It is part of our growing collection of knife sharpener guides.
Before You Start: Check Your Knife and Sharpener
Most sharpening trouble starts before the first pass. A few minutes with the manual and the blade saves you from the mistakes that are hardest to undo.
Check Blade Compatibility and the Manufacturer's Instructions
Read the instructions for your exact sharpener. Stage labels, slot layouts, abrasive materials, and required sequences differ from model to model, so the manual beats any general advice, including ours.
Then check the knife. Ordinary double-bevel kitchen knives suit most guided sharpeners. Single-bevel Japanese blades need a separate procedure. Ceramic knives need a sharpener made for ceramic. Some Japanese knives have an approved matching pull-through option, but country of origin alone does not settle the question, so confirm the blade's geometry and the sharpener's stated compatibility first. Serrated knives are covered in the FAQ below.
Identify the Sharpening Stages and Set Up a Stable Work Area
Most guided sharpeners have a coarse stage that restores a dull edge and a fine stage that maintains or finishes it. Use the maintenance stage for a modest touch-up, and save coarse abrasion for an edge that truly needs reshaping. Not every session needs every slot.
Put the sharpener on a dry, stable counter, and use clean blades. If the base slides, use a damp cloth underneath or follow whatever the manual says about feet and grips. Keep your fingers behind any guard, and never run a finger along the edge to test it.
Here is a quick way to pick your route.
| Manual pull-through | Electric sharpener | Whetstone | Honing rod | |
|---|---|---|---|---|
| Main role | Guided restoration or maintenance | Powered restoration and finishing | Controlled shaping and refinement | Maintenance; abrasive rods also remove steel |
| Angle control | Preset or model-adjustable guide | Model-specific guide | You hold the geometry | You hold the approved angle |
| Start by | Identifying coarse and fine functions | Checking the blade-specific stage sequence | Preparing and stabilizing a flat stone | Checking knife and rod compatibility |
| Main limit | Fixed carbide designs can damage edges | Wrong sequence or tip handling can damage edges | Takes practice and stone care | Cannot replace real edge repair |
How to Use a Manual Pull-Through Knife Sharpener
A manual pull-through is the easiest way to start. The guides are preset, so you are not asking your wrist to hold an angle. The trade-off is that fixed carbide slots can leave chatter marks and a ragged edge, especially near the heel, so we treat them as a convenience tool rather than a precision one.
Step 1: Select the Appropriate Slot
Look at the knife and decide whether it needs restoring or just a touch-up. A knife that cuts poorly but is not damaged usually needs only the fine or maintenance slot. A knife that has gone properly dull may need the coarse slot first, followed by the fine one.
Stabilize the sharpener, grip its handle securely with your fingers behind the guard, and hold the knife level. Tilting the blade through a carbide slot can gouge the edge and turn a quick touch-up into a repair, so keep the blade square to the slot.
Step 2: Draw the Blade from Heel to Tip
Place the heel of the blade in the slot and pull the knife toward you, following the curve of the edge so the whole length meets the abrasive by the time the tip leaves the slot. Use gentle pressure. Let the abrasive do the work, and do not saw the knife back and forth.
This applies to draw-through designs. Some rolling diamond-disk sharpeners work differently: the Pronto manual, for example, asks for centered, level, back-and-forth strokes with enough pressure to rotate its disks. That procedure does not transfer to fixed carbide slots, and a carbide slot's technique does not transfer to disks. Check which mechanism you own.
Because no pass count fits every blade, abrasive, and starting condition, follow your manual and check progress as you go. Make a few passes and check the edge rather than relying on a fixed count from a general guide.
Step 3: Refine the Edge with the Finishing Stage
Move to the fine slot and use the same heel-to-tip pull with lighter pressure. This stage smooths the rough edge the coarse abrasive leaves behind. Some models, such as the Pronto, describe a finer finishing stage for exactly this reason.
Stop when the edge feels even along its whole length. Extra passes past that point rarely help and can remove steel you did not need to lose. A leftover burr can make an edge seem sharp briefly, then fold over and leave the knife cutting poorly again. That is why the finishing stage is essential after coarse work.
Tip. If the knife is only slightly dull, start at the fine slot. You can always go back to the coarse one, but you cannot put steel back.
How to Use an Electric Knife Sharpener
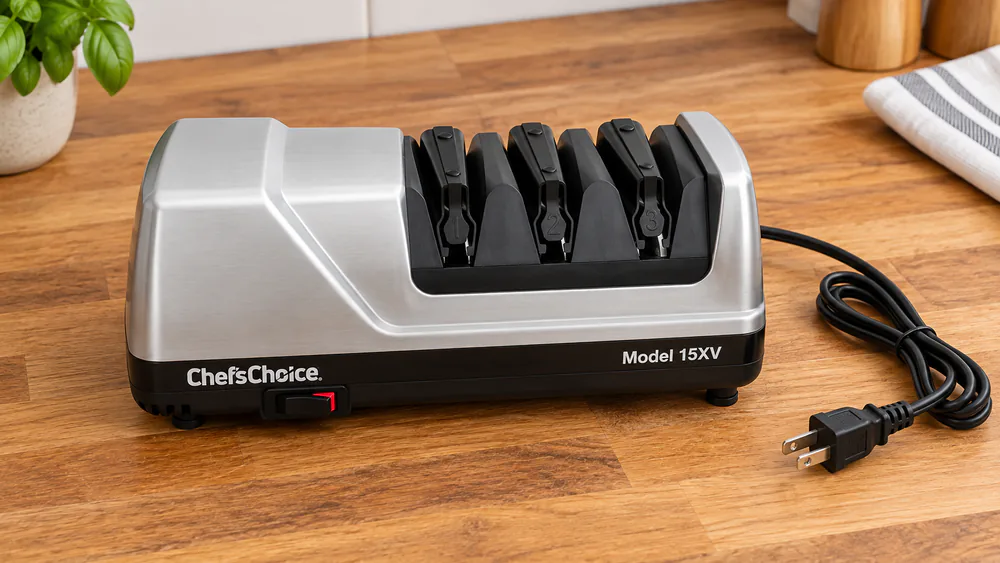
An electric sharpener holds the angle for you and adds abrasive stages that would take time by hand. We use the Chef'sChoice Model 15 as the worked example here, because its instructions are clear and detailed. Treat it as an illustration of the method, not a recommendation, and follow your own model's manual.
Step 1: Select the Correct Stage and Guide
Set the sharpener on a stable counter, make sure it is unplugged while you handle the blade path, and start with a clean knife. Guided stages move from abrasive sharpening to polishing disks, and paired slots address opposite sides of the edge.
Pick the stage by the knife's condition. Initial edge conversion and later maintenance need different sequences. On the Model 15, touch-ups can start in the polishing stage, and extra pressure does not speed anything up.
If the knife is serrated, the Model 15 normally treats serrations in Stage 3. Other models handle serrated blades differently or not at all, so check the manual before you try it.
Step 2: Make Controlled Passes as Directed
Alternate between the two guides, which is how the machine reaches both sides of an ordinary double-bevel blade. Keep the knife in contact with the abrasive without twisting or pausing, and let the machine set the angle.
Pace matters. Model 15 initial sharpening calls for about 3-4 seconds per pull for a 5-inch blade. Slower is not better, because dwelling in one spot removes extra steel in that spot. Near the belly of the blade, lift the handle slightly as the instructions direct so the curve keeps meeting the abrasive.
Handle the tip with care. Pausing or lifting too far at the tip on a powered belt can round it off, so keep the motion continuous right through the end of each pull.
A guide helps, but it does not make the process foolproof. Small alignment errors still happen. On the Tormek T-1, for instance, blade movement within the guide can change the edge profile, and running a knife outside the guide can scuff the blade instead of keeping the intended alignment. The lesson carries over to any guided machine: keep the knife steady and in the slot.
Step 3: Complete the Finishing Stage
Finish in the polishing stage, using the same steady motion. This is where the edge settles into its final shape. Then unplug the machine before you clean anything.
Never immerse the appliance in water, and never run a finger along the edge to see whether it worked. Check with a cut instead, which we cover next.
Clean the Knife and Check the Edge
Sharpening leaves fine metal particles on the blade. Clean them off and test the edge before you decide whether to keep going.
Remove Sharpening Residue and Dry the Blade
Wash the blade with mild soap and water, then dry it completely before food preparation. Wipe from the spine toward the back of the blade, never along the edge. Wipe the sharpener's slots and surfaces according to the manual too, and unplug electric models before any cleaning.
Test Cutting Performance Before Making More Passes
A clean sheet of paper makes a good test. Slice into it. A clean cut means the edge is cutting well, while catching or tearing can reveal a dull or damaged section. A ripe tomato is a second test: the skin should part under the blade without pressure.
Check before you make more passes, not after. Overworking an edge is easier than fixing one. Also remember that a leftover burr can fool you for a moment, so test again after a few real cuts. If a section still catches, go back to the stage that fits the problem rather than repeating the coarse one.
How to Use a Whetstone
A whetstone gives you the most control, but it also demands the most skill. Abrasive stones shape and refine the edge, and you hold the geometry yourself. If your guided sharpener leaves you wanting a finer result, this is the next step. We keep this section short, since each stone's maker publishes its own detailed instructions.
Prepare the Stone and Match the Blade's Angle
Prepare the stone the way its maker specifies. Soaking and splash-and-go stones differ, and prolonged immersion can damage some stones, so do not guess a soak time from grit alone. Put the stone in a stable holder with room for your knuckles. Flatten it when wear has hollowed the surface.
No single angle suits every Western, Japanese, single-bevel, or asymmetric knife. Find your blade's actual geometry, then hold that angle steadily. Single-bevel and asymmetric knives need their own sequence that preserves their shape, not equal grinding on both faces.
Sharpen Both Sides and Refine the Edge
Work the full length of the edge at a consistent angle until you raise an even burr. Then turn to the other side and repeat. Refine the edge with a finer stone if you have one.
Remove the burr gently. Reduce your pressure and slide the burred side lightly against the stone. That step matters, because a leftover burr feels sharp for a moment and then folds over. When you finish, clean the stone and let it air-dry before storing it. Putting a wet stone away in cardboard encourages mold and deterioration.
How to Use a Honing Rod
Honing keeps a good edge in shape between sharpenings. It does not repair a dull one.
Understand How Honing Differs from Sharpening
Smooth steel rods mainly realign the edge, while ceramic and diamond rods abrade metal. The word honing alone does not tell you which mechanism your rod uses, so check what you own. Either way, a rod is maintenance. If honing no longer brings the knife back, it is time to sharpen. For a longer walkthrough, see how to use a honing rod.
Use Controlled Strokes at the Correct Angle
Rest the rod's tip on a stable wood or plastic board, hold it upright, and draw the knife down it from heel to tip while keeping the knife's angle steady. Use light, controlled strokes. Shun's honing-steel guide, for example, is set to 16 degrees for its intended blades, but that number belongs to those knives and not to all of them. Match the knife's approved angle and rod type.
Japanese knives differ in steel and geometry, and permission to hone one range does not establish compatibility for all.
After you finish, wipe the board and the blade. Metal residue can reach the board beneath a honing rod, so clean that surface before food prep.
Common Knife-Sharpening Mistakes and Fixes
Most sharpening problems come from a short list of habits.
Too Much Pressure, Incorrect Motion, or the Wrong Stage
Pressing hard does not speed up sharpening. Extra pressure can chew the edge on a carbide slot and does nothing useful on an electric model. Use gentle, even pressure and let the abrasive work.
Motion errors come next. Sawing in a draw-through slot, tilting the blade, twisting in an electric guide, and pausing on a powered belt all damage the edge. Pull steadily from heel to tip, or follow your model's stated motion if it uses a different mechanism.
The wrong stage is the third. Going straight to coarse for a small touch-up removes more steel than you need. Skipping the finishing stage after coarse work leaves a rough, burred edge. Match the stage to the knife's condition.
Warning. Do not use a pull-through or electric sharpener on a ceramic knife, a single-bevel blade, or a serrated knife unless the manual says that sharpener supports it. Guessing can ruin the edge.
A Knife That Still Cuts Poorly or Has a Damaged Edge
If the knife still cuts badly, work through the likely causes. Is a burr still on the edge? Did you finish in the fine stage? Was the stage you used the right one? A final gentle pass or a wash and a second paper test often settles it.
Restoring a damaged edge can leave deeper nicks showing even after cutting performance has already improved. Chips and broken tips can require repair rather than routine touch-up. Large chips and cracks may exceed what any home sharpener can do, so hand the knife to a sharpening service rather than grinding away more steel.
Keep Your Knife Sharp Between Sessions
Good habits stretch the time between sharpenings.
Decide When to Hone or Sharpen Again
Hone when the edge feels slightly off. Sharpen when cutting performance remains poor after suitable honing, including difficulty entering tomato skin. No weekly or monthly schedule suits every cook. Frequency depends on use, edge condition, and care, so let the knife's performance tell you.
Clean, Store, and Use the Knife with Care
Hand-wash the knife with gentle soap, dry it, and protect the edge in storage. Avoid loose contact with other utensils in a drawer. Cut on a blade-friendly board. Wood is an established option, while glass, stone, and metal surfaces should be avoided. Advice on plastic varies by knife maker and board material, so follow your knife's care guidance.
A clean, dry knife on a suitable board stays sharp longer, and every session after the first is easier.
Frequently Asked Questions
Do I have to use every slot on my sharpener?
No. Stage labels and required sequences differ by model, and not every session needs every slot. A modest touch-up usually needs only the maintenance stage, while a dull edge may need the coarse stage followed by the fine one. Your manual sets the sequence for your model.
How many passes does my sharpener need?
It depends on the model, the blade, the abrasive, and how dull the knife is. No count fits every case. Follow the manual, make a few passes, and check the edge on paper before you continue.
Can I sharpen serrated, ceramic, or Japanese knives with a pull-through or electric sharpener?
Only if the sharpener says it supports that blade. Some electric models, like the Chef'sChoice Model 15, treat serrations in a dedicated stage. Ceramic knives need a sharpener made for ceramic, and Kyocera, for one, identifies a dedicated electric diamond sharpener for its ceramic blades. Some Japanese knives have an approved matching pull-through, while single-bevel blades need a separate procedure.
When is a pull-through the wrong tool?
Skip it when the knife is chipped, has a broken tip, or has a single-bevel or ceramic blade. A pull-through is also a poor fit if you want a fine, polished edge, since fixed carbide slots can leave a ragged edge near the heel. A whetstone or a sharpening service is the better choice in those cases.
How often should I sharpen my knives?
When honing no longer restores cutting performance. If the knife struggles to enter tomato skin even after honing, sharpen it.
Read next
Ready to upgrade your kitchen?
Explore more kitchen guides and get practical tips for caring for your knives.