
Kitchen Appliances
How to Use an Instant Pot: From Setup to Steam Release

As an Amazon Associate we earn from qualifying purchases. We may earn a commission from links on this page, at no extra cost to you. Learn more.
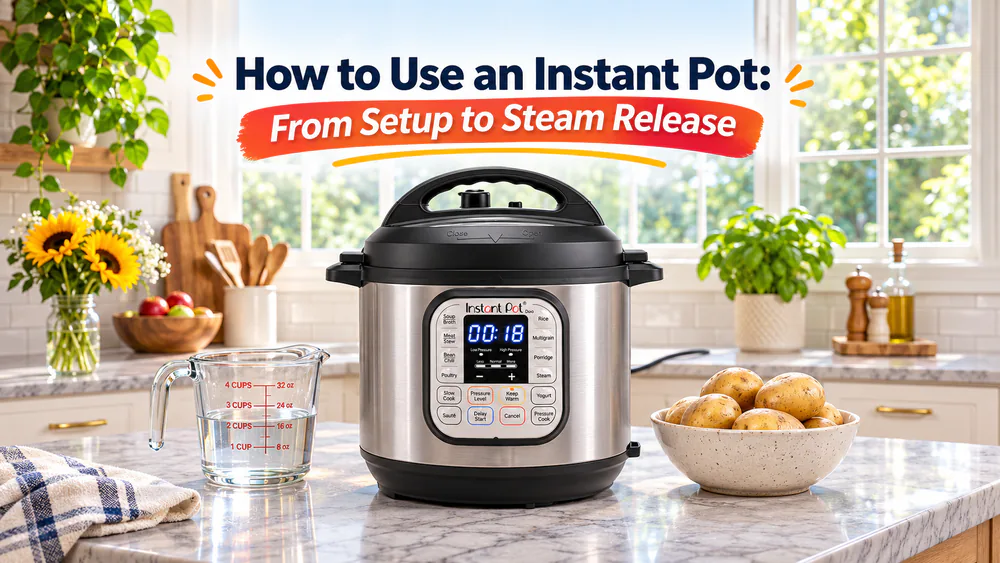
A new Instant Pot can feel overwhelming, with its locking lid, steam valve and row of buttons. Will it hiss? Will it explode? Will dinner ever get done? Take a breath. The cooker is far more forgiving than it looks. This guide walks you through the parts, a water-only practice run, and your first real meal, one calm step at a time. As a family kitchen, we cook three meals a day for seven, so we care most about steps that work on a busy Tuesday.
How an Instant Pot Works and What to Expect
An Instant Pot is a pressure cooker with a heating base, a removable inner pot, and a locking lid. When the lid is sealed, steam builds pressure inside, and that pressure cooks food much faster than a regular pot. Many models also saute, slow cook, and keep food warm. Rice, yogurt, and other programs depend on the model.
If you want a broader look at the technique, see how to use a pressure cooker. We cover the wider pressure cooker reviews and guides here on the site, and the brand line has its own page of Instant Pot articles.
Preheating, pressure cooking, and pressure release take separate time
The cooking time in a recipe covers only the middle phase of the process. Three phases happen in order:
- Preheating. The pot heats and builds pressure. The display often shows On while this happens.
- Pressure cooking. The timed countdown runs.
- Pressure release. Pressure drops, either slowly or by venting steam.
Cooking time alone is not total time. In our kitchen, the quiet wait before the countdown starts can feel much longer than the programmed cooking time suggests, so plan dinner with that in mind.
Set Up Your Instant Pot Before First Use
Before you cook anything, spend ten calm minutes getting to know the machine. Keep your own manual open beside you, because models differ.
Identify the inner pot, sealing ring, float valve, and steam release
Here is what you are looking at:
- Base. It supplies heat and holds the controls. Never pour food or water directly into it.
- Inner pot. The removable stainless pot that holds food and liquid.
- Lid and sealing ring. Together they hold pressure in. The ring is the silicone loop inside the lid.
- Float valve. The small pin that rises when the cooker has pressure.
- Steam release. The control that vents steam.
- Anti-block shield. It protects the steam passage under the lid.
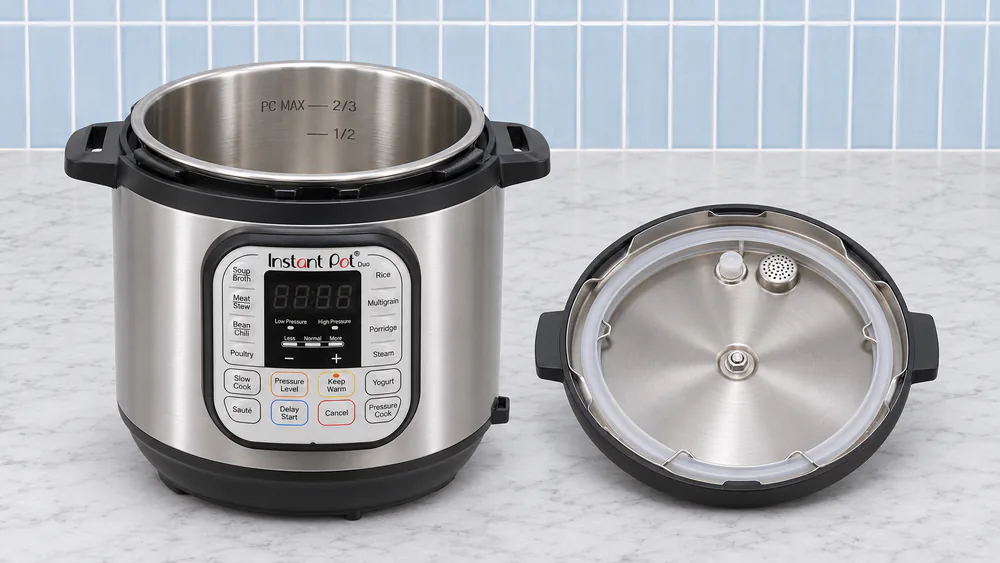
Check that the sealing ring sits correctly on its rack before you close the lid. A poorly seated ring can keep the pot from building pressure, even with an easy recipe.
Clean and check the parts before assembling the cooker
Wash and dry the inner pot, remove any packaging debris, and install the condensation collector if your cooker came with one. Empty and rinse the collector after cooking. Then set the inner pot into the base and give it a small turn so it sits flat.
Aligning and twisting the lid feels awkward at first. It becomes familiar with use, so do not worry if your first few tries are clumsy.
Tip. Choose a stable, open counter away from the stove and overhead cupboards. Steam rises straight up, so clear space above the cooker matters.
Check your model's liquid requirements and fill limits
Pressure cooking needs thin, water-based liquid. The minimum depends on your model and size. Current Duo guidance gives 1 cup for a 3-quart cooker, 1 1/2 cups for a 6-quart, and 2 cups for an 8-quart. A recipe written for a different cooker may call for less, so use the minimum in your own manual.
Fill limits matter just as much. Do not let the combined food and liquid pass the PC MAX 2/3 line. For foods that expand, such as rice and dried beans, stay at or below the 1/2 line.
Learn the Instant Pot Buttons You Need First
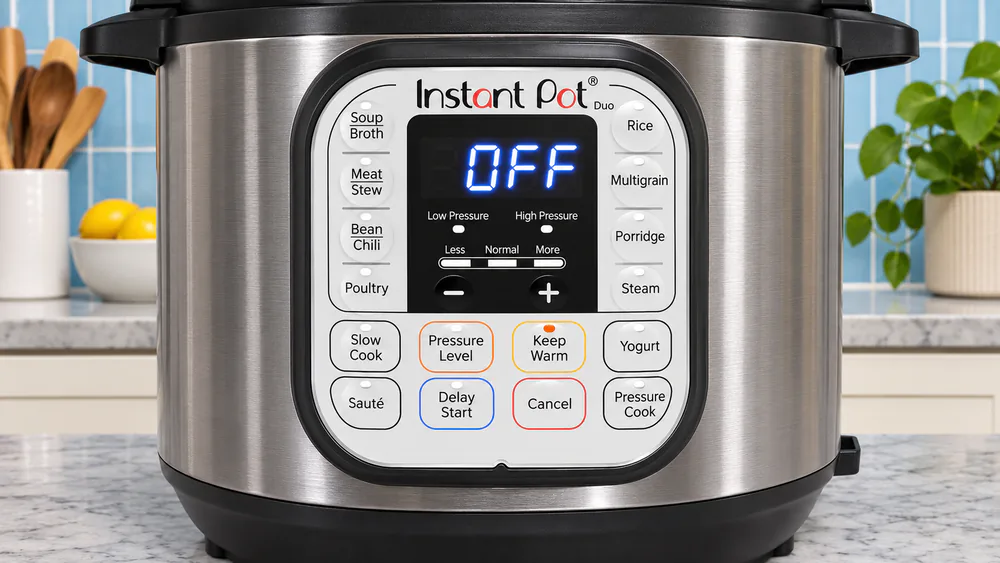
Do not try to learn every button. A handful cover most weeknight cooking.
Pressure Cook or Manual, pressure level, and cooking time
Pressure Cook (or Manual on some models) lets you set the cook time from your recipe. Controls may be buttons or a dial. Some cookers start by themselves, and others need you to press Start. Check the pressure setting each time instead of assuming the last one is still right.
You will see preset buttons for foods like rice or soup. We find them unnecessary for many everyday recipes once you enter pressure and time yourself. That makes the controls simpler to learn, since one button handles most of the setup.
Sauté, Cancel, and Keep Warm
Sauté browns food or reduces liquid with the pressure lid off. After browning, add liquid and scrape up the browned bits from the bottom. This is called deglazing, and it helps prevent a Burn message later.
Cancel stops the program you chose. It does not release pressure, so never treat Cancel as a sign that the lid is safe to open.
Keep Warm may switch on when cooking ends. Its display counts upward, so it is not another cooking countdown.
How controls and sealing mechanisms vary by model
Newer lids, older lids, and combined lids all work a little differently. Some use a separate steam release handle. Others use a switch or a combined design. Some have a ring you can remove, and some have a permanently attached ring. Your manual wins whenever it differs from a general guide like this one.
Run the Instant Pot Water Test
The water test is a practice run with no food. It checks that the cooker seals and lets you rehearse the buttons and the release. A water-only run makes the controls easier to learn without risking dinner.
Follow your model's initial-test instructions
Water amount, program, and time differ between models. One manufacturer example uses 3 cups of water, Pressure Cook or Manual for 5 minutes, then quick release. Treat that as an example only. An older Duo Plus manual calls for a short Steam cycle instead. Use the exact steps in your own manual.
- Place the inner pot in the base and add the water your manual specifies.
- Check that the sealing ring is seated, then close and lock the lid.
- Set the steam release to the sealing position.
- Choose the program and time from your manual, and press Start if your model needs it.
Watch what happens before and during the countdown
First the display may show On while the pot heats and builds pressure. That is normal. A little hissing during buildup can be normal too. Then the float valve rises and the countdown begins.
If steam keeps leaking around the rim, stop and check the seal. We cover that in the troubleshooting section below.
Finish the test and open the lid safely
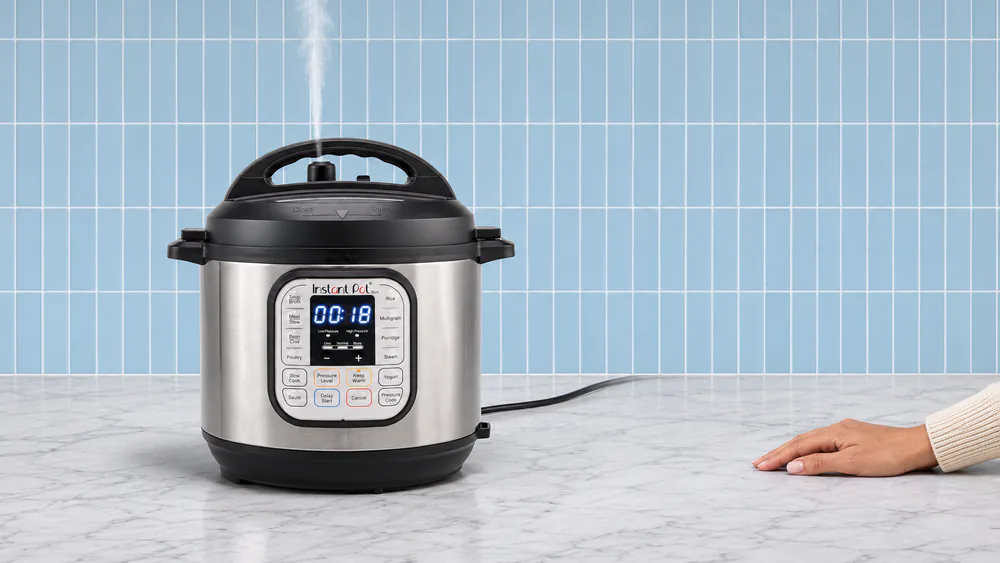
When the timer ends, release pressure the way your manual describes. For the water test, that is often a quick release. Keep your hands and face away from the steam outlet.
Warning. Wait until the float valve drops and the lid turns freely. If the float is up or the lid resists, do not force it. Cancel and elapsed time do not prove the pot is depressurized. Also keep the steam outlet and float valve clear, and never put a towel over them.
Natural Release vs. Quick Release
Release is the third phase of cooking, and it affects both safety and texture. Choosing the right method matters.
What natural release means
With natural release, you leave the cooker sealed while it cools and pressure falls on its own. Food keeps cooking during the wait, and delicate vegetables can turn softer. Thick, starchy, and expanding foods need this method.
What quick release means
With quick release, you open the designated steam release control and the steam escapes. It sends steam upward, so keep skin clear and leave space overhead. Never cover the outlet.
Follow the recipe and model instructions when choosing a method
Do not quick-release thick, oily, fatty, high-starch, or expanding foods. Chili, pasta, beans, and grains are examples. When in doubt, follow your recipe and your manual.
| Method | What happens | Recipe-directed use | Model-specific cautions |
|---|---|---|---|
| Natural release | Cooker stays sealed while pressure falls through cooling | Thick, expanding, and starchy foods require this approach; follow the recipe and manual | Wait for full depressurization; elapsed time alone does not prove safety |
| Quick release | Designated control vents steam | Water test when specified; suitable quick-cooking foods when permitted | Control varies; keep skin clear and never cover the outlet |
Cook Your First Meal in the Instant Pot
Rice, eggs, and potatoes are friendly first recipes. Pick a complete pressure-cooker recipe that lists the liquid, pressure level, time, and release method. Cooking rice while you work on the rest of dinner frees your attention for other pans, which is why it is a favorite in our house.
Step 1: Choose a beginner recipe
Pick a recipe written for a pressure cooker, not a stovetop recipe you hope will work. Read it through once before you start.
Step 2: Add ingredients and the specified liquid
Put everything in the inner pot, never in the base. Add at least the liquid your model requires, and stay below the fill lines. If you are cooking eggs or potatoes, a trivet keeps them above the water instead of against the pot bottom.
Note. Add starch-based thickeners after pressure cooking. Flour or starch on the bottom can interfere with heat transfer and cause overheating.
Step 3: Close the lid and set the steam release correctly
Check the sealing ring, then align, twist, and lock the lid. Set the steam release to the sealing position your model uses.
Step 4: Select pressure and cooking time
Choose Pressure Cook or Manual, confirm the pressure level, and enter the recipe's time. Press Start if your model asks for it.
Step 5: Wait through preheating and pressure cooking
Expect a quiet stretch while the pot builds pressure. Do not open or move the cooker under pressure. This is a good time to set the table or start a side dish.
Step 6: Release pressure as directed and open the lid
Release pressure the way the recipe says, natural or quick. Keep skin clear of escaping steam. Open the lid only after the float valve has dropped and the lid turns freely. If it resists, wait. See the release section above for the full details.
Troubleshoot Common Instant Pot Problems
Most problems have simple fixes. Stop the program and let the pressure release safely before you inspect anything.
The pot will not pressurize or the countdown has not started
First, check the sealing position and the ring. A torn or stretched ring needs replacing. If the display shows On, the cooker is probably still preheating. That wait is normal, and thick or cold contents make it longer.
Steam is leaking around the lid
Brief hissing during pressure buildup can be normal. Steady leaking around the rim is not. Stop the cooker, release pressure safely, and inspect the ring and lid alignment.
The display shows a Burn message
Too little thin liquid, thick sauces, and dairy can all trigger a Burn or overheating warning. Browned residue and thick tomato mixtures also scorch easily. Cancel, let pressure release safely, then check and clean the pot. Deglaze, correct the recipe, and restart.
The food needs more cooking
Open the pot safely and check the food against the recipe's doneness cues. There is no single extra time that suits every food, so follow your recipe's correction steps. Make sure there is enough liquid before you run another cycle.
Clean and Store Your Instant Pot
Unplug the cooker and let it cool before you clean it. Wipe the base with a damp cloth and never immerse it in water.
Clean the inner pot, lid, and removable parts
Duo guidance allows the inner pot and lid to go in the dishwasher, but other lid assemblies need their own care. Check which parts of your exact lid are dishwasher-safe before you wash. Empty and rinse the condensation collector too.
Care for the sealing ring and store the cooker
Remove the sealing ring for cleaning only if your model's instructions permit it. Some combined lids have a permanently attached ring. Savory smells can linger in a silicone ring and carry into a mild dish, so some families keep separate compatible rings for sweet and savory cooking.
Dry every part before storing. Closing up a damp cooker traps moisture around the gasket, so store it with the lid resting loosely for ventilation.
Easy Instant Pot Recipes to Try Next
Once your first meal works, try these:
- Plain rice, which teaches you natural release.
- Hard-boiled eggs on a trivet.
- Baked-style potatoes, also on a trivet.
- A simple soup that starts with a sauté step.
Always use a complete pressure-cooker recipe for each, with its liquid, pressure, time, and release method listed.
Frequently Asked Questions
Do I need to use the preset buttons?
No. Food-specific presets are unnecessary for many everyday recipes when you enter the pressure level and time yourself with Pressure Cook or Manual. Presets can still be handy for programs your model offers, so check your manual.
Can I cook frozen ingredients in an Instant Pot?
Yes, frozen ingredients can be pressure-cooked. Preheating takes longer, and the cooking time may also change. There is no universal conversion from fresh to frozen, so use a recipe written for the ingredient's frozen state and thickness.
Does doubling a recipe mean doubling the cooking time?
Not automatically. A larger load may take longer to heat, but the pressure-cook time does not simply double. Stay within the fill limits and use recipe-specific scaling.
Read next
Ready to upgrade your kitchen?
Explore more kitchen guides or join our newsletter for help with your next meal.