
Appliances
How to Use an Aroma Rice Cooker: Step-by-Step for Perfect Rice

As an Amazon Associate we earn from qualifying purchases. We may earn a commission from links on this page, at no extra cost to you. Learn more.

If you've just unboxed an Aroma and the cup, the tray, and the buttons look like more than rice needs, relax. Every model comes down to the same loop: measure, rinse, add water, press Cook, and let it rest. This guide explains those steps for both one-switch analog models and digital multicookers, including water lines, settings, and the fixes we use when a batch goes wrong.
Our test kitchen cooks on both styles, and we point out where they behave differently. If you're still choosing a machine, our rice cooker reviews cover the field, and our general guide to how to use a rice cooker covers the basics shared by every brand.
Know Your Aroma Rice Cooker: Parts and Controls
Before you cook, learn what each piece does. A few minutes here saves you from the most common first-batch mistakes.
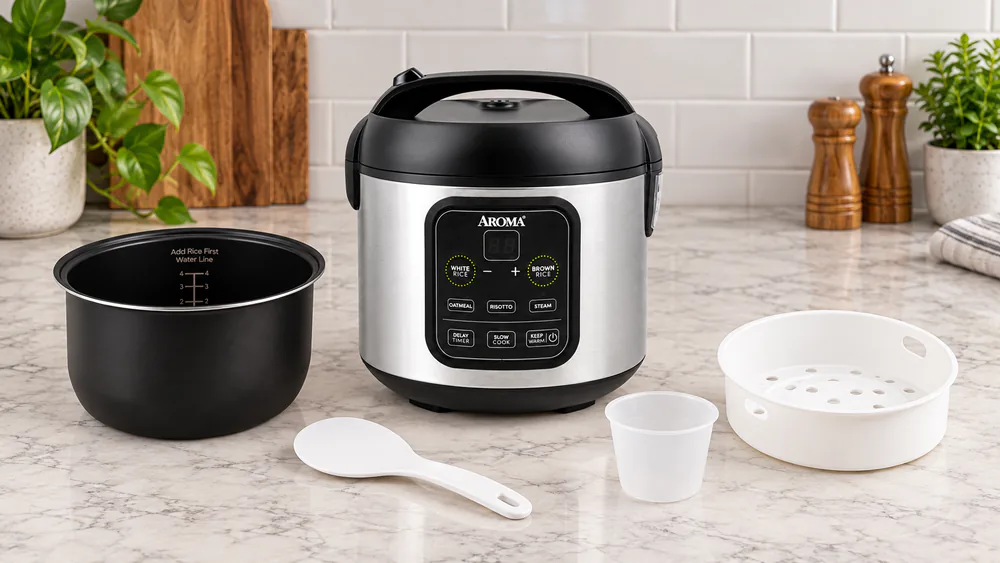
Inner pot, lid, steam tray, and measuring cup
The inner pot holds the rice and water, and it carries the water lines on its inside wall. The lid traps steam, and digital models add a condensation collector that catches drips. Digital multicookers also include a steam tray that sits in the pot, plus a spatula.
The measuring cup is the part new users get wrong. The included Aroma cup is about 3/4 U.S. cup (180 mL), so a standard cup measures more rice than the cooker's lines expect. A level Aroma cup of white rice weighs about 150 g.
Tip. Use the Aroma cup that came in the box, not a standard measuring cup. The water lines inside the pot are numbered for Aroma cups of rice, and mixing the two gives you soggy or scorched rice.
Analog (one-switch) vs digital multicooker models
The analog Select Stainless has a single Cook switch. It drops to Warm automatically when the rice is done, with no alert. It uses a 304 stainless pot, a glass lid, and a single hot plate, and it handles 2 to 6 cups of cooked rice per batch on the 6-cup model.
The digital multicooker has buttons for White Rice, Brown Rice, Oatmeal, Risotto, Steam, Slow Cook, Delay Timer, and Keep Warm. It beeps when the cycle ends and then switches to Keep Warm on its own, and a red light tells you so. The ARC-994SB holds 8 cups cooked (4 cups uncooked) and draws 700 watts.
In our kitchen the digital model gives plumper, more even grains. The analog cooker can leave grains slightly wet and hard, with some scorching at the bottom from hot spots. It works well once you learn its habits, and the sections below cover them.
Set Up and Test Your Cooker the First Time
With the parts identified, prepare the cooker for its first batch. Wash the inner pot, lid, cup, and paddle in warm soapy water with a non-abrasive sponge. Dry the outside of the pot before you set it in the base, because a wet pot bottom can leave the cooker uneven or noisy.
Seat the pot firmly and turn it slightly until it sits flat. Plug the cooker into a wall outlet, keep the steam vent clear, and leave a few inches of space around the unit.
Warning. Never immerse the base in water, and never run the cooker without the inner pot seated. Wipe the body with a damp cloth only.
How to Cook White Rice in an Aroma Rice Cooker: Step by Step
With the cooker set up, this is the loop that works on every Aroma. The steps below use the Aroma cup and the pot's own lines.
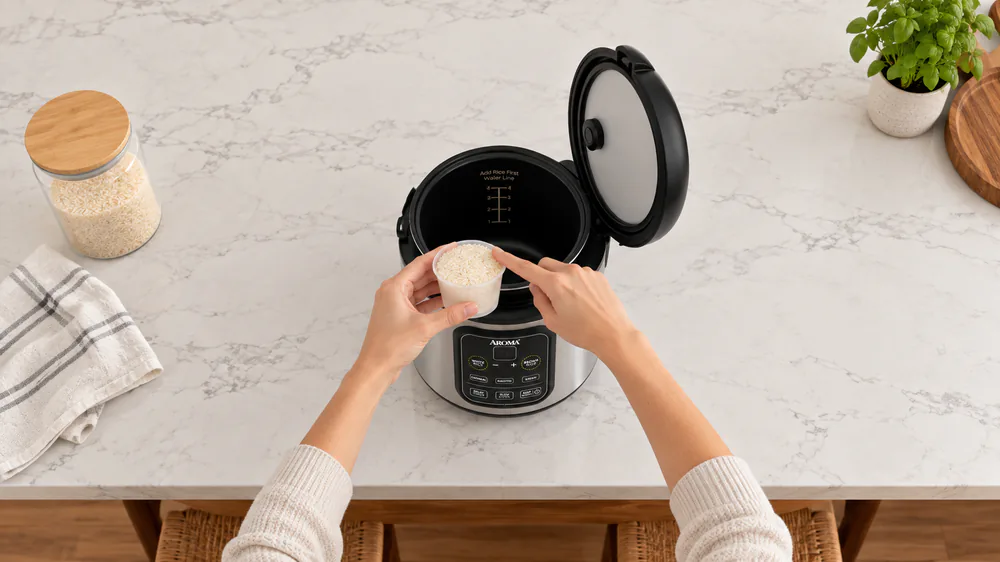
Step 1: Measure the rice with the Aroma cup
Scoop the rice and level the top with your finger. Use the same cup for every batch so your results stay repeatable. Two level cups feed two people comfortably; on the larger digital model, keep batches within its stated range of 2 to 8 cups cooked.
Step 2: Rinse the rice
Rinse the rice in a separate bowl or strainer, not in the nonstick pot, until the water runs clearer. Rinsing removes loose surface starch that would otherwise turn into a gluey film as the grains cook. Swirl with your fingers and pour off the cloudy water two or three times. Rinsing in the pot also wears the coating out sooner.
Step 3: Add the water
Move the rinsed rice into the inner pot and give it a gentle shake so it lies flat. Then fill water to the line matching the number of Aroma cups of rice. For two cups of rice, fill to line 2.
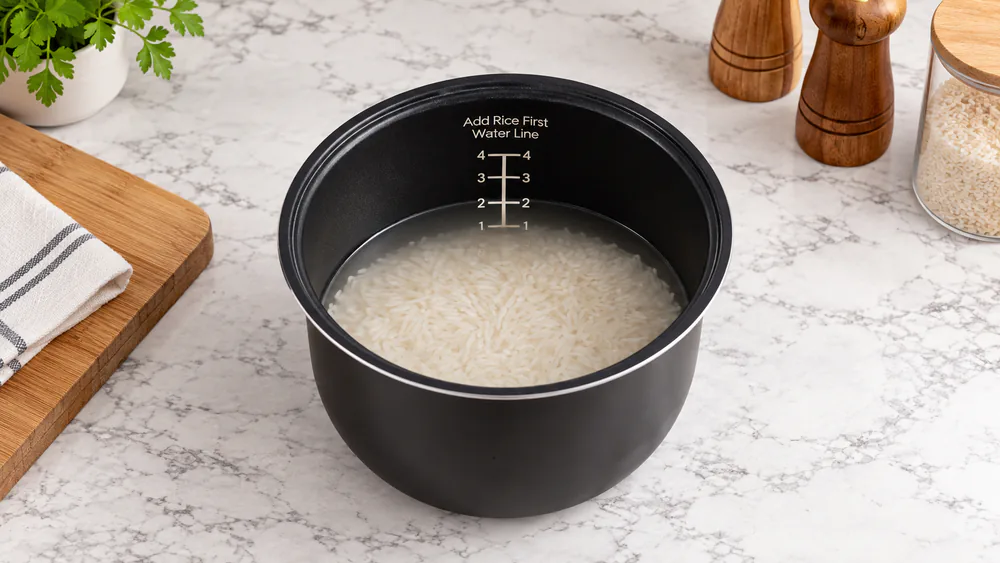
On the digital model, the white rice ratio is 1 scoop of rice to about 1 1/3 scoops of water. Flattening the rice surface by hand before closing the lid gives more even cooking.
Step 4: Close the lid and press Cook
Set the pot in the base, close the lid, and plug in the cord. On an analog model, push the Cook switch down. On a digital model, pick White Rice.
The digital white rice cycle takes about 30 minutes. The analog Select Stainless runs about 20 minutes, plus a 10 minute lid-on rest.
Warning. Open the lid away from your face. The steam that rushes out is hot enough to burn.
Step 5: Let the rice rest, then fluff
When the cooker switches to Keep Warm, leave the lid closed for 10 to 15 minutes. The grains finish absorbing moisture and firm up, so skipping this leaves the bottom layer wetter than the top. Then open the lid, fold the rice with the paddle from the edge toward the center, and serve.
Aroma Rice Cooker Rice-to-Water Ratios
Those steps use the pot's own lines because both the markings and rice-to-water ratios vary by Aroma model. The table gives the starting points we use.
| White rice, digital model | 1 scoop rice to about 1 1/3 scoops water, filled to the matching line |
|---|---|
| White rice, 1 scoop | about 236 mL (8 fl oz) water |
| White rice, 2 scoops | about 475 mL (16 fl oz) water |
| White rice, general rule of thumb | 1:1.5 by volume |
| Brown rice, general rule of thumb | 1:2 by volume, or use the Brown line on your pot |
| Analog Select Stainless | a ratio nearer 1:1 by scoop gives firmer grains |
The manual's 2-scoop line holds about 16 fl oz of water, which feels wet on the analog pot. If your rice comes out soft, drop the water slightly next time and write the adjustment on the lid of your storage bin.
Cooking Brown, Jasmine, Basmati, and Sushi Rice
Other grains follow the same loop with small changes. Brown rice needs more water and more time, so use the Brown Rice button on a digital model, or on an analog model expect a longer cycle and check the lines. We start brown rice near 1:2 and adjust from there.
Jasmine and basmati are lighter and finish with less water, so rinse them well and go a touch under the white-rice line. Sushi rice is short grain and sticky by design. Rinse it until the water runs nearly clear, then rest it with the lid closed.
Treat these as starting points and adjust by a fraction of a line at a time. For other grains, see our guide to cooking quinoa in a rice cooker.
Using the Steam Tray and Other Functions
Beyond rice, the digital model does more than most owners expect.
Steaming vegetables and fish
Set the steam tray on the inner pot and select Steam. Add water to the pot first, below the tray, and keep the vent clear. Cut vegetables to similar sizes so they cook together.
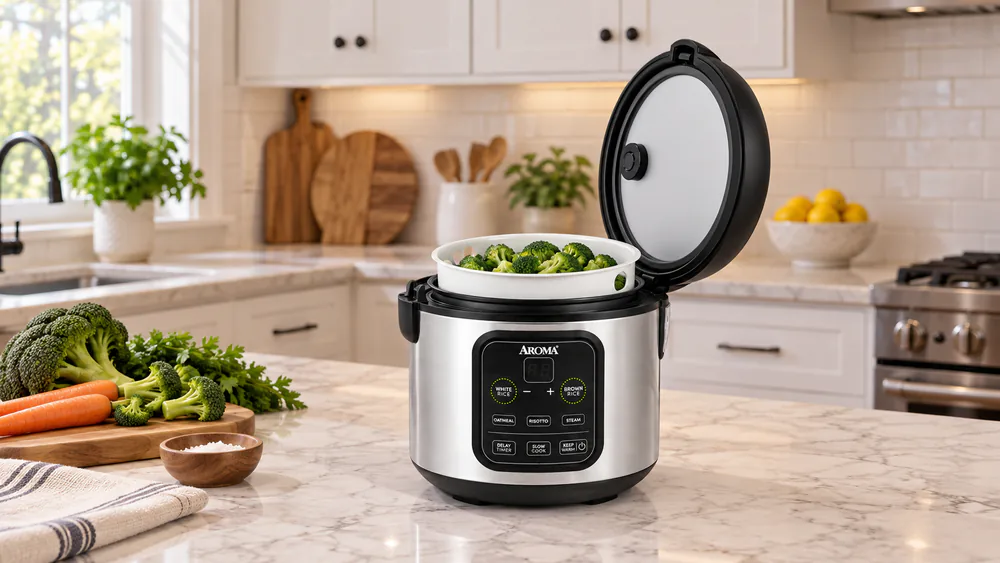
Check doneness with a fork and add a few minutes as needed.
Oatmeal, quinoa, and one-pot meals
The Oatmeal and Risotto buttons turn the cooker into a hands-off pot. Slow Cook works as a roughly 2-quart slow cooker. Add liquid, stir once, and let it do the rest.
Keep Warm and delay timer (digital models)
Keep Warm starts on its own after cooking. The delay timer runs up to 15 hours, so you can load the pot in the morning and have rice at dinner.
Warning. Keep Warm is for serving, not storage. Aroma publishes no hold-time limit, and USDA guidance on how long cooked rice is safe to hold is to refrigerate it within 2 hours. Spoon leftovers into a shallow container and chill them promptly.
The analog cooker gives no alert when it flips to Warm, so walking away dries out the top layer. The digital one beeps loudly when done, which makes it the safer choice if you cook while multitasking.
Cleaning and Maintenance
Once the meal is over, unplug the cooker and let it cool fully. Hand wash the inner pot, steam tray, cup, and spatula with warm soapy water and a non-abrasive sponge. Skip scouring pads, because they strip the nonstick coating. Hand washing is what the manual recommends, so check your own model's manual before trying a dishwasher.
Empty and wash the condensation collector after each use. Lid condensation on ceramic-style pots can drip onto the counter if the collector is full. Wipe the body with a damp cloth and keep the steam vent clear.
The nonstick coating is the first part to wear and can start flaking with regular use, even when you use the plastic paddle. Stainless pots hold up better but make it harder to keep rice from sticking. The steam tray and nonstick coating on the digital model are the wear points, so replace a pot that has visibly flaked.
Troubleshooting Common Problems
When a batch still goes wrong, these fixes cover the usual causes.
Rice too wet or mushy
Use less water next time and rinse the rice well. Make sure you used the Aroma cup and not a standard one. Let the finished batch rest uncovered a few minutes to release steam.
Rice too dry or hard
Add a little water and rerun the cycle, or microwave the rice with 2 tablespoons of water. Next time add slightly more water, and check that the lid closed fully.
Rice stuck to the bottom
Level the rice and avoid running Keep Warm for hours. A thin film of sticking on the nonstick pot is normal after long holds, and soaking the pot with warm water loosens it. Scorching on analog pots comes from hot spots.
Bubbling over, error codes, and power issues
Boil-over means too much water or a blocked vent. Measure again and clear the vent. If the unit won't power on, check the cord and the outlet. If rice cooks unevenly, seat the pot properly and level the rice.
Tips for Better Results
Once the fixes above are second nature, a few habits keep batches consistent.
- Keep a short note on the adjustment you made after each batch, so the next one starts from a known result.
- Change only one thing at a time, either the water or the rice amount, so you can tell what helped.
- Use a plastic or wooden paddle, which protects the nonstick coating.
Frequently Asked Questions
Beyond the basic steps, these questions come up once you've cooked a few batches.
Can I cook brown rice in the analog model?
Yes, but it has no Brown Rice button. Use the 1:2 rule of thumb or the Brown line on your pot, expect a longer cycle, and adjust by a fraction of a line on the next batch. Official brown rice tables were not available to us.
Why does my analog cooker pop to Warm early?
On analog stainless models the switch can fail to stay down when the pot bottom warps slightly and drifts from the magnetic switch. Nudging the lever or reseating the pot is the first fix.
How much cooked rice does one Aroma cup make?
Roughly double. The digital ARC-994SB is rated for 4 cups uncooked and 8 cups cooked, so each Aroma cup of dry rice fills about two cups of the pot.
Do the water lines match on bigger Aroma models?
Not necessarily. Line markings differ by model, so follow the numbers inside your own pot rather than a chart written for a different size.
Conclusion
Start with the pot's lines, change one thing per batch, and keep a note of what worked. The cooker handles the rest.
Read next
Ready to upgrade your kitchen?
Browse our tested buying guides and find the right appliance for your counter.