
Kitchen Appliances
How to Use a Black and Decker Rice Cooker

As an Amazon Associate we earn from qualifying purchases. We may earn a commission from links on this page, at no extra cost to you. Learn more.
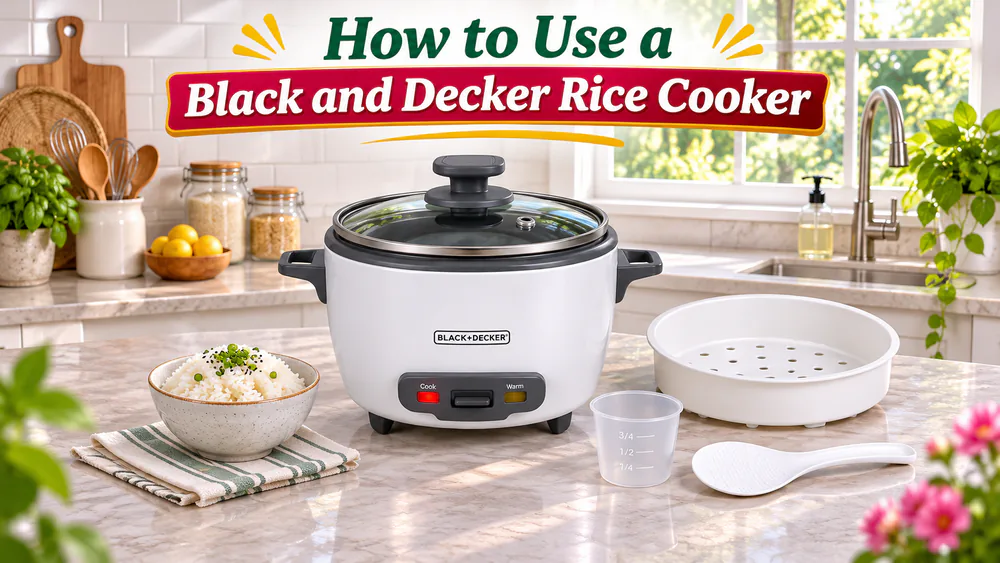
Using a Black and Decker rice cooker is a breeze: rinse the rice, add water, seat the bowl, close the lid, plug it in, and press Cook. When the switch pops up, let the rice rest covered, then fluff and serve. Keep in mind that water amounts and times depend on your model. We use the simple Cook/Warm RC506 as our worked example here, so check your own manual if your cooker has digital controls.
If you cook for a full household, this is a handy machine to learn well. A cooker that runs itself frees up a burner and a pair of hands. The steps below follow the order we would work through at the counter. If you are still comparing machines, our rice cooker reviews cover the wider field.
Before You Start: Check Your Model and Measuring Cup
Take two minutes before the first batch to learn what you are holding. Most mistakes with this cooker come from skipping this step, not from the cooker itself.
Identify the controls and included accessories
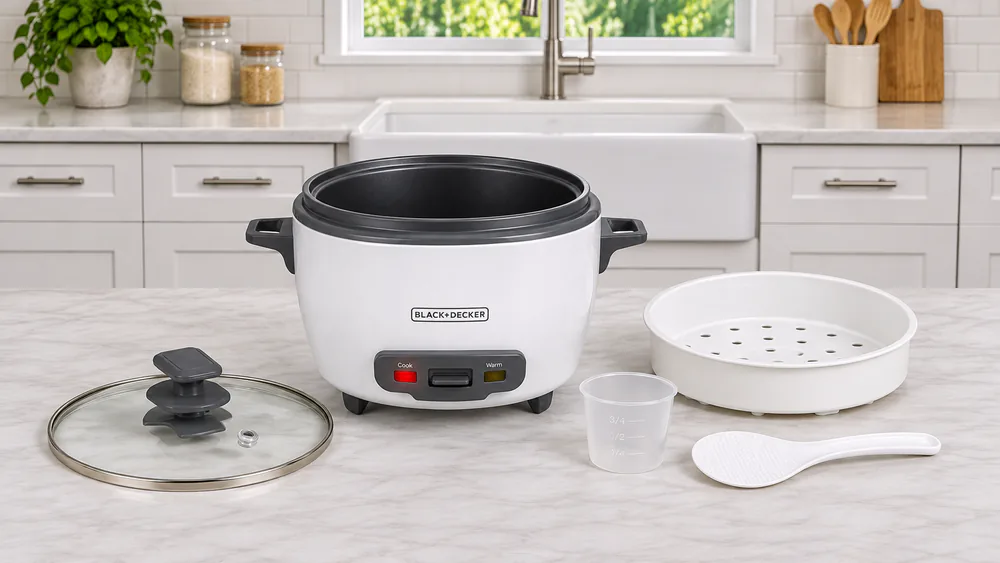
The RC506 has one Cook/Warm switch, a removable nonstick bowl, a vented glass lid, a lid hanger, a steaming basket, a rice measure, and a serving spoon. Separate indicator lights show whether the cooker is cooking or warming. It runs on 300W at 120V, and the label on the base tells you the rating for your region.
The controls are simple, and that helps. There are no separate rice menus to learn, so the work is all in the measuring. Wash the removable parts before the first use, and set the cooker on a stable, heat-resistant surface with clear space overhead. The short power cord means you need a counter spot near an outlet.
Understand rice-cooker cups and cooked-rice capacity
The supplied rice measure is not a standard US cup. One measure equals 3/4 of a standard cup, so a recipe written in standard cups will not match it. The cooker holds a maximum of 3 supplied rice measures of dry rice, not three kitchen cups.
The nominal cooked capacity is up to 6 cups, but cooked yield varies with the type of rice. The white-rice chart tops out at 5.3 standard cups, so do not plan a six-cup batch every time. The compact body suits smaller batches well, and it is easy to tuck away in a cabinet. Measure the actual unit before you squeeze it into a tight spot, since published dimensions vary.
Note. A different Black and Decker model may use different cups, water lines, and times. This guide's numbers are for the RC506 only. Never apply them to a digital model without checking its manual.
How to Cook Rice in a Black and Decker Rice Cooker
Here is the full sequence. It is short, and it works the same way every time.
Step 1: Measure and rinse the rice
Level off the dry rice in the supplied measure and tip it into a bowl or fine strainer. Rinse it under cool water, swishing with your hand, until the water runs mostly clear. Drain it well.
Rinsing is worth the extra minute. It removes surface starch, and rinsing plus adjusting the water for the rice variety improves texture and helps the grains cook evenly. It also cuts down on the starchy foam that can push out of the vent and leave a sticky film on the cooker and the counter.
Step 2: Add rice and the correct amount of water
Put the rinsed rice in the removable bowl first, then add water. For white rice, you fill to the numbered line that matches the number of rice measures you added. Add 1 measure of rice, fill to line 1. Add 2, fill to line 2. The water line is the final level with the rice already in the pot, not a separate cup of water.
Level the rice with a spoon so it sits flat. Wipe any water or grains off the outside of the bowl before it goes into the cooker.
Step 3: Seat the bowl, close the lid and start cooking
Lower the bowl into the base and turn it slightly until it sits flat. Set the glass lid in place, plug in the cooker, and press the switch down to Cook. The Warm light comes on when you plug in, and the Cook light takes over once you press the switch. Never force the switch down. If it will not stay on Cook, recheck that the bowl is seated and the lid is on.
Keep children away from the vent while the cooker runs, because the steam is hot, and handle the lid yourself.
Step 4: Let the cooking cycle finish and the rice rest
When the rice finishes, the switch rises automatically to Warm. Do not lift the lid right away. Let the rice rest covered on Warm for 15 minutes. That rest lets the moisture settle through the pot, so the top is not wet and the bottom is not dry.
Step 5: Fluff, serve and switch off as instructed
Fluff the rice with the supplied spoon. Use plastic or wood instead of metal, since metal can scratch the nonstick coating. Serve what you need, then unplug the cooker when you are done. Leaving it on Warm for long stretches dries small portions and can form a crust on the bottom, so we serve soon and do not use Warm as storage.
How Much Rice and Water Should You Add?
Accurate measuring makes the difference here. The right amount of water depends on the rice type and the batch size.
Follow the measuring method in your model's manual
For the RC506, the manual method works from dry rice measures, not from cooked-cup marks. Some guides online describe a one-size 1:2 rice-to-water ratio. That does not match this cooker's chart, so we follow the manual's lines and do not import a universal ratio.
| Row | White rice | Brown rice |
|---|---|---|
| Dry measure | Supplied 3/4-cup measure | Same measure |
| 1 measure | Fill rice plus water to line 1 | Add 1.5 standard cups water |
| 2 measures | Fill rice plus water to line 2 | Add 3 standard cups water |
| 3 measures | Fill rice plus water to line 3 | Not charted |
| Cook time, 1 measure | About 19-24 minutes | About 26-31 minutes |
| Cook time, 2 measures | About 21-26 minutes | About 28-33 minutes |
| Covered rest | 15 minutes on Warm | 15 minutes on Warm |
This table covers the RC506 only. If you want three measures of brown rice, the chart does not cover it, so we would not guess.
Adjust for white rice and brown rice
White rice uses the numbered lines inside the bowl. Brown rice works differently: you add a set amount of standard cups of water for each rice measure, so you need a regular measuring cup for brown rice. That is an easy detail to miss, and it is why a brown batch sometimes turns out wet when someone fills to the line out of habit.
If the rice comes out a little firm or soft, adjust the water by a small amount on the next batch, not by a lot. Small changes help you find the right water amount for your rice.
How Long Does the Rice Take to Cook?
The cooker has no timer, because the switch decides when the rice is done. For white rice, plan on about 19-24 minutes for 1 measure, 21-26 minutes for 2 measures, and 23-28 minutes for 3 measures. Brown rice runs longer: about 26-31 minutes for 1 measure and 28-33 minutes for 2.
Treat those as ranges, not promises. Rice type and batch size shift the time, and the covered rest of 15 minutes comes on top. A general 20 to 30 minute estimate is fair for white rice, but add the rest when you plan dinner, so the rice is ready when the rest of the meal is.
How to Use the Steaming Basket
The basket turns the cooker into a small steamer, which is handy on busy nights when the stove is already full.
Steam food separately
Pour water into the bowl, keeping the level below the basket so the food sits above the water, not in it. Set the basket in, add the food, cover, and press Cook. The setup instructions call for 3/4 cup of water, while the vegetable chart in the manual lists 1 to 1.5 cups. Those amounts differ, so use the instructions for the specific food in the manual that came with your cooker.
Start checking for doneness at about 5 minutes. Steaming does not follow the rice cycle, so we watch the cooker and stop it by hand when the food is tender.
Steam vegetables while rice cooks, if your model allows it
The RC506 can steam food above cooking rice, which saves a pot. There is no verified combined load or timing schedule, so keep it conditional. Add only a modest amount of vegetables, make sure the basket fits without crowding the lid, and check your manual first. Dense vegetables may need longer than the rice, so cut them small.
How to Clean the Cooker After Use
Easy cleanup makes a kitchen gadget more convenient to use regularly. Here, the removable nonstick bowl keeps the effort low.
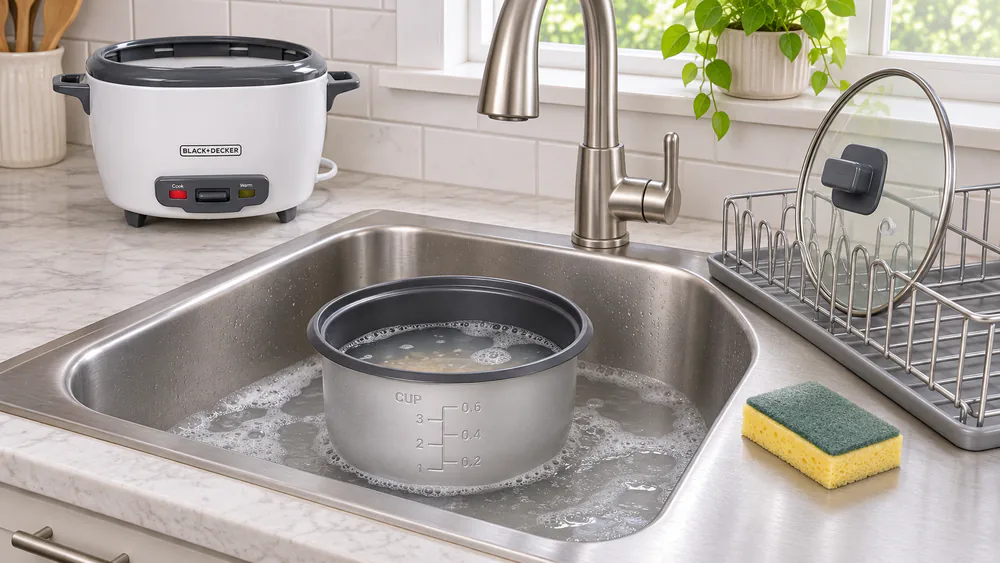
Unplug the cooker and let it cool first. Then soak any stuck rice in warm, soapy water. A warm-water soak loosens stuck rice and makes sink cleanup easier, so we fill the bowl and let it soak. Use a nonabrasive sponge, never steel wool. The bowl and tempered-glass lid are dishwasher safe, so you can run them through the top rack if you prefer.
Wipe the base with a damp cloth, and never put it in water. Dry every part thoroughly before you put it away. Rice can also stick underneath and form an overcooked crust despite rinsing, so give the bottom of the bowl a look each time.
Troubleshooting Common Rice-Cooker Problems
Most problems trace back to water, rinsing, or lid and bowl placement.
Rice is too hard, too wet or sticking to the bowl
If the kernels are hard, add a few tablespoons of water, press Cook again, and let the rice rest. If the rice is gummy, use less water next time. If the bottom sticks or browns, you may have left it on Warm too long, since keeping rice on Warm can brown the bottom layer. Serve sooner and soak the bowl afterward.
Water bubbles over or the cooker will not stay on Cook
Boiling over usually means the bowl is too full. Check the fill limits and remember that rice swells as it cooks. Starchy foam can escape through the vent, so rinse well and keep the lid seated.
If the switch will not stay down, go back through normal setup. Make sure the bowl is seated, the lid is on, and the cooker is plugged in. Never jam the lever, and never open the base to look inside. If it still will not hold, the 2-year limited warranty is the next stop, so keep your proof of purchase.
Frequently Asked Questions
What if I have lost the rice measuring cup?
Use a standard measuring cup filled to 3/4 of a cup, which equals one supplied rice measure. Then follow the water lines or brown-rice amounts as usual.
What does the Warm setting do?
Warm holds the rice after cooking. The switch rises to Warm on its own when the rice finishes. Long stretches dry small portions and can brown the bottom, so we serve soon and unplug when done.
Can I cook other grains, oatmeal or soup?
Yes, the RC506 handles steaming, soups, stews, and oatmeal. For grains missing from the chart, follow the package directions. Keep oatmeal liquid below half the bowl and stir. For soups and stews, use a separate timer and move the switch to Warm by hand when the food is ready, because liquid dishes do not follow the rice cycle.
Read next
Ready to upgrade your kitchen?
Explore more kitchen guides or join our newsletter for practical cooking advice.