
Kitchen Appliances
How to Use a Cuisinart Ice Cream Maker: Step-by-Step Guide

As an Amazon Associate we earn from qualifying purchases. We may earn a commission from links on this page, at no extra cost to you. Learn more.

Using a Cuisinart ice cream maker comes down to three things: a fully frozen bowl, a well-chilled base, and about 20 minutes of churning. In our test kitchen, where we batch-cook desserts the same way we prep a week of dinners, that simple sequence is exactly why these freezer-bowl machines earn their counter space.
The catch is that the order matters. Skip the overnight freeze or pour a warm base into the bowl, and you get soup instead of soft-serve. Get the timing right, and the machine does the rest almost on its own.
This guide walks through the whole process from the freezer bowl to the finished scoop: what to prep, how to assemble the machine, how to run it, and how to fix the problems that trip up most first-timers. We have run enough batches through these bowls to know where the small mistakes hide, so we will call them out as we go.
What You Need Before You Start
Before any churning happens, two things need a head start in cold storage: the freezer bowl and your ice cream base. Both take hours, not minutes, so the real work of making ice cream is deciding to make it the day before.
You will need the machine itself, its paddle and lid, a chilled base of your choosing, and any mix-ins you plan to fold in. That is a short list, and it is meant to be. The whole appeal of a freezer-bowl model is that there is very little to it.
Know Your Cuisinart Model and Parts
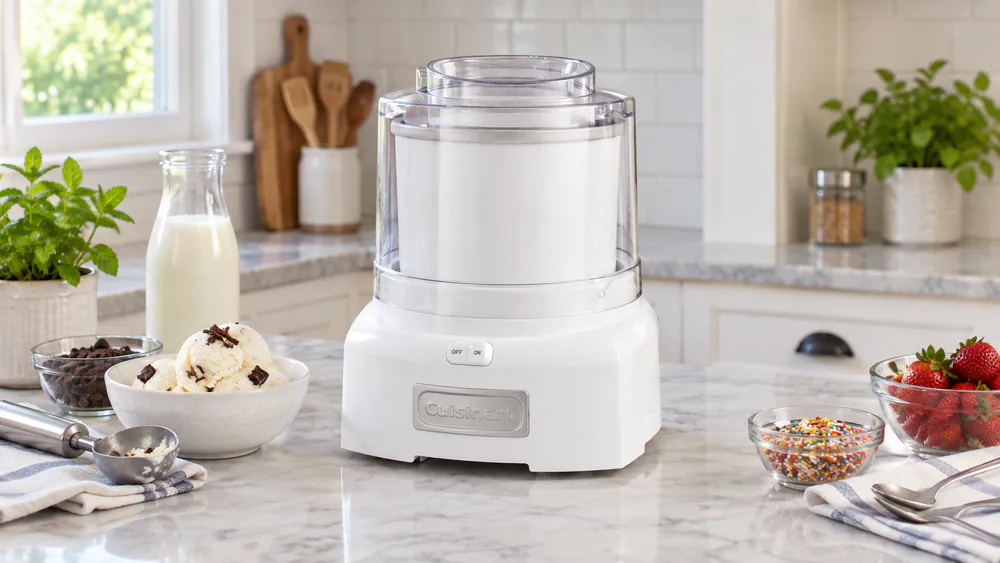
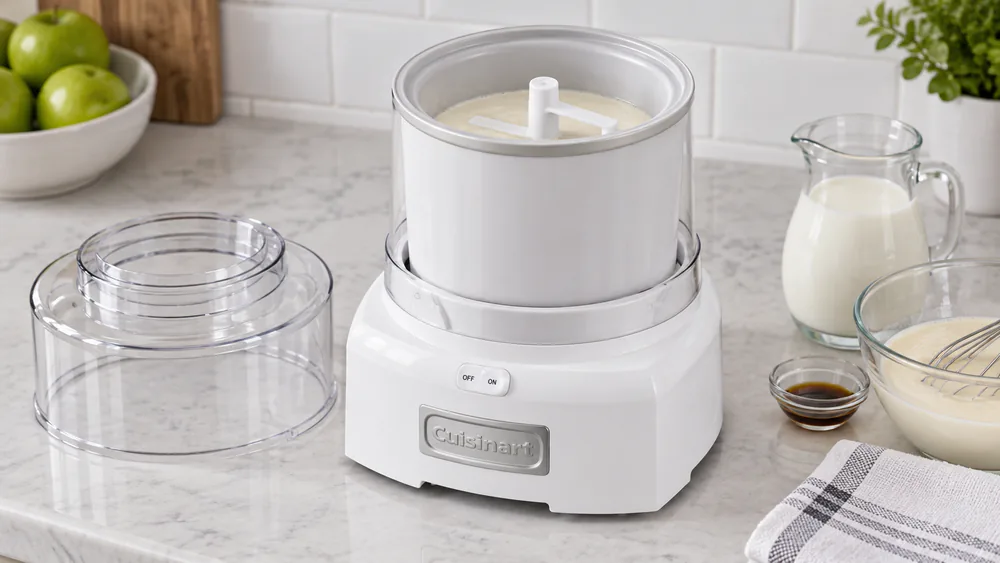
Most home Cuisinart machines, including the popular ICE-21, share the same basic anatomy: a double-insulated freezer bowl, a motorized paddle called the dasher, an easy-lock lid with a pour spout, and a simple on/off switch. The bowl holds the freezing liquid sealed inside its walls, the paddle scrapes and aerates the mixture, and the lid keeps everything contained while it runs.
That simplicity is a feature. With just a motor, a dasher, a freezable bowl, and a switch, there is very little to go wrong, and cleanup of the paddle and lid stays quick. The ICE-21 makes up to 1.5 quarts of ice cream, frozen yogurt, gelato, or sorbet per batch, which is a comfortable single-batch size for a small household.
Note. Model numbers vary, but the freezer-bowl method is the same across the ICE-21, ICE-22, and similar units. When a step depends on your exact model, the printed manual in the box is the final word.
Pre-Freezing the Freezer Bowl
This is the step people rush, and it is the one that decides everything. Pre-freeze the freezer bowl for 16 to 24 hours before you plan to churn. A full day is the safest bet, because a bowl that is even slightly under-frozen will not pull enough heat out of the base to set it.
There is a simple way to check. Pick the bowl up and shake it. When it is ready, you hear no liquid sloshing inside the walls. If you still hear a slosh, the freezing solution has not fully solidified, and the bowl needs more time.
Plan for where the bowl will live, too. It is bulky, and it takes up real freezer space overnight. In our kitchen the biggest planning hurdle is never the churning; it is remembering to clear a shelf a day ahead so the bowl can freeze solid.
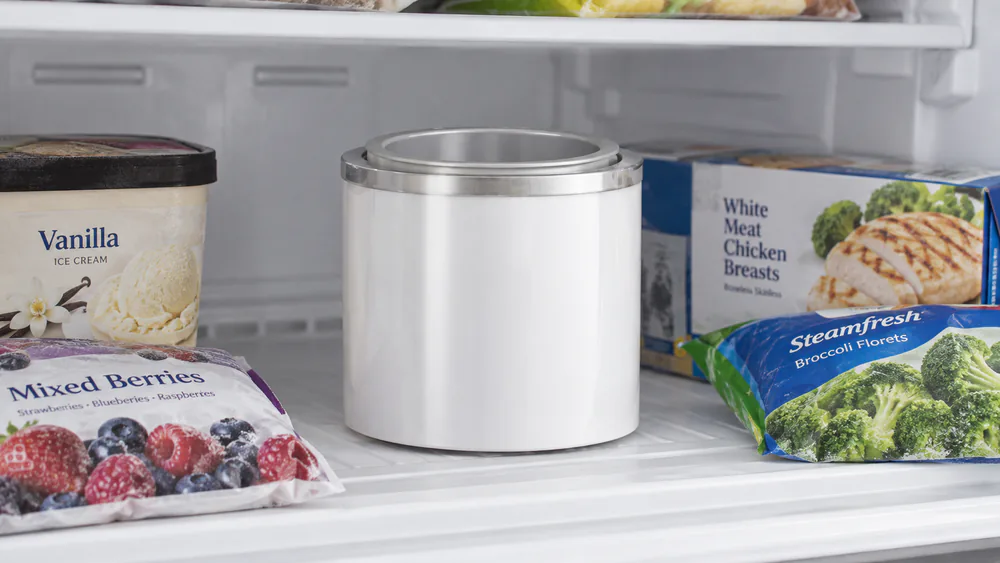
Tip. Keep the freezer bowl in the freezer between uses if you have room. Then it is always ready, and a spur-of-the-moment batch does not mean waiting until tomorrow.
How to Assemble the Cuisinart Ice Cream Maker
Assembly takes under a minute once the bowl is frozen. Work quickly here, because the bowl starts warming the moment it leaves the freezer, and every minute of standing around is freezing power you lose.
Set the freezer bowl onto the motor base. Drop the paddle into the center of the bowl so it sits on the base of the machine, not spinning freely. Then place the lid on top and turn it until the easy-lock tabs click into place. The lid has to lock before the machine will run, so make sure it seats fully.
Give the assembled machine a quick check: bowl on the base, paddle centered, lid locked, pour spout facing where you can reach it. Locking the lid before you start is also one of the small fixes for a machine that seems like it will not run, so confirm it now rather than mid-pour.
How to Prepare the Ice Cream Base
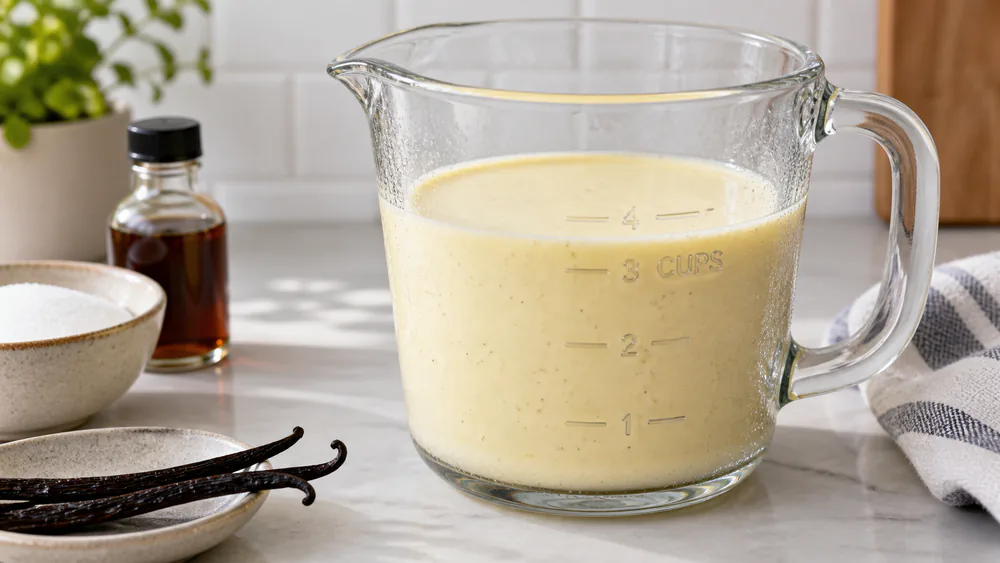
Your base is the mixture that becomes ice cream, and it needs to be cold before it ever touches the bowl. Chill the base at least 4 hours, or overnight, before churning. A warm or even room-temperature base wastes the bowl's freezing capacity and is the most common reason a batch never sets.
A classic vanilla base is a good first mix: whole milk, heavy cream, sugar, a pinch of salt, and vanilla, whisked until the sugar dissolves. The ratio of cream to milk matters more than any single ingredient. Lean too far toward milk, and the result freezes harder and icier; more cream gives you the smooth, aerated texture that makes homemade ice cream worth the effort.
Keep an eye on volume as well. Keep the liquid base to about 3 cups or less, which leaves room for the mixture to expand as it churns. Overfilling causes overflow as air works into the base and it grows in the bowl.
Warning. Do not fill past the fill line or push much beyond 3 cups of liquid base. As the ice cream churns it expands, and an overfilled bowl pushes the mixture up and out from under the lid.
How to Churn: Adding Ingredients and Running the Machine
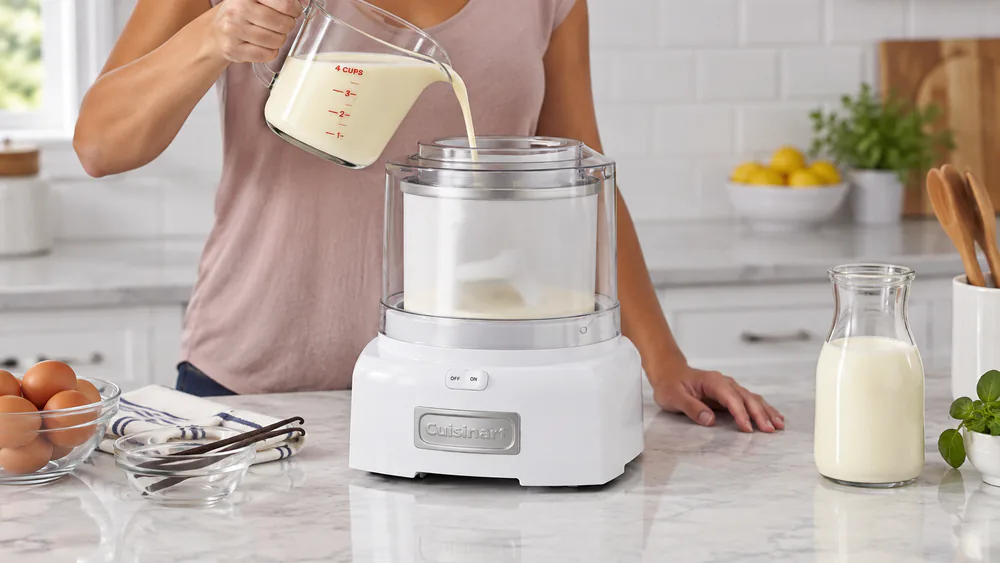
Here is the step that surprises people: turn the motor on before you pour the base in, not after. Start the paddle spinning first, then pour the chilled base through the spout in the lid. If you pour first and start second, the base can freeze to the bowl wall in a solid ring before the paddle ever moves it, and the machine strains against it.
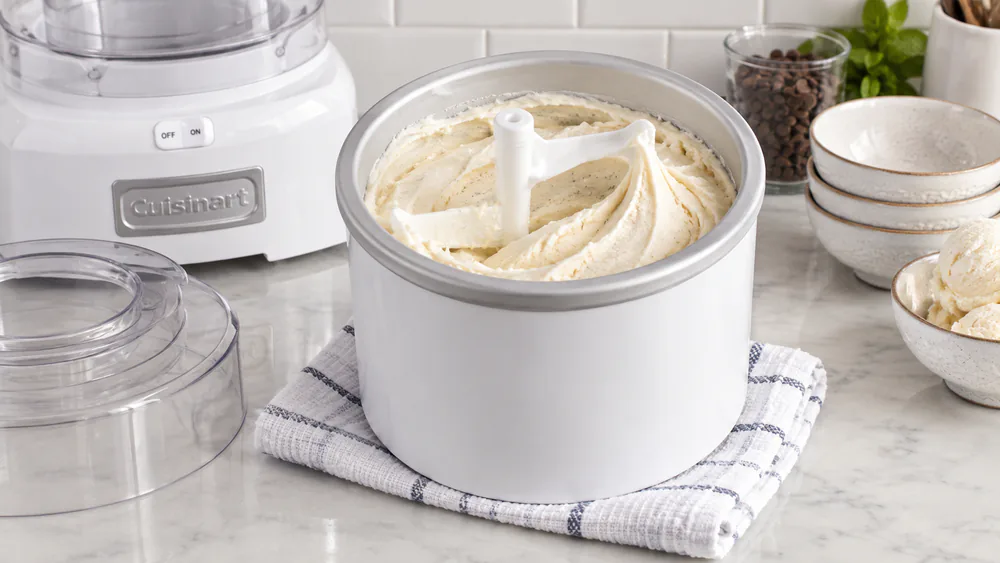
Once the base is in and the paddle is turning, the machine does the work. You will watch the mixture thicken from liquid to a soft, glossy swirl over the churn. There is no button to press and walk away from; you simply let it run and keep an eye on the texture.
When and How to Add Mix-Ins
Chocolate chips, cookie pieces, fruit, and nuts all go in near the end, not the beginning. Add mix-ins during the last 5 minutes of churning so they distribute evenly without sinking or getting pulverized by the paddle. Drop them in through the spout while the machine keeps running.
Size matters for anything you add. Keep the pieces small, roughly under half an inch, so they fold in cleanly and do not jam the paddle. This half-inch guide is a practical rule of thumb rather than a fixed spec, so err on the smaller side with hard mix-ins like frozen fruit or chocolate chunks.
Tip. Chop mix-ins small and, for chocolate, chill them first. Cold, small pieces stay distinct in the ice cream instead of melting into streaks or clumping at the bottom.
Churning Time and How to Tell When It's Ready
A Cuisinart freezer bowl churns to a soft-serve consistency in about 20 minutes. That is the number to plan around, but it is a guide, not a timer. There is no built-in timer on these machines, so you watch the texture rather than the clock and stop it yourself.
Ready looks like soft-serve straight from a shop: thick, smooth, holding a soft peak, but still too loose to scoop into a firm ball. When the mixture pulls away from the sides and the paddle leaves a clear trail, it is done churning. Running it much longer risks over-churning and working in too much air, so stop it once it reaches that soft-serve stage.
One thing to expect: the machine runs loud enough to notice during the full churn. It is not a quiet-kitchen appliance, so this is not the dessert to make while a baby naps in the next room.
Texture Tips and Hardening (Ripening) After Churning
Fresh out of the machine, the ice cream comes out at the soft-serve stage. If you like it that way, serve it right now, because it will never be softer or creamier than this moment. Many people are happiest eating it straight from the bowl.
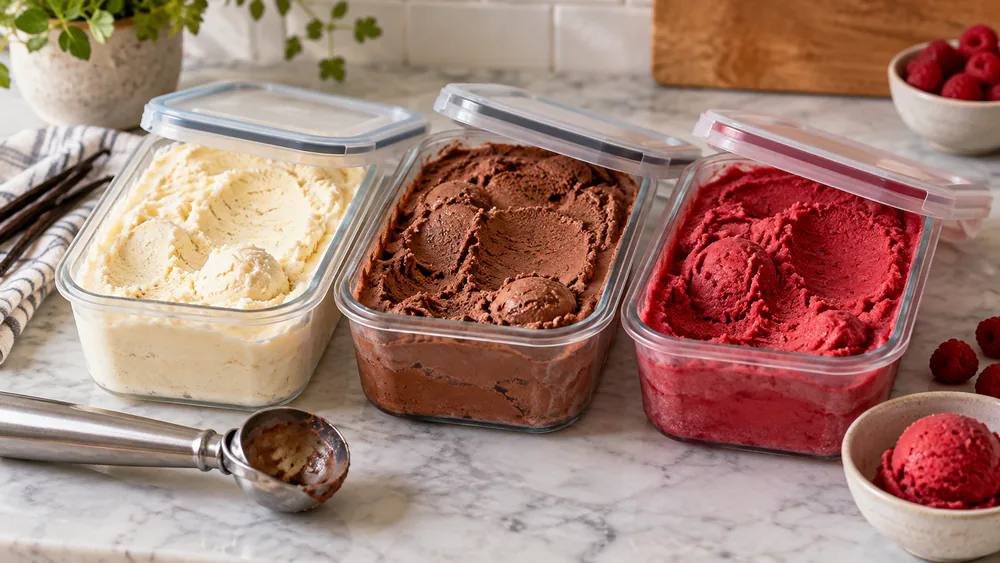
For firmer, scoopable ice cream, you need a second freeze that ice cream makers call ripening. Transfer the ice cream to a covered container and freeze it for 2 to 4 more hours. Press a piece of parchment or plastic wrap against the surface before you seal the lid to keep ice crystals from forming on top.
When the base was properly chilled, the payoff is real: the finished texture is smooth and nicely aerated, with no ice crystals. That clean, creamy result is the whole reason to churn at home instead of buying a tub, and it comes down almost entirely to how cold your base and bowl were when you started.
The base and bowl do the work before the machine ever turns on. Cold in, creamy out; that is the whole secret to a Cuisinart batch.
Easy Recipes to Try First
Your first few batches should be simple, so you learn the machine before you chase a complicated flavor. Start with a plain vanilla base, then branch out once you trust your timing.
- No-cook vanilla: whole milk, heavy cream, sugar, salt, and vanilla whisked cold. It is the fastest base and the best one for learning what soft-serve stage looks like.
- Chocolate: whisk cocoa powder and a little extra sugar into the vanilla base until fully dissolved before chilling.
- Fruit sorbet: pureed fruit, sugar, and a splash of lemon juice, with no dairy at all. A great option when you want something lighter.
- Frozen yogurt: swap much of the cream for whole-milk yogurt for a tangier, leaner result.
- Cookies and cream: the vanilla base with chopped cookies added in the last 5 minutes.
The machine handles ice cream, frozen yogurt, gelato, and sorbet with the same method, so once you have the churn down, the flavor is just a matter of what goes in the bowl.
Cleaning and Storing Your Cuisinart Ice Cream Maker
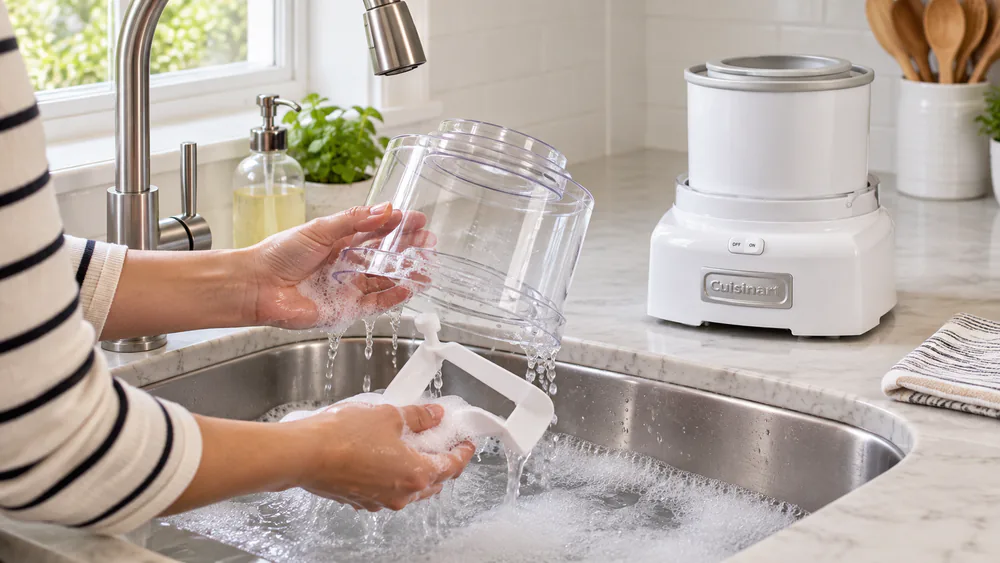
Cleanup is short, with one hard rule at the center of it. Never immerse the motor base in water. Wipe it down with a damp cloth instead, and keep it away from the sink entirely. Water inside the motor housing is how these machines die young.
Hand-wash the lid, paddle, and freezer bowl in warm, soapy water. Dishwasher safety varies by part and model, with some lids and paddles rated top-rack only, so check your model's manual before you put anything in the machine. When you are done, dry the freezer bowl completely before returning it to the freezer, because leftover moisture can freeze into a frost layer.
Be ready for the one genuinely awkward part. The frozen bowl is heavy and awkward to scrape clean, and cream sets along the edges the paddle never quite reaches. We wash the bowl promptly, before that residue freezes hard against the walls, which makes the job far easier. For model-specific operating, assembly, and cleaning steps, the official Cuisinart ice cream and yogurt maker manuals cover each unit against the manufacturer's own instructions.
Troubleshooting Common Problems
Most problems trace back to temperature, and most have quick fixes. Here is what goes wrong and how to steer around it.
- Ice cream stays soupy or will not freeze: the usual culprit is a bowl that was not fully frozen or a base that went in warm. Confirm the bowl passed the no-slosh shake test and that the base chilled at least 4 hours. A base heavy on milk instead of cream also sets poorly.
- It churns but stays too soft: that is normal at 20 minutes; it is soft-serve by design. Harden it in the freezer for 2 to 4 hours for scoopable texture.
- The motor stalls or stops: check for overfill or a jam from large mix-ins, and make sure the lid is locked. If the motor labored and stopped, let it cool for about 15 minutes before trying again.
- Overflow during churning: you started with too much base. Keep it to about 3 cups so there is room to expand.
- Icy, grainy texture: the base likely was not cold enough, or it churned too long. Chill thoroughly next time and stop at soft-serve stage.
Warning. If the motor strains or stalls, stop the machine. Do not keep forcing it, which can overheat the motor. Clear the jam, check the fill level, let it rest about 15 minutes, and restart.
Frequently Asked Questions
How long should the freezer bowl be frozen?
Freeze the bowl for 16 to 24 hours before churning, and a full day is the safest bet. To confirm it is ready, shake it: you should hear no liquid sloshing inside the walls. If you still hear liquid, it needs more time in the freezer.
How long does churning take?
About 20 minutes to reach a soft-serve consistency. There is no built-in timer, so watch the texture rather than the clock. Stop the machine once the mixture is thick, smooth, and holding a soft peak.
Why is my ice cream soft or not freezing?
Almost always a temperature problem. Make sure the bowl was fully frozen and passed the no-slosh test, and that the base chilled at least 4 hours first. A base with too much milk versus cream also struggles to set. Remember that soft-serve texture at 20 minutes is normal; freeze it 2 to 4 hours to firm up.
Can I use low-fat or non-dairy milk?
Yes, though texture changes. Higher fat gives the creamiest, smoothest result, so low-fat and non-dairy bases tend to freeze harder and a little icier. Non-dairy options like coconut or oat can work well, especially in sorbet-style recipes with added sugar to keep them scoopable.
Can I make frozen yogurt, sorbet, or soft-serve?
Yes. The same freezer-bowl method makes ice cream, frozen yogurt, gelato, and sorbet; only the base changes. What comes out of the machine is soft-serve consistency by default, so if you want it firmer, harden it in the freezer afterward.
Is the freezer bowl dishwasher safe?
It depends on your model. Dishwasher safety varies by part, and some lids and paddles are top-rack only, so check your model's manual first. Hand-washing the bowl, lid, and paddle in warm soapy water is the safe default. Never put the motor base in water; wipe it with a damp cloth.
Conclusion
Making ice cream in a Cuisinart machine is genuinely easy once you respect the two cold steps that happen before churning. Freeze the bowl a full day ahead, chill your base for at least 4 hours, and the 20-minute churn almost takes care of itself.
From there, it is all repetition and small tweaks: a little more cream for smoothness, mix-ins in the last 5 minutes, and a few hours of hardening when you want a firm scoop. Start with a plain vanilla base to learn the rhythm, keep the motor base out of the water, and you will be turning out creamy homemade batches every time.
Read next
Ready to churn your first batch?
Freeze the bowl tonight, chill a simple base, and you are one short churn away from creamy homemade ice cream.