
Kitchen Appliances
How to Use the Ninja Creami: A Step-by-Step Guide

As an Amazon Associate we earn from qualifying purchases. We may earn a commission from links on this page, at no extra cost to you. Learn more.
If you just unboxed your Ninja CREAMi and you are not sure which button to press first, you are in the right place. It looks a little intimidating on the counter, but the routine is simple once you learn it: build a base, freeze it solid, and let the machine shave it into ice cream. That is the whole idea, and everything below is just the detail.
We spun batch after batch through our test kitchen to write this guide, from plain vanilla to high-protein pints, so we could tell you exactly what to expect on the first try. The good news for beginners is that the machine does the hard part. Your job is mostly prep and patience.
We learned the machine by cycling the same few base families over and over, since texture only becomes predictable once you have repeated a base type many times. A plain dairy base of cream, milk, and sugar was the most forgiving: crumbly on the first spin, then smooth after a single re-spin. High-protein pints froze harder and came out powdery, usually needing a re-spin or two and a splash of milk. Fruit sorbet bases, with no fat to soften them, also read dry and took a re-spin, sometimes with a little liquid. The pattern held every time: fat buys forgiveness, so the richer the base, the easier the pint.
What Is the Ninja Creami (and What It Does)
The Ninja CREAMi is a countertop machine that turns a frozen block of base into ice cream, gelato, sorbet, and more. Instead of churning a chilled liquid the way an old-fashioned ice cream maker does, it works the opposite way. You freeze your base solid for a full day, then a spinning paddle shaves that frozen block into a fine, creamy texture. You can read a plain-language explainer of how the CREAMi works if you want the short version before you start.
The original NC300 series runs on an 800W motor and gives you 7 one-touch programs. Each pint holds 16 ounces, which is about two generous servings. It is a genuinely fun machine, and in our kitchen it earned its counter space fastest as a high-protein ice cream maker: a scoop of protein powder, some milk, and a program press gave us a dessert we actually wanted to eat.
It is worth setting one expectation early. This is a bulky appliance, standing around 17 inches tall, so it needs real cabinet or counter clearance. Measure your shelf before you commit to a permanent home for it.
Before You Start: What's in the Box and Setup
Parts and Accessories
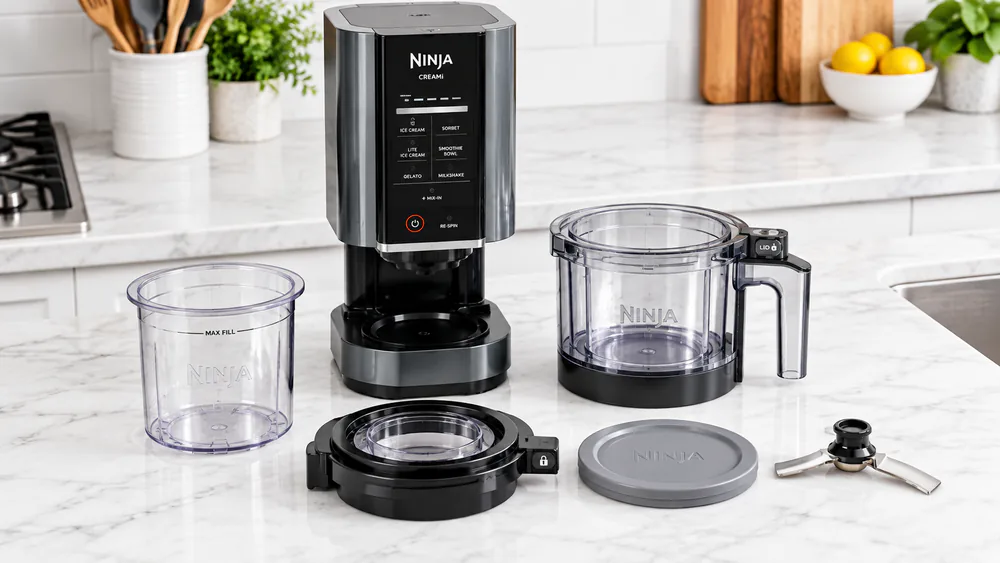
Open the box and lay everything out so you know the cast of characters. The NC300 CREAMi ships with the motor base, one 16-ounce CREAMi Pint with a storage lid, the Creamerizer Paddle, and an outer bowl with its own lid. Those four pieces are all you need for a first batch.
A quick note on the pint. The paddle attaches to the outer bowl lid, and the pint locks inside the outer bowl. The one rule to remember is that NC300 and NC299 pints only fit this machine; they are not interchangeable with the larger NC500 Deluxe tubs. Keep your pints matched to your model and you will never have a fit problem.
First-Time Cleaning
Before the first batch, wash the pint, the lid, the paddle, and the outer bowl in warm soapy water and let them dry fully. The pint, storage lid, and Creamerizer Paddle are top-rack dishwasher safe, so you can run them through if you prefer. The motor base never goes in water; wipe it with a damp cloth only. For the exact assembly and operating sequence, keep the official Ninja CREAMi owner's guide handy on your phone the first time through.
The Most Important Rule for Creamy Results
Here is the single rule that decides whether your first batch is a triumph or a letdown: freeze the base for a full 24 hours, and freeze it flat. The CREAMi shaves a uniformly frozen block, so the block has to actually be frozen through, not just firm on top.
Set the pint on a level shelf in your freezer, not tilted against a bag of peas. A slanted freeze gives you a lopsided block, and the paddle then bites unevenly. In our kitchen the pints that came out smoothest were the ones that had a flat, glassy top before spinning.
Tip. Freeze several pints at once so one is always ready to spin. The 24-hour wait is the only slow part of the whole process, and batch-freezing means you never have to plan dessert a day ahead again.
How to Use the Ninja Creami: Step by Step
Step 1: Make and Mix Your Base
Your base is just the liquid you plan to freeze. A reliable beginner base is heavy cream and sugar with whatever flavoring you like; you do not have to follow a strict recipe to get a good result. Whisk it until the sugar dissolves so you do not end up with gritty spots after spinning.
Base composition matters more than any button you will press. Fat and sugar are what keep the texture smooth, which is the food-science behind why fat and sugar affect texture. A leaner base freezes harder and icier; a richer one spins creamier. For high-protein pints, blend your protein powder fully into the liquid so it does not clump when frozen.
Step 2: Freeze the Pint for 24 Hours (Level It Flat)
Pour the base into the pint, staying below the fill line, and snap on the storage lid. Now freeze it for a full 24 hours on a level surface. This is the step beginners rush, and rushing it is the number one cause of a bad first batch.
Do not try to shortcut the freeze. A base that is only partly frozen will not shave into a smooth texture no matter which program you choose. The manufacturer's own official CREAMi FAQ on base temperature and re-spin is worth a look if you want to confirm fill limits for your recipe.
Step 3: Install the Pint in the Outer Bowl
When the 24 hours are up, take the pint straight from the freezer. Attach the Creamerizer Paddle to the outer bowl lid, drop the frozen pint into the outer bowl, and lock the assembly onto the motor base by twisting until it seats. Then push it down and forward on the base until it clicks into the running position.
Work from cold. The block should still be rock solid when you install it. If you let it sit and soften on the counter, you lose the clean shave the machine is built to deliver. The exact locking sequence is spelled out in the manufacturer's quick-start setup steps if anything feels stiff on your first assembly.
Warning. Do not overfill the pint. Freezing expands your base, and a block that rises above the fill line can jam the paddle or force the motor to strain. If your machine sounds like it is working unusually hard on a very stiff pint, stop and check that the base is level and under the line.
Step 4: Choose Your Program (Ice Cream, Sorbet, etc.)
Press the button that matches what you made. On the 7-in-1, your choices are Ice Cream, Gelato, Sorbet, Milkshake, Smoothie Bowl, Lite Ice Cream, and Mix-In. Match the program to the base: full-fat dairy takes Ice Cream, a leaner or protein base does well on Lite Ice Cream, and a fruit-and-juice base wants Sorbet.
The machine runs on its own once you press the button. It is loud while it works, louder than a blender, so it is not a quiet late-night operation. On very stiff frozen bases the motor can sound like it is straining, and we occasionally caught a faint burning smell on the hardest pints; a little effort from the motor is expected while the paddle grinds a solid block.
Step 5: Re-Spin If the Texture Looks Crumbly
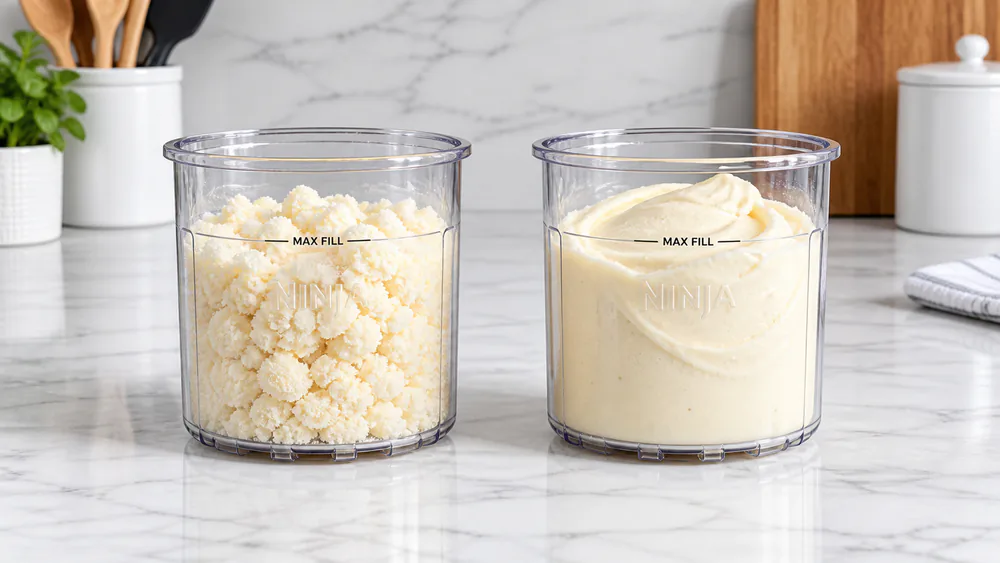
Here is the part nobody warns beginners about. On the basic Ice Cream setting, the first pass often comes out dry and crumbly, almost like Dippin' Dots. That is not a broken machine and not a ruined pint. It is simply the first shave, and the fix is built into the CREAMi.
Press the Re-spin button. The re-spin cycle reliably rescues a crumbly or pebbly first pass and turns it smooth and creamy, and in our kitchen it worked nearly every time. Smoothie bowls sometimes need two or three passes to get there. If you started with a cooked-custard base, you may find it comes out thick and creamy on the first spin with no ice crystals at all, which is a good reminder that the base matters as much as the setting.
Step 6: Add Mix-Ins
Once the base is spun and smooth, add mix-ins the right way. Dig a hole about an inch and a half wide down the center of the pint, drop in your chocolate chips, cookie pieces, or fruit, and run the Mix-In program. The Mix-In setting distributes the add-ins evenly instead of leaving them piled on top.
Keep pieces small so they fold in cleanly. Big frozen chunks can fight the paddle, while chopped bits blend through the whole pint. This is the step that makes a homemade pint taste like a shop scoop.
Troubleshooting: Crumbly, Icy, or Powdery Texture
Most texture problems trace back to two things: the base or the freeze. A powdery or crumbly result usually just needs a re-spin, and that alone solves the majority of first-batch complaints. If it is still crumbly after a re-spin, your base is probably too lean, so add a little more fat or sugar next time.
Icy results point to a base that is too watery or a freeze that was not level. Whisk your base thoroughly, keep it under the fill line, and freeze it flat for the full day. For a deeper checklist of fixes, the manufacturer's troubleshooting guide for crumbly or icy results walks through each texture problem in order.
Nine times out of ten, a crumbly pint is not a broken machine. It is a first spin that simply needs a re-spin.
There is a genuine learning curve here, and it is fair to expect your first attempt or two to disappoint before you find the bases and settings that work for you. Do not judge the machine on batch one. By your third or fourth pint you will have a base you trust and a program you reach for without thinking.
Understanding the Ninja Creami Programs and Settings
Each one-touch program is tuned for a different base, so picking the right one is mostly about matching texture to ingredients. Ice Cream and Gelato are for rich dairy bases. Lite Ice Cream handles lower-fat and protein bases without leaving them too icy. Sorbet is for fruit and juice, Smoothie Bowl for thicker blended fruit, and Milkshake for a pourable treat. Mix-In folds in your add-ins, and Re-spin is your rescue button for any texture that comes out too firm.
If you are weighing the original against the step-up model, the main difference is capacity and program count. The NC300 gives you 7 programs and a 16-ounce pint; the Deluxe NC501 gives you 11 programs and a larger 24-ounce tub. The Deluxe also steps up to dual-drive motors and can hold two flavors in one tub, while both models still ask for the same 24-hour freeze. The one catch is compatibility: NC300-series pints and NC500-series XL tubs are not interchangeable.
Note. The two models do not share containers. NC300 pints fit only NC300-series machines, and the Deluxe uses its own 24-ounce XL tubs. If you own both, label your containers so a pint never ends up in the wrong bowl.
Storing and Re-Spinning Leftovers
The beauty of the pint system is that it doubles as storage. Once you have spun a pint, snap the storage lid back on and return it to the freezer. It refreezes solid, just like your original base.
To eat it again, treat it like a fresh pint: run it through the machine and give it a re-spin. Refrozen ice cream comes back hard, and that first shave will look crumbly again, which is completely normal. One re-spin brings the leftover pint right back to a scoopable, creamy texture.
How to Clean the Ninja Creami
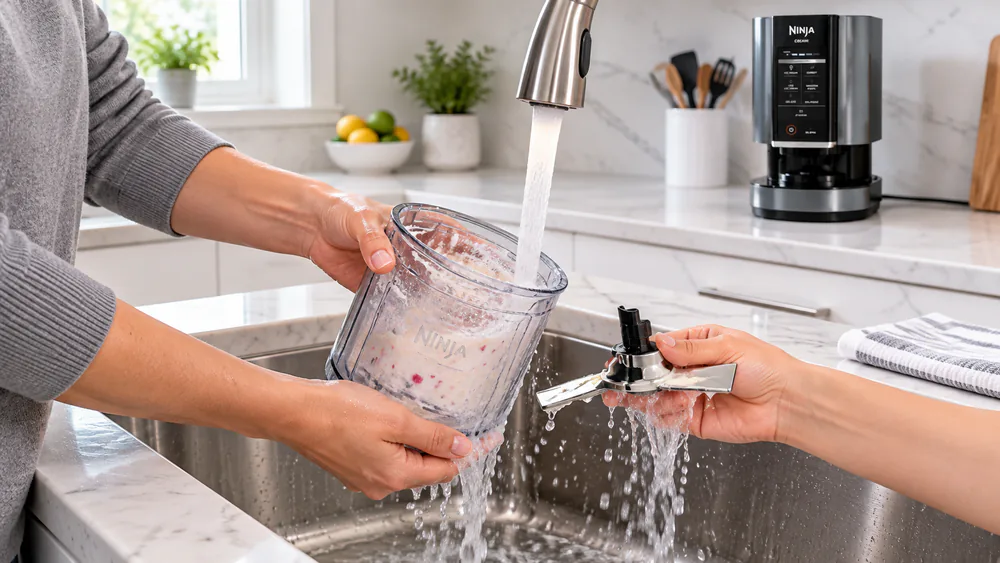
Cleanup is easier than the machine's size suggests. The pint, storage lid, and Creamerizer Paddle are all dishwasher safe on the top rack, and in our kitchen they rinsed quickly under warm water right after processing. The sooner you rinse, the less anything has a chance to dry on.
The motor base is the one part that never touches water. Wipe it down with a damp cloth and dry it. Pay attention to the paddle, since its grooves and center hub catch the most residue; a quick pass with a bottle brush gets into the spots a rinse misses.
Tips for Beginners
A few habits will get you to good results faster. First, always start with a richer base than you think you need; you can lean it out later once you know how your freezer and machine behave together. Second, batch-freeze several pints so you are never waiting a day for dessert.
Third, do not skip the re-spin out of impatience. It is a two-minute step that turns a mediocre pint into a great one. And if you are shopping for a machine, buy new and add a protection plan. Durability is this machine's weak spot: some units slow down or the motor wears out within a year or so of heavy use, so a warranty is worth having.
Frequently Asked Questions
Can I use a store-bought mix or premade liquid as my base?
Yes. Anything pourable that you can freeze in the pint will spin, from a boxed ice cream mix to a carton of flavored oat milk. Just keep an eye on fat content: leaner store-bought liquids behave like our lean homemade bases, freezing harder and needing an extra re-spin, sometimes with a splash of milk stirred in.
How full can I fill the pint?
Keep the base below the fill line molded into the pint and never top it off to the rim. The base expands as it freezes, and an overfilled pint can rise into the paddle's path and make the motor strain. If your recipe makes a little extra, freeze the overflow in a second pint rather than crowding one.
Can I refreeze and re-spin leftovers?
Yes. Snap the storage lid back on and refreeze the pint. To eat it again, run it through the machine and re-spin it, since refrozen pints come back hard and need that shave to soften.
Do I have to follow an exact recipe?
No. A simple heavy-cream-and-sugar base plus your favorite flavoring works well, and strict recipe-following is not required. Base composition matters more than precise measurements: more fat and sugar means a creamier result.
Does my freezer's temperature change the result?
A colder freezer only helps, since the whole point is a block frozen solid all the way through. What actually trips people up is not temperature but a tilted shelf or a rushed freeze. Give the pint a flat surface and the full 24 hours, and a standard home freezer setting is plenty cold.
Is the Ninja Creami loud?
Yes, it is loud while it runs, louder than a blender, because the paddle is grinding a solid frozen block. Some effort from the motor is normal and not a sign of a problem.
Final Thoughts
Once you internalize the rhythm, the Ninja CREAMi is one of the easiest desserts you can make at home: mix a base, freeze it flat for 24 hours, spin it, and re-spin if it looks crumbly. The learning curve is real for the first pint or two, but the payoff is smooth, personalized ice cream, especially the high-protein pints we loved.
Give yourself grace on the first batch, lean on the re-spin button, and keep a couple of pints in the freezer at all times. Do that, and the guesswork disappears for good.
Read next
Ready to spin your first pint?
Freeze a base flat tonight, and tomorrow you are one program press away from creamy homemade ice cream.